Did you know that the humble hoodie can do more than just keep you cozy? As a staple of casual wear, it also offers endless opportunities for personalization and style. However, one common challenge many face is getting the drawstring back through the hoodie’s opening when it gets lost or comes out. Whether you’re reviving an old favorite or customizing a new piece, knowing how to effectively thread the string can save you time and frustration. In this guide, we’ll share quick and clever tricks to help you navigate this little dilemma with ease. Get ready to empower your hoodie game and keep it looking fresh and functional!
How to Effectively Thread a String Through a Hoodie

When it comes to personalizing your hoodie, threading a new string can significantly enhance its style and maintain its functionality. Whether you’re looking to replace a lost drawstring or simply want to switch things up with a colorful option, knowing how to thread a string through your hoodie can save you time and frustration. Let’s dive into some tricks that will help you achieve this with ease.
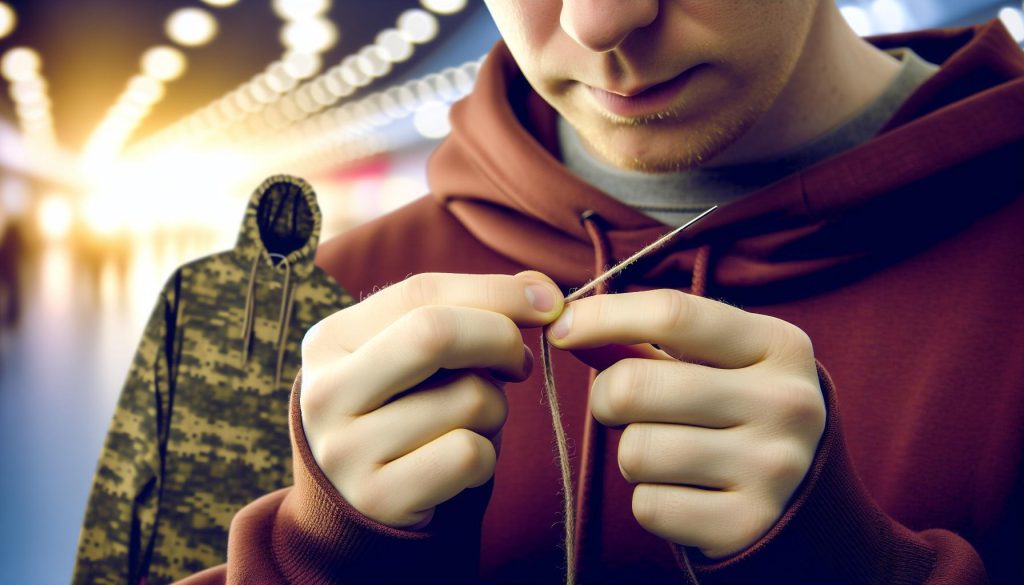
To start, the most straightforward method involves using a safety pin or a threading tool. Simply attach one end of your string to the safety pin, then carefully feed the pin into the hoodie’s channel. As you push the pin through, gently pull the string along, ensuring you don’t yank too hard to avoid damaging the fabric. This technique works wonders for hoodies that have a sewn-in channel for the drawstrings. If you find yourself lacking a safety pin, a sturdy straw can serve as a helpful alternative. Insert the string into the straw, then push the straw through the channel while pulling the string behind it. This method is particularly effective for longer lengths or when the drawstring passage is somewhat obscured.
Considerations for Different Hoodie Types
Different hoodie designs may require slight variations in your approach. For example, hoodies with multiple openings or complex lining might benefit from a simpler approach-consider tying a knot at the end of your string to prevent it from slipping too far through the channel. Additionally, always ensure that the chosen string is appropriate for your hoodie’s material; lightweight strings work better with thinner fabrics, while thicker strings could be more suited to heavier hoodies.
Finally, keep in mind that adding a fresh string not only revives an old hoodie but also gives you a chance to showcase your creativity. From vibrant colors to unique patterns, the right string can take your casual wear to the next level. So go ahead, give your hoodie a new twist with a fresh string and enjoy both the form and functionality that your cozy piece offers!
Essential Tools for Threading Strings in Hoodies
When it comes to threading a string through your hoodie, having the right tools on hand can make all the difference. It’s not just about functionality; it’s also an opportunity to express your personal style and keep your cozy gear looking fresh. A simple yet effective approach often begins with a few essential items that can turn this task into a breeze.
Start with a safety pin or a threading tool-these are your go-to items for easy stringing. Attach your string to the safety pin, and as you push it through the hoodie’s channel, gently pull the string behind it. If you’re in a pinch, a sturdy straw can work wonders too; insert the string, push the straw through, and pull the string along with it. This method is especially useful for longer strings or those tricky drawstring passages that seem to disappear.
Next, consider scissors or a razor blade for trimming the string to the desired length. A clean cut ensures that you avoid any fraying that might occur with a rough edge, keeping your hoodie looking sharp. If your string starts to fray during the process, some clear nail polish can be a quick fix to seal the ends, providing durability for future wear.
Finally, don’t forget about tape. A bit of clear tape can help you secure the end of your string temporarily while you’re threading it, making the process smoother. Additionally, have a ruler or measuring tape on hand if you want to ensure a precise fit when adding new strings, especially if you’re switching to something bolder or thicker.
Equipping yourself with these essential tools will not only simplify the threading process but also enhance your hoodie-wearing experience, allowing you to easily customize and maintain your favorite comfortable apparel.
Step-by-Step Guide: Stringing Your Hoodie Like a Pro

When it comes to threading a string through your hoodie, mastering a few simple techniques can elevate your DIY skills from novice to pro. First off, ensure you’ve got all your tools ready-this includes a safety pin or a threading tool, which are invaluable in guiding the string through the drawstring channel. Not only does this make the process easier, but it also minimizes frustration when you’re working with long or snag-prone strings. Once you’ve collected your essentials, let’s dive into how to effectively get that string threaded and ready for action.
Begin by attaching the end of your string to the safety pin. This will allow you to navigate the twists and turns of the drawstring casing seamlessly. If you don’t have a safety pin handy, a sturdy straw can work in a pinch: just insert the string into the straw, pinch the straw and slide it through the channel, pulling the string behind it. When using either method, be sure to keep tension on the string, preventing it from getting tangled or caught as you draw it through.
After successfully threading your string, it’s essential to trim the ends for a clean look. Use scissors or a razor blade to cut the string, ensuring it’s free from fraying. If your string does start to fray, a quick dab of clear nail polish can seal the edges, increasing durability for future wear. Additionally, you’ll want to have some tape on hand; a small piece of clear tape can hold the string in place temporarily as you maneuver it through the hoodie.
Lastly, remember to check the fit. If you’re adding a new string, use a measuring tape to compare lengths and guarantees that it matches the existing setup or your intended style. Once you’re done, take a moment to admire your handiwork. Not only have you refreshed your hoodie, but you’ve also equipped yourself with skills that simplify future DIY projects. Whether you’re customizing or simply maintaining your favorite garment, these techniques will help you keep your hoodie game strong and stylish!
Troubleshooting Common Hoodie String Issues
It can be incredibly frustrating when your hoodie drawstring gets stuck or tangled, but fear not! Many common issues can be resolved with just a little patience and some handy techniques. When threading your string through the drawstring channel, one of the most frequent problems encountered is snagging. This usually happens if the string isn’t smooth or if there are any knots or twists in the casing. To prevent this, always ensure your string is straightened out and free from knots before beginning. If you do find that the string has become tangled, it’s best to carefully work it out from the casing instead of pulling too hard, which could lead to further complications.
Another common hiccup involves the string itself coming undone as you work it through. Often, the ends of thinner strings can fray, preventing them from fitting through the channel comfortably. A simple solution to this is to use a bit of clear nail polish at the tips after cutting the string to prevent fraying. Alternatively, using a lighter to carefully melt the ends of synthetic strings can also help them stay intact. If your string keeps getting lost in the channel, consider using a sturdy safety pin to anchor a larger piece of string; this can provide a more secure and easier way to pull through.
Lastly, if you notice that your string is too short to fit through the channel, it might be time to measure and replace it. Use a measuring tape to ensure your new string is the same length as the previous one or slightly longer if you want some extra to play with. When threading a new string, check for any obstructions in the channel-sometimes fabric or debris can block the way, making it a hassle to get the string through. A simple cleaning with a lint roller or a quick shake can usually help clear it out.
By understanding these common hoodie string issues, you’ll be better equipped to tackle any challenges that come your way, making your next customization project not just fun, but also hassle-free!
Creative Ways to Customize Your Hoodie Strings
There’s something undeniably special about a personalized hoodie that reflects your unique style. One of the simplest yet most impactful ways to customize your hoodie is by giving a fresh twist to the drawstrings. Not only can this reflect your personality, but it also adds a fun layer of creativity to your casual wear. Whether you’re looking to make a statement or just want a pop of color, there are numerous ways to transform those strings into something truly one-of-a-kind.
The first approach you can take is adding beads or charms to your hoodie strings. This is a straightforward DIY project that requires minimal materials. Just select some beads that match your style or reflect your interests-think wooden beads for a boho vibe or metallic ones for a sleek look. Simply thread them onto the strings before securing them, and you instantly elevate the aesthetic of your hoodie. Additionally, experimenting with different string types can make a big difference. Consider using paracord for a rugged look or satin cords for a touch of elegance. You can even braid your own strings using different colors to create a unique pattern!
Another exciting option is to dye or paint your strings. Fabric dye is an excellent way to infuse vibrant colors into plain strings, while fabric paint allows for intricate designs. Use sponges or brushes to apply your designs, or get creative with stencils for crisp edges. Whichever method you choose, make sure to protect your work area and follow the instructions for setting the dye or paint to ensure durability. Lastly, incorporating embroidery is a timeless craft that can personalize your strings beautifully. A small stitch with your initials or a fun motif can make your hoodie genuinely yours. Just be careful to keep stitches loose enough that the string can still slide through the channel easily.
With these creative ideas, you can transform your hoodie strings into an expression of your individuality. Play around with different materials, textures, and designs until you craft the perfect look. So get that hoodie out of your closet, gather your supplies, and start customizing! Not only will you make your hoodie stand out, but you’ll also revel in the satisfaction of having a piece that’s uniquely yours.
Top Styling Tips for Showcasing Your Hoodie String
Elevating your hoodie game begins with thoughtful string styling. Those drawstrings can go beyond securing your hood; they can become the highlight of your outfit. By incorporating vibrant colors, unique textures, and creative materials, you can transform the ordinary into the extraordinary. Whether you’re going for a sporty vibe or a chic look, here are some essential tips to effectively showcase your hoodie strings.
One of the simplest yet most effective ways to make your strings pop is through color coordination. Choose hoodie strings that contrast with or complement the color of your hoodie. For example, a classic black hoodie can be jazzed up with neon or metallic strings, creating a fun and edgy look. Similarly, if you opt for a patterned hoodie, consider matching your strings to one of its hues to create a cohesive outfit. This enhances visual interest and allows your hoodie to stand out as a fashionable statement piece.
Accessorizing your strings can also add flair. Consider adding beads, tassels, or charms that resonate with your personal style. These accessories not only capture attention but also express your individuality. For instance, wooden beads can give a more laid-back, rustic vibe, while metallic charms can imbue your look with an urban edge. Remember to keep the accessories lightweight and securely fastened to avoid any annoyances while wearing your hoodie.
When it comes to showcasing your hoodie strings, the method of tying can make a significant difference. Experiment with different tying techniques-such as a loose bow or a snug knot-to give your hoodie a tailored look. You could even try asymmetrical tying by grouping the strings to one side for an unusually chic appearance. This subtle styling choice can add an element of surprise and creativity to your outfit.
Lastly, keep in mind that the vibe of your entire ensemble contributes to how your hoodie strings are perceived. Pair your hoodie with complementary pieces like joggers, distressed jeans, or even a skirt for a trendy, relaxed outfit. Footwear also plays a critical role; try finishing off your look with sneakers for comfort or ankle boots for an unexpected twist. By curating your outfit thoughtfully, your styled strings won’t just stand out-they will effortlessly tie your entire look together.
Maintaining Your Hoodie: Washing and Stain Removal
Maintaining your hoodie is essential not just for keeping it looking fresh and stylish, but also for extending its lifespan. Did you know that proper washing and stain removal can preserve the fabric’s integrity and keep your hoodie feeling soft? Here’s a handy guide on how to wash your hoodies without losing their appeal and how to tackle those pesky stains.
When it comes to washing your hoodie, always refer to the care label first. Most hoodies can withstand a cool wash, which is gentler on the fabric and helps prevent fading. Here are some essential washing tips:
- Turn Inside Out: Before tossing your hoodie in the wash, turn it inside out. This helps protect the outer fabric from friction and reduces pilling.
- Use a Gentle Cycle: Opt for a gentle or delicate cycle to minimize the wear and tear on the fibers.
- Cold Water Only: Wash in cold water to prevent shrinking and color bleeding, especially if it’s a dark or vibrant color.
- Avoid Fabric Softeners: These can coat the fibers and make them less breathable, which is not ideal for hoodies that you want to wear comfortably.
For stain removal, the quicker you act, the better your chances of lifting the stain completely. Here’s a simple approach for common types of stains:
Basic Stain Removal Tips
- Food or Drink Stains: Blot the stain with a clean cloth and cold water immediately. Apply a bit of laundry detergent directly to the stain, wait five minutes, and rinse.
- Grease Stains: Sprinkle baking soda on the stain and let it sit for 15-20 minutes to absorb the oil. Brush it off before washing.
- Ink Stains: Dab the stain with rubbing alcohol or hairspray before washing as usual. Test on a small area first to avoid any damage.
After washing, reshaping your hoodie is crucial. Simply lay it flat to dry instead of hanging it up, which can stretch the fabric. If you want to add a personal touch, consider DIY projects like tie-dye or embroidery after ensuring the hoodie is clean and dry.
Taking the time to properly care for your hoodie not only keeps it looking great but also enables you to express your personal style longer. With these washing and stain removal techniques, your hoodies can remain a beloved staple in your wardrobe for years to come!
DIY Projects: Transforming Your Hoodie with Fun Techniques
Transforming your hoodie through DIY projects can breathe new life into an old favorite or personalize a new one. Whether you want to enhance your style with colorful drawstring options or create a completely unique look, there are many fun techniques to explore. Not only will these projects let you showcase your creativity, but they also offer a chance to make your hoodie a standout piece in your wardrobe.
To start, consider adding or swapping out the drawstring with unique materials. Instead of fabric, you can use colorful shoelaces, chunky rope, or even chain to create an edgy vibe. This simple change instantly elevates the typical hoodie. You can also use fabric markers or paint to create custom designs on the hoodie itself, making it uniquely yours. Tie-dyeing remains a classic option; it’s a fantastic way to add vibrant colors and patterns. Remember, the key to tie-dyeing is to secure the parts of the fabric you want to keep undyed and have fun with swirling colors to achieve that retro look.
Another idea involves appliqué or embroidery. Adding patches, especially ones that resonate with your interests-like favorite bands, sports teams, or quirky symbols-can give your hoodie a one-of-a-kind character. If you’re comfortable with a sewing machine, you can even embroider your name or a fun message on the kangaroo pocket for a personal touch. This creates not just a functional item but also a canvas for self-expression.
Don’t forget about custom pockets or hidden compartments! Sewing an extra pocket on the inside can be a practical addition for small items like keys or cards. Or get adventurous and use fabric scraps to create layered pockets for a textured look. These creative alterations will keep your hoodie versatile and practical while ensuring you always stand out.
Incorporating these DIY techniques allows you to stretch your imagination while celebrating hoodie culture. With just a few supplies and a bit of time, you can take a simple piece of clothing and turn it into an expression of your personal style. So grab your hoodies and get ready to transform them into something completely new!
Q&A
Q: How can I use a safety pin to thread a string through my hoodie?
A: Using a safety pin is an effective method to thread a string through your hoodie. Simply attach one end of the string to the safety pin, insert the pin into the hoodie channel, and gently push it through while guiding the pin along. This method ensures a smooth, hassle-free threading process.
Q: What alternatives can I use if I don’t have a safety pin to thread hoodie strings?
A: If you don’t have a safety pin, you can use a paperclip or a thin wire. Just bend the wire into a hook shape, attach the string, and pull it through the hoodie’s channel. These alternatives work well and are easily accessible for quick fixes.
Q: Can I replace hoodie strings with shoelaces?
A: Yes, shoelaces can successfully replace hoodie strings. Their durability and variety in colors add a stylish touch. Ensure the shoelaces fit through the hoodie channel and complement the overall design. This is a great way to customize your hoodie further.
Q: What tips exist for preventing hoodie strings from getting tangled?
A: To prevent tangling, always tie the ends of your hoodie strings together or use a small clip to keep them secured when not in use. Additionally, avoid pulling on the strings too hard, which can create knots and tangles.
Q: How often should I wash my hoodie to maintain its strings?
A: Wash your hoodie every few wears, or when it becomes visibly dirty. To maintain the strings, close the drawstrings and wash on a gentle cycle, avoiding high heat which can damage both fabric and strings. Always air dry to keep the shape intact.
Q: What should I do if my hoodie string gets stuck?
A: If your hoodie string is stuck, gently tug on both ends to see if it loosens. If it remains stuck, try using a wooden dowel or thin rod to push it along the channel. Avoid yanking to prevent ripping the fabric.
Q: How can I creatively customize my hoodie strings?
A: You can customize your hoodie strings by adding beads, painting them, or using fabric markers for designs. These creative touches can personalize your hoodie and provide a unique style that stands out.
Q: Why do some hoodies have drawstring locks, and how do they work?
A: Drawstring locks are designed to prevent strings from slipping or loosening during wear. They typically have a sliding mechanism; simply pull the string through the hole, adjust the length, and lock in place. This ensures a snug fit while providing ease of adjustment.
The Way Forward
Thank you for exploring our quick tricks for getting string through your hoodie! Now that you’re equipped with these handy techniques, why not dive deeper into the world of hoodies? Check out our guides on hoodie care, DIY customization, and styling tips to keep your favorite piece looking fresh and unique. Don’t forget to explore our washing instructions and stain removal strategies to maintain its quality.
If you enjoyed this content, share it with your friends and drop your thoughts in the comments below! Also, consider signing up for our newsletter for more practical hoodie tips and exclusive resources. Remember, styling and caring for your hoodie doesn’t just enhance your look; it’s about celebrating comfort and creativity. Stay cozy and stylish!