Did you know that a simple cut can transform your basic sweatshirt into a trendy statement piece? Learning how to cut a sweatshirt can unleash your creativity and help you express your unique style. Whether you’re looking to refresh an old favorite or create a brand-new look, this guide will walk you through five trendy transforms that you’ll absolutely love. Embracing customization not only makes your wardrobe more exciting but also allows you to breathe new life into pieces that may otherwise gather dust in your closet. As you explore these styles, you’ll discover practical tips on measuring, cutting, and even caring for your modified gear. Get ready to embark on a stylish journey that celebrates comfort and individuality-let’s dive in!
Understanding the Basics of Cutting a Sweatshirt
Cutting a sweatshirt can be a rewarding way to personalize your wardrobe and express your unique style. With just a few simple techniques, you can transform an ordinary sweatshirt into something extraordinary. The process is not only creative but also relatively easy, making it accessible even for those who may not consider themselves particularly crafty. Understanding how to properly cut and manipulate fabric will empower you to create stylish pieces that reflect your personality.
When approaching the cutting process, the first step is to decide on the design you want to achieve. Whether you’re looking for a cropped style, an oversized fit, or unique detailing, having a clear vision will guide your cuts. It’s also essential to choose the right sweatshirt; thicker materials may offer a more structured look, while lighter fabrics can provide a softer, drapey finish. Keep in mind the importance of fabric type-fleece, cotton blends, and jersey all behave differently when cut.
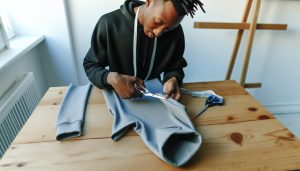
For those new to customizing sweatshirts, it’s advisable to start with a less expensive piece to practice on. Always use quality scissors or fabric cutters to ensure clean edges, as jagged cuts can detract from your final look. Mark your cutting lines with chalk or fabric markers, and measure twice before making any cuts to avoid mistakes. If you’re aiming for a specific fit or style, don’t hesitate to take inspiration from designs you see online or in stores. Remember, the aim is to create something that not only looks good but feels good too-your comfort should always be a priority!
Essential Tools for Your DIY Sweatshirt Transformations
Having the right tools can make all the difference when it comes to transforming a basic sweatshirt into a stylish statement piece. With just a few essentials in your crafting arsenal, you’ll be ready to unleash your creativity and customize your clothing. Whether you’re a seasoned DIY enthusiast or a newcomer eager to dabble in fabric manipulation, here’s what you need to make your sweatshirt transformations seamless and enjoyable.
First and foremost, sharp fabric scissors or rotary cutters are crucial. These tools enable precise cuts and ensure clean edges, reducing the risk of fraying. Snagging a pair of fabric-specific scissors can help you achieve professional-looking results, while rotary cutters can be particularly useful for straight lines and larger cuts. Pair these with a cutting mat to protect your surfaces and keep your workspace clean.
Another indispensable tool is a measuring tape or ruler. Measurement is key when cutting your sweatshirt, whether you’re going for a cropped look or customizing the sleeves. Mark your lines with tailor’s chalk or fabric markers, which wash out easily after you’re done. This practice minimizes mistakes and helps maintain symmetry, especially important for more intricate designs.
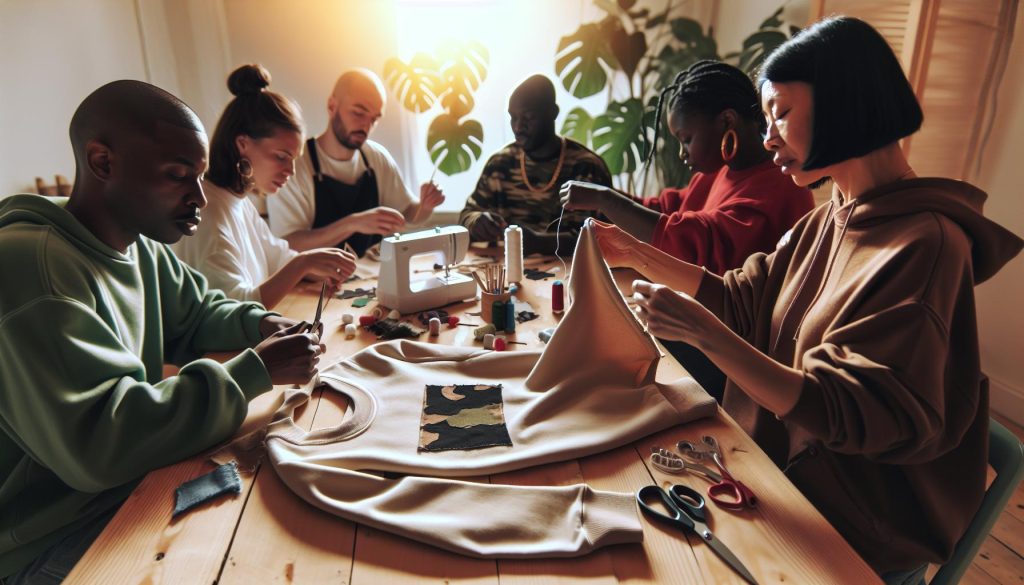
For those looking to add embellishments or unique details, a sewing machine can be a game changer. If you’re planning on adding embroidery, patches, or even altering hems, having a sewing machine handy makes these processes faster and more efficient. You don’t need an expensive model; a simple, functional one will do just fine. For individuals who prefer a hand-sewn touch, needle and thread will suffice for lighter alterations.
Finally, if you’re considering incorporating dye techniques or other finishes, gather a few dye kits and brushes. Fabric dye allows for endless customization possibilities, from tie-dye patterns to ombres. Don’t forget to collect a few basic items like pins for holding fabric in place while cutting or sewing, and a spray bottle with water to lightly mist your fabric before dyeing for a more blended effect.
With these essential tools at your disposal, you’re fully equipped to dive into your sweatshirt transformation adventure. Embrace the process, enjoy the creativity, and wear your custom creations with pride!
Five Stylish Ways to Cut and Customize Your Sweatshirt
Transforming a plain sweatshirt into a stylish statement piece can be both fun and rewarding. With the right techniques, you can effortlessly elevate your wardrobe and express your unique style. Here are five trendy methods to cut and customize your sweatshirt, each offering a distinct look that’s sure to turn heads.
1. Cropped Cuts
A cropped sweatshirt is a great way to showcase your high-waisted bottoms while adding a fresh twist to a classic piece. To achieve this look, select the length you desire; usually, cutting just above the natural waistline works well. Use a measuring tape to mark your desired length and make sure to cut evenly across the fabric. This style is particularly popular for layering over dresses or pairing with high-waisted jeans for a relaxed, yet chic outfit.
2. Off-the-Shoulder Style
Going for an off-the-shoulder vibe adds a playful romantic element to your sweatshirt. To create this look, begin by choosing one shoulder to cut. Measure about 2-4 inches from the neckline, depending on your preference, and cut in a gentle curve down to the sleeve seam. This design not only shows off a little skin but also adds an effortless flair, perfect for casual outings or a cozy night in.
3. Fringe Details
Adding fringe to your sweatshirt gives it an edgy, bohemian touch that stands out. To make fringe, decide how long you want the strands to hang. Cut straight vertical slits along the hemline, about 1-2 inches deep, leaving about an inch of fabric at the top intact. The resulting fringe can be left as is or twisted for added texture. Pair this style with denim shorts or a long skirt for a laid-back festival-ready look.
4. Sleeveless Transformation
For warmer weather or a sporty aesthetic, consider turning your sweatshirt into a sleeveless top. Start by cutting off both sleeves at the seam for a clean finish. You can also round the neckline deeper if you prefer a more open look. To enhance your sleeveless sweatshirt, you might want to add some side slits for extra breathability and style. This versatile piece works well for workouts or casual summer outings.
5. Unique Hem Styles
Play with different hem styles for a fresh take on your sweatshirt’s silhouette. You can create a rounded or high-low hem by cutting the front shorter than the back, or even add a raw edge for a more relaxed feel. Consider cutting a scalloped design along the bottom for added creativity. This method not only updates the look of your sweatshirt but also showcases your crafting skills.
By exploring these cutting techniques, you can easily transform a basic sweatshirt into a bespoke item that reflects your personality. So grab your fabric scissors, let your creativity fly, and enjoy the process of customizing your closet essentials!
How to Create Unique Hem Styles for Your Hoodies
Crafting unique hem styles for your hoodies is a fantastic way to personalize your look and infuse some creativity into your wardrobe. Whether you aim for a trendy high-low design or an effortlessly casual raw edge, the possibilities are nearly endless. Remember, every cut you make isn’t just about aesthetics; it’s also about making your piece functional and comfortable. With just a few simple techniques, you can transform your basic hoodie into a stylish centerpiece that showcases your individuality.
To start, consider the classic high-low hem, which adds dimension and can be particularly flattering when paired with fitted bottoms. To achieve this look, simply determine how much longer you want the back to be compared to the front-typically, a difference of 3-5 inches works well. Measure and mark your desired lengths on both the front and back before cutting in a smooth arc. This subtle change can make a standard hoodie feel fresh and fashion-forward, perfect for layering with tights or skinny jeans.
For a more whimsical approach, try a scalloped hem. This playful style adds texture and interest to the bottom of your hoodie. Start by cutting the hem in a slight wave or ‘U’ shape, ensuring that you leave enough fabric to maintain the hoodie’s structure. Measure your curves for a balanced look. If you’re feeling adventurous, consider going deeper on one side to create an asymmetrical appearance. This type of cut pairs beautifully with sneakers and gives off an effortless vibe that is perfect for casual outings.
Another fun option is to implement a frayed hem, allowing the fabric to show a bit of raw edge for a trendy, laid-back look. To create this style, cut the hem straight across where you want it to fall, then carefully pull at the threads along the bottom to achieve that frayed effect. The result is a chic look that embodies relaxed comfort, making it ideal for casual days or lounging at home.
Finally, ensure you take care of your customized hoodies properly to preserve their unique styles. When washing, turn your hoodie inside out and use cold water to prevent any unwanted shrinkage or fading. Air drying is recommended to maintain the shape and length of your hem. Avoid bleach or harsh detergents that could damage your creative cuts. By lovingly maintaining your hoodies, you’ll keep your stylish creations looking fresh for many seasons to come.
Dive into these hem transformations and let your hoodie reflect who you are! Your DIY project not only showcases your creativity but also gives a unique twist to casual wear that others will admire. Happy customizing!
Mastering the Art of Oversized and Cropped Cuts
Transforming your sweatshirt with oversized or cropped cuts is not only a fashionable statement but also a creative outlet that lets you express your unique style. Oversized sweatshirts bring a cozy, relaxed vibe that pairs perfectly with skinny jeans or leggings, while cropped styles offer a playful, trendy look that can elevate any outfit. Whether you’re looking to stay comfortable or make a bold fashion statement, learning how to master these cuts can completely refresh your wardrobe.
To achieve the oversized look, start by selecting a sweatshirt that’s already a size or two larger than your usual fit. This extra material allows for ample room to work with, giving you the freedom to create a relaxed silhouette. When cutting, aim to retain a slouchy appearance; you can experiment with deeper armholes or longer sleeves to enhance the drape. Consider cutting at an angle to create a layered look-this adds an element of depth and makes each piece unique. Here are some quick styling tips to pair with your oversized cut:
- Layer with different textures: Combine your oversized sweatshirt with a fitted turtleneck or a denim jacket for a balanced look.
- Accessorize: Add a chunky scarf or oversized sunglasses to draw attention to your ensemble.
- Choose the right bottoms: High-waisted jeans or joggers can help define your waist and balance the oversized style.
On the other hand, if you’re leaning towards a cropped sweatshirt, the key is to decide on the heart of your cropped design-do you want to show off more of your midriff or keep it subtle? To crop, choose a length that works for you, typically around the natural waistline for a trendy look, but feel free to experiment with different heights based on your comfort level. When cutting, make sure to use fabric scissors for clean edges and consider creating a raw hem for an edgy finish. Here’s how to style a cropped sweatshirt:
- High-waisted bottoms: Pairing your cropped sweatshirt with high-waisted jeans or skirts helps create a flattering silhouette.
- Layering: Throw on a long cardigan or a light jacket to add dimension and keep warm.
- Access anything with movement: Cropped looks often benefit from flowy materials on the bottom, so a maxi skirt or flared trousers can be a great match.
Regardless of which style you choose, remember to embrace the DIY spirit! The act of cutting and customizing your hoodie isn’t just about the fabric-it’s about the joy of self-expression. By listening to your style instincts and trying new things, your sweatshirts can become one-of-a-kind pieces that you’ll love to wear again and again. Happy crafting!
Tips for Adding Funky Details: Rips, Frays, and More
Adding funky details like rips and frays to your sweatshirt can instantly elevate the look and give it that trendy, distressed vibe that’s perfect for casual wear. Whether you’re looking to embrace that ‘well-loved’ aesthetic or simply want to express your unique style, customizing your sweatshirt with these details is a fun and engaging DIY project. Not only will you end up with a one-of-a-kind piece, but the process allows for creativity and personal expression, making each cut and fray an essential part of your wardrobe story.
To start with rips, select areas of your sweatshirt that you feel would benefit from some wear and tear. Focus on commonly used spots like the elbows or neckline for a naturally distressed look. Use fabric scissors to make small cuts, gradually increasing the size for a more dramatic effect. Aim for asymmetry to keep things interesting – a little unevenness adds character! After cutting, you can enhance the edginess by pulling and fraying the edges of the fabric with your fingers. This method allows for a more authentic distressed appearance while maintaining the integrity of the fabric. Remember, less is often more when it comes to rips; start small and build up as you go.
When it comes to frays, choose the hemline or sleeves for a complete transformation. Fraying is relatively easy: use a seam ripper to loosen some threads at the hem, and gently pull them away to create that casual, unkempt look. For an extra touch, you could even cut the sleeves into a more dramatic style-think bell sleeves or raw hems-which can be especially eye-catching. As you experiment with frays, don’t forget to embrace the art of layering: pair your newly styled sweatshirt with structured pieces like tailored pants or a leather jacket to balance out the relaxed vibe.
Care and Maintenance of Funky Details
Keeping your newly customized sweatshirt looking fresh requires a bit of extra care. Always wash on a gentle cycle and consider air-drying to maintain the integrity of those stylish rips and frays. If you encounter stains, treat them immediately with a gentle stain remover, but avoid vigorous scrubbing which could damage your carefully crafted details. For long-lasting wear, it’s essential to read labels and follow the laundering instructions, while also keeping an eye on those unique elements you’ve added to ensure they don’t become overly damaged during cleaning.
By adding these funky details, your sweatshirt will not only reflect your personal style but also embody the spirit of DIY creativity. Embrace the challenge, and remember that each cut and rip tells a story-your story. Happy crafting!
Incorporating Tie-Dye and Other Dye Techniques
Transforming your sweatshirt with dye techniques is not only a fun and creative endeavor, but it also allows you to express your personal style in a vibrant way. Tie-dye, in particular, has made a huge comeback, becoming a staple in casual wear with its colorful swirls and patterns. It’s a perfect way to breathe new life into an old or plain sweatshirt. Plus, incorporating dye techniques gives your project a unique flair, making every piece truly one-of-a-kind.
To start with tie-dye, you’ll want to gather your materials: fabric dye (powdered or liquid), rubber bands, spray bottles or squeeze bottles, gloves, and a plastic table cover to protect your workspace. The classic spiral tie-dye method is a great place to begin. Lay your sweatshirt flat, pinch the fabric in the center, and twist it. Secure the twisted fabric with rubber bands spaced apart to create sections. Apply dye in each section, using different colors for a playful contrast. For a more subtle look, consider using a single color or two shades of the same color blended together.
After dyeing, it’s crucial to set the colors. Wrap your sweatshirt in plastic wrap or a plastic bag and let it sit for at least 6-8 hours (or overnight for more vibrant colors). Once you rinse it out, follow proper washing instructions to maintain the integrity of your design. Wash the sweatshirt separately in cold water for the first few washes to remove excess dye, and air dry to avoid shrinking or damaging the new design.
Embellishing your freshly dyed sweatshirt can take it to the next level. Consider adding embroidered patches or using fabric paint to create complimentary designs. These techniques can add texture and personalization that take your DIY project from simple to standout. With such customization, your sweatshirt not only becomes a wardrobe staple but also a canvas for your artistry and creativity. So grab your dye and start experimenting-each color combination tells a story, and the best part is that you control the narrative!
Embellishing Your Sweatshirt with Embroidery and Patches
Adding personalized touches to a sweatshirt can transform it into a unique expression of your style, and two of the most popular methods for customization are embroidery and patches. These techniques not only enhance the visual appeal but also add texture and depth to your garment. Imagine wearing a piece that reflects your personality, adorned with meaningful symbols or phrases that tell your story. Let’s dive into how you can effectively embellish your hoodie using these creative methods.
To get started with embroidery, you need some basic supplies: embroidery thread, needles, embroidery hoops, and fabric scissors. Choose a design that resonates with you-this could be anything from a simple monogram to intricate floral patterns. If you’re new to this craft, simple designs are usually the best place to begin. Use an embroidery hoop to secure the fabric tightly; this prevents any puckering and makes stitching easier. You can sketch your design lightly on the fabric with a wash-away marker or transfer paper for guidance. As you stitch, take your time to ensure neat and even stitches. Experimenting with different stitches, such as backstitch or satin stitch, can add variety and texture to your work.
Patches are another delightful way to personalize your sweatshirt. You can purchase ready-made patches that feature anything from vintage logos to quirky designs, or you can create your own using fabric scraps, iron-on adhesive, and sewing supplies. To apply a patch, position it on your sweatshirt and either sew it on for a permanent fixture or use an iron to adhere an iron-on patch. For enhanced durability, consider sewing around the edges of the patch to prevent any lifting after washing. Mix and match various patch sizes and shapes to craft a unique design; for instance, placing a larger patch on the back and smaller ones on the sleeves adds a playful touch.
When caring for your embellished sweatshirt, it’s essential to wash it properly to maintain the integrity of your designs. Turn your sweatshirt inside out to prevent abrasion on the embroidery and patches during washing. Use cold water and a gentle cycle, and avoid fabric softeners which can damage the embellishments. For dyers, it’s crucial to air dry-this preserves both the shape and the detailed designs you worked hard to create. With these tips and techniques, your sweatshirt will be a vibrant canvas that stands out in any casual setting, showcasing your empowering, creative spirit!
Perfecting Fit: Measuring and Planning Your Cuts
To achieve the perfect fit when transforming your sweatshirt, precise measuring and careful planning are absolutely essential. Taking your time with these steps will not only help avoid mistakes but also ensure that the new style complements your body shape and personal aesthetic. Start by gathering your materials-you’ll need a soft measuring tape, a pencil, and a pair of fabric scissors. Having a flat, sturdy surface to work on is vital as well, ensuring your sweatshirt lays out evenly.
Begin by measuring the key areas where you plan to make cuts. For instance, if you’re aiming for a cropped look, measure from the top of your shoulder down to the desired hemline. This will help you visualize how high you want to cut. Another critical area to focus on is the sleeve length if you’re considering ¾ length or even sleeveless designs. Measure from the shoulder seam to your preferred sleeve length, ensuring you factor in a little extra room for a relaxed fit. It’s also helpful to consider the width of the body; mark where you want to create slits or side cutouts to allow for that comfy, stylish drape.
Once you have your measurements, you can sketch a simple plan on paper. This could include the new hemline, sleeve lengths, and any additional features like uneven hems or frays. Visualizing your design can help clarify your ideas and make the cutting process much smoother. If you’re feeling adventurous, consider adding a unique asymmetrical cut or a playful fringe along the edge. Just remember to mark your intended cuts lightly with a pencil so that your lines are visible but can easily be washed away later.
Finally, always check and double-check your measurements before making any cuts. Planning aids not only avoid that dreaded “oops” moment but also empower you to express your individual style confidently. By focusing on fit and thoughtful planning, you’ll wind up with a sweatshirt that’s not only trendy but also feels tailored just for you, ensuring that your comfortable casual wear shines!
Caring for Your Cut Sweatshirt: Washing and Maintenance
Taking care of your freshly cut sweatshirt is just as important as the transformation itself! After customizing your favorite piece, the last thing you want is for it to lose its charm after a few washes. Here’s how to maintain the look and feel of your tailored hoodie while ensuring its durability.
First, always check the care label before washing to see if there are any specific instructions for the material. Most sweatshirts can be machine washed in cold water on a gentle cycle to prevent any shrinkage, especially after you’ve created your unique modifications. When washing, turn your sweatshirt inside out to minimize wear on the outer side. This simple step can protect any embellishments or cuts you’ve made, reducing the chance of fraying or pulling. For those tie-dyed or embellished styles, using a mild detergent will help preserve colors and prevent fading.
Drying your sweatshirt properly is crucial. Instead of tossing it in the dryer, which can lead to unwanted shrinkage and damage, lay it flat to dry or hang it up. If you’re dealing with any funky details you’ve added, like rips or frays, avoid using strong heat from the dryer which can change their appearance or structure. Instead, air drying gives your sweatshirt time to retain its shape while preventing any extra wear and tear.
When it comes to stain removal, addressing marks promptly can make all the difference. Blot-but don’t rub-any stains with cold water immediately. For tougher stains, apply a dab of liquid detergent directly to the spot and let it sit for a few minutes before washing. Remember to do a patch test on any areas that you’ve customized to ensure nothing reacts poorly, particularly if you’ve added dye or embroidery.
Finally, keep your customized sweatshirt looking fresh by storing it correctly. Fold it neatly or hang it on a padded hanger to maintain the shape and prevent unnecessary creasing. Avoid overcrowding in your closet to keep your designs from getting squeezed and losing their flair. With these care tips, your sweatshirt will not only reflect your unique style but will also remain a cozy staple in your wardrobe for years to come!
Finding Inspiration: Trendy Looks from Social Media
The world of sweatshirts has taken a creative turn, especially on social media platforms where DIY enthusiasts showcase their unique styles and transformations. If you’re looking to breathe new life into a plain sweatshirt, the vast array of inspiration available online is at your fingertips. From Instagram to Pinterest, you can find countless variations that can spark your imagination for customizing your own pieces.
One of the most popular trends is the oversized crop look, often styled with high-waisted jeans or leggings. Content creators frequently demonstrate how to turn an ordinary sweatshirt into a chic cropped top with simple cutting techniques. Watching these transformations can give you the confidence to try cutting your own hoodies and pairing them with stylish layers. Be sure to check for videos or tutorials on platforms like TikTok, where many creators share step-by-step processes, making it easy for you to follow along.
Another trending theme is the incorporation of vibrant colors through tie-dye techniques. Users often showcase before-and-after shots, demonstrating not just the dyeing process but also how they style their newly transformed hoodies. You might find inspiration in how they mix and match colors or layer their sweatshirts with other items for a curated look. Don’t hesitate to engage with these posts by asking questions or seeking advice; the community is usually very welcoming.
As you browse through social media, keep an eye out for unique embellishments such as embroidery or patches. Many creators personalize their sweatshirts with meaningful symbols or quotes, which adds a distinct flair to their outfits. You can take inspiration from these ideas and even create mood boards with your favorite styles, helping to solidify your vision before starting your own project.
Embrace the creative energy around hoodie culture and let social media be your guide. The combination of visual inspiration and hands-on tutorials will empower you to customize your sweatshirts, making them not just a comfortable staple but also a reflection of your personal style. Happy cutting and customizing!
Budget-Friendly Tips for Customizing Your Hoodies
Customizing your hoodies doesn’t have to break the bank; in fact, with a little creativity and resourcefulness, you can transform your sweatshirts into unique fashion statements without spending a fortune. One of the best ways to save money is to start with what you already own. Dig through your closet for old hoodies that might benefit from a little TLC. A plain, oversized sweater can be perfect for cropping or cutting into a trendy, modern shape. Additionally, consider checking thrift stores or online marketplaces for inexpensive options that you can revamp.
To make the most of your customization journey, gather materials that are budget-friendly and versatile. For instance, invest in a good pair of fabric scissors, which will help you achieve clean cuts. You can find fabric markers or paint at a craft store that can be used for tie-dyeing, detailing, or even writing personal messages on your hoodie. Finally, embellishments like patches or embroidery floss can often be found at thrift shops or through swap groups, allowing you to add flair without spending much.
When planning your designs, think creatively about how to use everyday items. For instance, instead of buying new drawstrings, consider using old shoelaces or belts to add a unique touch to the hems or necklines. You can also reuse fabric scraps from other projects to create appliqués or patches that align with your style. This not only personalizes your hoodie but also reduces waste, making your customization project eco-friendly.
Remember that the key to a budget-friendly customization is to embrace the DIY ethos: take your time, experiment, and have fun with the process! Whether you’re creating a trendy cropped top or giving an old favorite a bold makeover, every little change is a step toward crafting a piece that truly speaks to your personal style. Happy crafting!
Frequently asked questions
Q: What are some creative ways to style a cut sweatshirt?
A: Creative styling for a cut sweatshirt includes pairing it with high-waisted jeans or leggings for a trendy look. You can also layer it over a fitted turtleneck or dress it up with a statement necklace. For more ideas, check out the section on “Finding Inspiration: Trendy Looks from Social Media.”
Q: How do I prevent fraying when cutting a sweatshirt?
A: To prevent fraying after cutting a sweatshirt, use a zigzag stitch or a serger on the edges. Alternatively, apply a fabric sealant to the cut areas. Further details can be found in “Tips for Adding Funky Details: Rips, Frays, and More.”
Q: Can I cut a sweatshirt to make it more oversized?
A: Yes, you can cut a sweatshirt to create an oversized look by enlarging the armholes or cutting it wider. This method works well for achieving a relaxed vibe. Explore more about this in “Mastering the Art of Oversized and Cropped Cuts.”
Q: What should I consider before cutting my sweatshirt?
A: Before cutting, consider the fabric type, desired length, and style. Always plan your cuts carefully and test on a less important piece first. Refer to “Perfecting Fit: Measuring and Planning Your Cuts” for detailed guidance.
Q: How can I incorporate tie-dye after cutting my sweatshirt?
A: After cutting, you can tie-dye your sweatshirt for a unique effect. Use rubber bands to section parts before applying dye. For techniques, see “Incorporating Tie-Dye and Other Dye Techniques” for various styles and methods.
Q: What tools do I need to cut a sweatshirt properly?
A: Essential tools for cutting include sharp fabric scissors, a measuring tape, chalk or fabric markers, and optionally a rotary cutter for more intricate designs. Refer to “Essential Tools for Your DIY Sweatshirt Transformations” for more insights.
Q: Is cutting a sweatshirt hard for beginners?
A: Cutting a sweatshirt can be easy for beginners, especially with simple styles like cropped lengths. Start with the basic styles, and practice on old sweatshirts. For additional tips, check “Five Stylish Ways to Cut and Customize Your Sweatshirt.”
Q: How can I care for my customized sweatshirt after cutting?
A: To care for your customized sweatshirt, wash it in cold water with mild detergent and air dry. Avoid harsh chemicals to maintain color and shape. More care tips are detailed in “Caring for Your Cut Sweatshirt: Washing and Maintenance.”
Closing Remarks
Now that you know how to transform your sweatshirt into trendy styles, it’s time to bring your creativity to life! Remember, a little customization can make a big impact on your wardrobe. If you have any questions about the cutting techniques or styling tips, feel free to leave a comment below-we’d love to hear from you!
For more inspiration, check out our guides on hoodie care and DIY projects like tie-dye and embroidery that can elevate your fashion game even further. Don’t miss out on our exclusive newsletter for the latest tips and ideas directly to your inbox!
Transform your casual wear and embrace your unique style today. Your perfect look awaits, so don’t wait-dive into your next project and share your creations with us on social media!