Did you know you can easily transform your favorite hoodie into a stylish crew neck? This DIY crew neck conversion not only refreshes your wardrobe but also allows you to customize your look. Cutting off the hood can give a whole new vibe to a hoodie that might otherwise sit unused in your closet. Whether you’re looking to adapt to warmer weather, create a more versatile piece, or simply express your creativity, this project is a fantastic way to breathe new life into your casual wear. Get ready to grab your scissors and unleash your inner designer! Dive into this guide to discover all the tips and tricks for a seamless conversion, along with essential care advice to keep your newly styled hoodie looking fresh.
How to Choose the Right Hoodie for Conversion
When embarking on the journey of converting your favorite hoodie into a stylish crew neck, the first step is selecting the right hoodie for the job. Not all hoodies are created equal, and choosing one that complements your vision and personal style can make a significant difference in the final outcome of your project.
Start by considering the fabric. Hoodies made from soft, durable materials like cotton or a cotton-polyester blend are ideal for cutting and customizing. They retain their shape well and provide comfort, ensuring that your converted crew neck will be cozy and wearable. Additionally, check the weight of the fabric; heavier hoodies often lend a more structured appearance to your finished product, while lighter ones can create a laid-back, relaxed look.
Next, pay attention to the fit. If you prefer a loose, casual aesthetic, opt for an oversized hoodie. For a more tailored, contemporary vibe, select a more fitted style. Remember that the original design of the hoodie also plays a role; hoodies with minimal or no embellishments will offer a cleaner slate for customization, allowing your creativity to shine through after the conversion process. Keep an eye out for hoodies with interesting textures or colors that can add a unique touch when transformed into a crew neck.
Lastly, don’t overlook the functional details. Features like front pockets, drawstrings, or contrasting stitching can play a significant role in your design once the hood is removed. By carefully selecting the right hoodie, you not only ensure a successful conversion but also create a piece that reflects your personal style and creativity. Happy customizing!
Essential Tools and Materials for Your Project
When converting your favorite hoodie into a cozy crew neck, having the right tools and materials at your disposal is essential for achieving a polished and stylish result. A few simple items can transform a casual DIY project into a chic statement piece that you’ll love to wear. The key is to prepare well and gather everything you need before diving into the cutting and customizing action.
Start with a sharp pair of fabric scissors or a rotary cutter, which will allow for clean, precise cuts along the neckline. Blunt scissors can lead to frayed edges and uneven cuts, diminishing the professional look of your updated hoodie. If you want to ensure perfect measurements and symmetry, a ruler or measuring tape is also crucial. This step ensures that both sides of your new crew neck are even, maintaining a sleek aesthetic.
It’s also wise to keep a sewing kit handy, which should include needle and thread in matching colors, fabric glue, or even an iron-on adhesive tape. These materials can help secure any raw edges after cutting or even attach creative embellishments later on. Don’t forget to have a fabric pen or chalk for marking where you’ll cut-this can save you from making mistakes and allows for any adjustments before committing to the cut.
Finally, consider incorporating some decorative elements to personalize your new crew neck. Think about a tie-dye kit, embroidery thread, or patches that can add flair to your design. Each of these options can help you take your creation from standard to standout, showcasing your unique style. By preparing with the right tools and materials, you’ll enhance your DIY experience and create a hoodie that’s not only comfortable but also uniquely yours. Happy crafting!
Step-by-Step Guide to Safely Remove the Hood

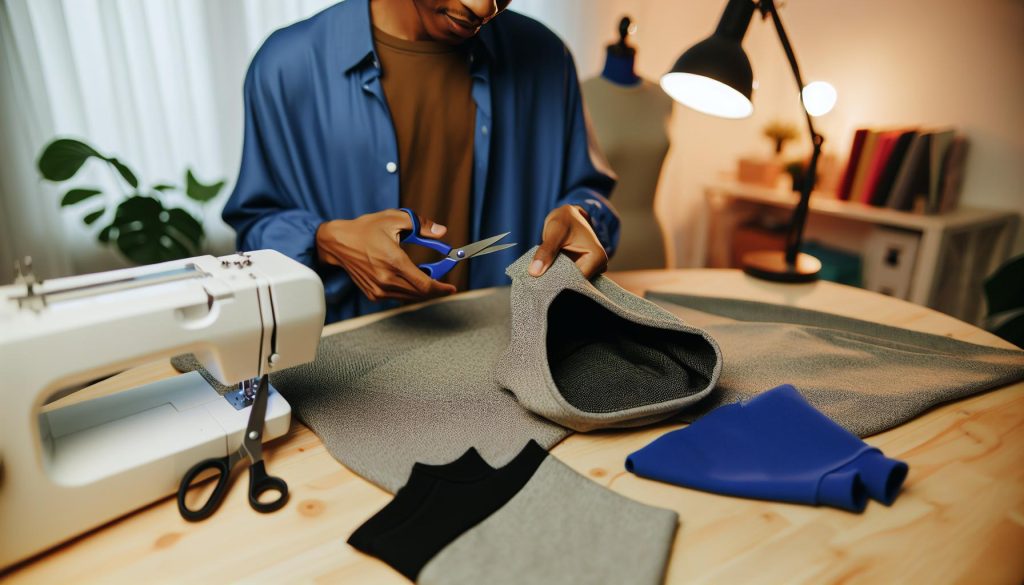
Transforming your favorite hoodie into a stylish crew neck is a fun and rewarding DIY project, but it requires careful technique to ensure a polished finish. Whether you’re looking to breathe new life into an old hoodie or simply prefer the look of a crew neck, removing the hood is an essential step in this creative transformation. Follow this step-by-step guide to safely detach the hood without compromising the integrity of the garment.
Start by laying your hoodie flat on a sturdy surface, preferably a cutting mat or an ironing board. Ensure that the fabric is smooth and wrinkle-free to make cutting easier. Use a fabric pen or chalk to mark the area where you plan to cut-generally, this will be just where the hood meets the neckline of the hoodie. It’s wise to take your time measuring and marking, as precise lines help in achieving a neat cut.
Next, grab your sharp fabric scissors or rotary cutter. Begin cutting along your marked line, gently following the curve of the neckline. Make sure to keep your cuts smooth and even. If you’re unsure, you can first make a small incision and gradually work your way around the hood, checking periodically to ensure you’re maintaining an even line. Once the hood is cut off, take a moment to inspect the edge; any rough spots can be trimmed for a cleaner finish.
After removing the hood, you’ll want to secure the raw edge for durability. A simple way to do this is by using fabric glue or an iron-on adhesive tape, which can prevent fraying. If you have a sewing machine, you can also sew a straight stitch along the edge to create a finished look. Finally, consider applying a decorative stitch or adding embellishments like patches or embroidery to personalize your new crew neck further. This small detail not only enhances the visual appeal but also adds character to your unique piece.
Tips for Designing a Stylish Crew Neck

Transforming your hoodie into a stylish crew neck is not only a fun DIY project but also an opportunity to express your unique style. When designing your new crew neck, consider the overall aesthetic you want to achieve. Here are some tips to ensure your converted piece is not just functional but also fashionable.
First, think about the fabric of your hoodie. The texture and color play a crucial role in your design. If you’re working with a basic cotton hoodie, you might want to elevate its look by adding details like contrasting stitches or patterns. Consider using a fabric paint to create custom designs or patterns that showcase your personality. Tie-dye techniques are also a popular choice; they add a retro vibe that’s perfect for streetwear.
Next, pay attention to the neckline. A raw edge can give your crew neck a casual look, but using a binding or a ribbed collar can instantly upgrade your hoodie to a more polished style. Experimenting with various necklines can help you find what looks best-think about a slightly wider or deeper crew neck for a relaxed feel. If you’re sewing a new hem, make sure to choose a thread color that complements or contrasts nicely with the hoodie to add a creative flair.
Don’t forget about the fit! A well-fitted crew neck looks stylish and feels comfortable. You can slightly taper the sides to create a more tailored look or even add some darts to the back for a snug fit. Keeping in mind that the final product should be comfortable, make sure there’s enough room for movement, especially if you plan on wearing it over layers or paired with your favorite jeans.
Lastly, accessorize your crew neck with embellishments. Patches, embroidery, or even fabric appliqués can bring a unique touch to your crew neck. These elements not only personalize your piece but also cover any rough edges left from the hood removal. So go ahead, experiment with textures, colors, and accessories, and let your creativity shine in this fun DIY project that reflects your personal style!
How to Maintain the Perfect Fit After Conversion

Maintaining the perfect fit after converting your hoodie into a crew neck is essential for looking stylish and feeling comfortable in your new design. The way you handle the modification can impact not just the aesthetic but also the overall fit, which is why careful consideration is key. When you cut the hood off, ensure that the neckline is even and does not stretch excessively; this can lead to an ill-fitting garment. It’s wise to use a pair of fabric scissors and take your time, making small cuts instead of one large snip.
After the conversion, try on your new crew neck to assess the fit. If the neckline feels too loose, consider adding a small elastic band sewn into the seam to create a more fitted look. Conversely, if you find it too snug, you can let out a few stitches or even modify the neckline further to create a wider opening. A well-fitted crew neck should rest comfortably against your collarbone while providing enough room to breathe without sagging or pulling when you move.
To maintain the fit over time, it’s crucial to wash and care for your newly converted crew neck appropriately. Always follow the care label instructions, typically washing cold and hanging to dry to avoid shrinkage. If you do notice any changes in fit after a wash, consider gentle stretching while the fabric is damp to reshape it. Using a fabric conditioner can also help maintain the softness and elasticity of the fabric, contributing to a more flattering fit.
Lastly, accessorizing and layering can enhance the fit and style of your crew neck. Pair it with a collared shirt underneath for a polished look, or layer it over a long-sleeve tee to add dimension. Patches or embroidery can also serve to distract from any minor fitting issues while allowing you to showcase your personal flair. Embracing these tips will not only help you maintain that perfect fit but also allow you to enjoy your stylish and unique crew neck for years to come!
Creative Ways to Customize Your New Crew Neck
Transforming a hoodie into a stylish crew neck is just the beginning of your creative journey. Once you’ve made the initial cut, you can take your customization to the next level! Personalizing your new crew neck not only makes it unique but also allows you to express your style and personality. Here are some fabulous ways to elevate your DIY project.
One of the simplest methods to customize your crew neck is through embroidery. You can add your initials, a favorite quote, or even cute designs like flowers or geometric patterns. If you’re not experienced with embroidery, start with pre-made patches. Just sew them on or use fabric glue for a no-sew option. This method can add a touch of flair and individuality to your hoodie.
Another fun way to refresh your crew neck is through tie-dye. Using a tie-dye kit, you can create vibrant swirls of color and transform a plain piece into a standout item. Tie-dye works wonderfully on basic colors and is a great way to use up fabric scraps if you’re feeling adventurous. Experiment with different folding techniques to achieve unique patterns, embracing the creative chaos that comes with DIY projects.
Adding embellishments like fabric paint, studs, or even fringe can also take your crew neck to new heights. Fabric paint allows for painting custom designs or shapes that can reflect your favorite themes. Studs or sequins can be applied along the neckline or at the cuffs for a bit of sparkle and glam. Just ensure any additions are securely attached to withstand washes.
Lastly, don’t forget to consider layering your newly customized crew neck in ways that enhance its look. Pair it with a long-sleeve shirt or turtleneck underneath for that chic, layered effect, perfect for transitioning seasons. The possibilities for personalization are endless, so let your creativity shine and enjoy the process of making your hoodie truly your own!
Washing and Caring for Your Hoodless Hoodie
When you’ve transformed your hoodie into a stylish crew neck, it’s essential to maintain its look and comfort through proper care. This not only keeps your creation looking fresh but also extends its lifespan, allowing you to enjoy your unique piece long after the DIY endeavor. Here are guidelines to washing and caring for your new hoodless hoodie.
To start, always check the care label on your hoodie. It will provide specific instructions tailored to the fabric. Typically, washing your hoodie in cold water is the best practice since it helps preserve colors and prevent shrinkage. Use a gentle cycle to prevent any wear on the fabric, especially after you’ve made custom alterations. When it comes to detergents, opt for mild, eco-friendly options to avoid harsh chemicals that can fade your designs or weaken the fibers.
If your hoodie has just undergone exciting customizations like embroidery or tie-dye, consider washing it inside out. This simple trick helps shield the embellishments from direct agitation, ensuring they stay intact. Additionally, avoid using fabric softeners as they can create a residue that affects the breathability of the fabric, which is especially important for a cozy and flexible fit.
Stain Removal and Maintenance
Accidents happen, so being prepared to tackle stains is key. For small stains, blot the area immediately with a damp cloth and a bit of mild soap. If a stain persists, pre-treat it with a stain remover before washing, but make sure to test it on a hidden area first to check for any adverse reactions. For grease or oil-based stains, gently dab (don’t rub) with a paper towel and treat with a specialized stain remover before washing.
To dry your hoodless hoodie, air drying is highly recommended. Hang it on a drying rack or a hanger to maintain its shape and avoid any potential shrinkage from a dryer. If you’re short on time, tumble dry on low heat; just be cautious of heat settings, as they can cause the fabric to warp or lose its form.
Maintaining the perfect look and fit of your converted crew neck is effortless with these caring tips. By treating your customized piece with a little love and attention, you’ll ensure it remains a cherished staple in your closet, ready for you to flaunt its unique charm every time you wear it.
Ideas for Adding Personal Touches and Embellishments
Transforming your hoodie into a crew neck is just the beginning of an exciting customization journey! Once you’ve snipped off that hood, you can breathe new life into your garment with a variety of personal touches and embellishments that will express your unique style. Whether you want to keep it classic or delve into bold designs, there’s no limit to what you can create.
Consider adding custom embroidery, which offers endless possibilities for personalization. You can stitch your initials, a favorite quote, or even a simple design that speaks to your personality. Embroidery patches are another fun option; simply sew or iron them on to create an eye-catching focal point. For those looking to go a step further, explore fabric paint or markers to create vibrant, one-of-a-kind artwork that showcases your creativity.
If you’re feeling adventurous, delve into the world of tie-dye! Use the dye method to create swirls and colors that reflect your mood or style. Follow it up with a matching scrunchie or hairband made from leftover fabric scraps to complete your look. Adding a bit of lace or mesh to the neckline or hem can also provide a trendy twist.
Lastly, don’t forget about accessorizing your transformed crew neck! Pair your newly styled hoodie with a bold necklace or wear it over a collared shirt for a chic layered look. These simple yet creative embellishments can make your hoodie a statement piece, infusing your wardrobe with personal flair and comfort.
Troubleshooting Common Issues During Conversion
When embarking on the transformation of a hoodie into a stylish crew neck, it’s important to acknowledge that like any DIY project, issues might arise. Understanding these common challenges can help you navigate through them smoothly and ensure your conversion is not only successful but also enjoyable. From accidental snips to uneven hems, being prepared with solutions can save both time and frustration.
One frequent issue is cutting the hood at an angle that results in an uneven or jagged edge. To avoid this, take a moment to lay the hoodie flat on a cutting surface and use a ruler or fabric measuring tape to mark a straight line before you cut. If you do find yourself with an uneven edge after cutting, you can always use fabric scissors to trim the area again or consider adding a band of complementary fabric along the neckline to create a cleaner finish.
Another common concern is the potential for stretching or warping around the neck after the hood is removed. This can happen, especially if the hoodie fabric is soft and stretchy. To combat this, reinforce the neckline with a simple straight stitch or a zigzag stitch used on a sewing machine. This will help maintain the shape of the neckline while adding a touch of professionalism to your conversion. Additionally, consider using a bias tape or a facing to keep the fabric from stretching out over time.
Lastly, the removal of the hood can leave unsightly holes where the drawstrings once were. If you’re not planning to reinsert drawstrings, consider creatively covering these holes with patches or fabric embellishments. Alternatively, if you want to keep the functionality of drawstrings, make sure to tuck them in before cutting or stitch them back in place, effectively making the opening a design feature rather than an eyesore.
Converting your hoodie into a crew neck should be a fun process of experimentation and creativity. By being aware of these potential hurdles and having strategies at hand, you can turn any mishap into an opportunity for further customization and style. Enjoy your transformation journey as you craft a unique piece that reflects your personal flair!
Inspiring DIY Projects to Transform Your Hoodies
When you’re ready to elevate your hoodie game, think beyond simply removing the hood. With a little imagination and some DIY spirit, your hoodie can transform into a unique piece that reflects your style. One popular project is to tie-dye your newly converted crew neck. Not only does this add vibrant colors, but it also helps to mask any uneven edges from your cut. Just be sure to use dye that is compatible with your fabric type and follow the instructions for setting the color.
Another inspiring idea is to add some embroidery to your design. You could stitch your initials or a fun graphic that resonates with your personality. If you’re new to embroidery, start with simple patterns or perhaps a border along the neckline. This not only enhances the look of your hoodie but also adds a personal touch that can’t be found in stores.
You might consider decorating your transformed hoodie with patches. Whether you opt for iron-on patches of your favorite bands, quirky slogans, or unique designs, they can easily cover up any awkward openings left by drawstrings. Alternatively, a fabric paint session can invigorate your hoodie; just remember to let it dry completely before you wear it!
The classic approach of layering can also give your crew neck a fresh look. Pair it with a collared shirt or a turtleneck underneath for a cozy, chic ensemble. Don’t shy away from mixing prints or colors; a contrasting fabric peeking through can make a bold statement. Remember, the goal is to blend comfort with creativity, making your hoodie a true reflection of your unique style.
By exploring these DIY projects and ideas, you’ll not only revitalize an old favorite but you’ll also become more attuned to your creative side. Every stitch and color choice serves as an expression of who you are. Now grab those scissors and materials, and let your imagination take the lead!
How to Style Your Converted Crew Neck для Every Occasion
Your newly converted crew neck is not just a cozy garment; it’s a versatile piece that can be styled for any occasion, making it a must-have in your wardrobe. Whether you’re heading to a casual brunch, a night out with friends, or lounging at home, your crew neck can adapt to fit the moment perfectly. To get you started, here are some creative styling ideas that celebrate the comfort of your DIY masterpiece.
For casual outings, pair your crew neck with high-waisted jeans or tailored joggers to blend comfort with trendiness. Layer a long-sleeve tee under your crew neck for added warmth and visual interest. A stylish belt can elevate the look, cinching your waist and adding a charming detail. Accessorize with chunky sneakers for an ultra-cool, laid-back vibe or opt for ankle boots for a hint of sophistication.
Evening Elegance
Dressing up your converted crew neck for a night out is all about pairing it smartly. Consider wearing your crew neck with a tailored blazer and leather leggings. This combination merges the relaxed style of your hoodie with the sharp edges of smart wear, creating a chic, elevated look. Go for statement earrings or a bold necklace to add that extra sparkle, ensuring your outfit transitions seamlessly from daytime casual to nighttime glam.
Weekend Chill
For a relaxed weekend look, drape your crew neck over a casual skirt or soft shorts. This playful mix of styles keeps you comfortable while looking effortlessly put together. Layer with a denim jacket and finish with slip-on sandals or canvas shoes for a carefree yet stylish ensemble. Don’t forget to accessorize with a trendy crossbody bag or a classic backpack for that touch of practicality.
Creative Layering
When styling a crew neck, the magic often lies in layering. Try mixing textures by wearing a flannel shirt open over your crew neck or pairing it with a long cardigan. This not only adds depth and interest to your outfit but also keeps you warm during cooler months. Moreover, scarves can be a fun way to introduce patterns or colors-just toss one over your shoulders, and you’re good to go!
No matter the occasion, your converted crew neck can be a canvas for creativity and personal expression. With these styling tips, you can make the most of your hoodie conversion, ensuring you look stylish while feeling cozy. Embrace the comfort and let your wardrobe shine!
FAQ
Q: How do I know if my hoodie is suitable for conversion to a crew neck?
A: To determine if your hoodie is suitable for a crew neck conversion, check for loose seams, a sturdy neckline, and fabric elasticity. Avoid hoodies with intricate designs around the hood that could complicate the cut. For tips on selecting the right hoodie, refer to the “How to Choose the Right Hoodie for Conversion” section.
Q: What are the best tools for cutting the hood off a hoodie?
A: Essential tools for cutting the hood off a hoodie include sharp fabric scissors, measuring tape for precise cutting, and fabric chalk to mark your cutting lines. If you want a clean finish, consider using a rotary cutter. Check the “Essential Tools and Materials for Your Project” section for more details.
Q: Can I sew or hem the neckline after removing the hood?
A: Yes, you can sew or hem the neckline after removing the hood. Use a straight stitch for a clean finish, or consider a zigzag stitch to prevent fraying. This not only enhances the look but also maintains the fabric’s integrity. For step-by-step guidance, refer to the “Step-by-Step Guide to Safely Remove the Hood” section.
Q: How can I customize my new crew neck after conversion?
A: To customize your new crew neck, consider adding patches, embroidery, or fabric paint. You can also use fabric dye for an entirely new color scheme. Get inspired by the “Creative Ways to Customize Your New Crew Neck” section for more unique ideas.
Q: What are common mistakes to avoid when cutting the hood off my hoodie?
A: Common mistakes include cutting too close to the neckline, uneven cutting, and failing to mark your cutting lines. Always take your time and double-check measurements before making any cuts. For troubleshooting tips, see the “Troubleshooting Common Issues During Conversion” section.
Q: Will converting my hoodie affect its overall fit and comfort?
A: Yes, converting your hoodie to a crew neck may slightly change its fit and comfort. It can create a more tailored look; hence, ensure you make necessary adjustments to preserve your desired fit. For maintaining fit, check out “How to Maintain the Perfect Fit After Conversion.”
Q: How do I care for my newly converted crew neck hoodie?
A: Care for your new crew neck by washing it inside out in cold water to prevent fading. Avoid bleach and tumble dry on low heat. For comprehensive care tips, refer to the “Washing and Caring for Your Hoodless Hoodie” section.
Q: Can I turn a hoodie with a fleece lining into a crew neck?
A: Yes, you can convert a fleece-lined hoodie into a crew neck. Just ensure to handle the fleece carefully to avoid rips. Following the guidelines in the “Step-by-Step Guide to Safely Remove the Hood” section will help achieve a neat finish.
Closing Remarks
Congratulations on transforming your hoodie into a stylish crew neck! This DIY project not only enhances your wardrobe but also empowers you to showcase your unique style. Remember, customizing your hoodie opens up endless possibilities for creativity-consider adding some tie-dye or embroidery to give it a personal touch! If you have questions or need more tips, dive into our care guides and DIY customization sections.
Don’t stop here! Explore our articles on hoodie styling tips, washing instructions, and stain removal strategies to keep your new crew neck looking fresh. Plus, sign up for our newsletter for exclusive DIY ideas and updates. Share your transformation with us in the comments below, and let us know how you plan to rock your new look. Happy crafting!