Did you know that customizing your clothing can not only refresh your wardrobe but also express your unique style? Cutting the hood off a hoodie is a simple technique that transforms a classic piece into a fresh, trendy item that you can wear in various ways. Whether you’re seeking to create a unique look or simply want to make your favorite hoodie more versatile, this DIY project is perfect for anyone looking to reinvigorate their casual wear.
As we delve into the steps and tips for removing that bulky hood, you’ll find not just practical guidance but also inspiration on how to personalize your clothing. From essential tools to styling suggestions, this article will empower you to embrace your creativity and make your wardrobe truly yours. Get ready to take your hoodie game to the next level!
How to Safely Remove a Hoodie Hood
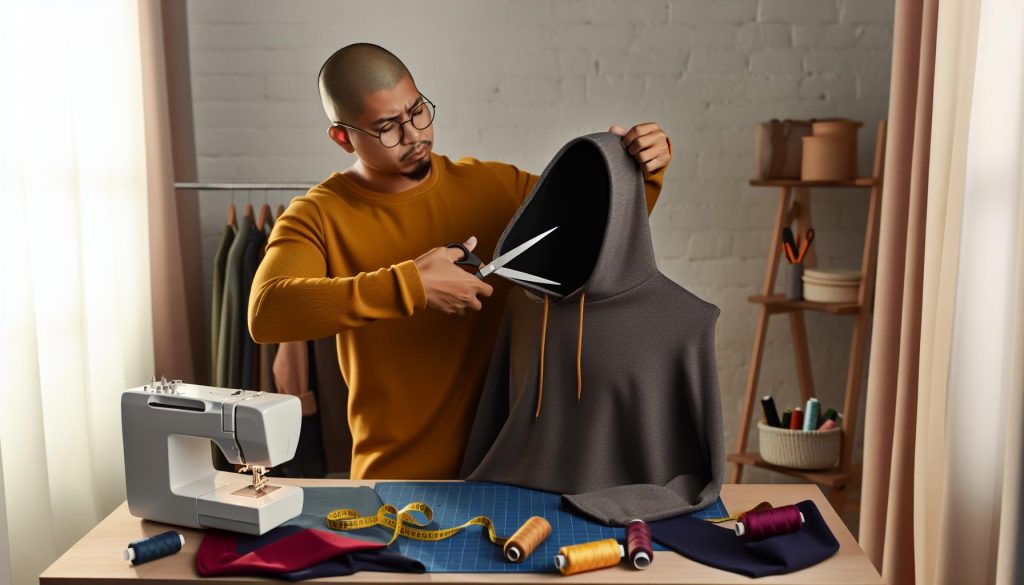
Removing the hood from your favorite hoodie can be an exciting way to transform the look and function of your garment, giving you a new piece to wear and express yourself. Whether you’re looking to create a sleeveless style or simply prefer a clean neckline, it’s essential to do this carefully to ensure your hoodie remains intact and stylish. Start by laying your hoodie flat on a table, ideally smoothing out any wrinkles. This preparation makes it easier to visualize your cutting line and avoids unwanted snags during the process.
Before diving in, check that you have the right tools at hand. You’ll need a pair of sharp fabric scissors, a ruler or measuring tape, and possibly some pins or fabric clips to hold everything in place. Carefully measure about an inch below the seam where the hood attaches to the body of the hoodie. Mark this line using chalk or a fabric marker; this helps ensure a straight and even cut. When you’re satisfied with your marking, take a deep breath, and make the cut in smooth, steady motions. Repeat this on both sides to maintain symmetry.
After removing the hood, you might find that the remaining edges feel a bit raw. To finish the look, consider using fabric binding or a simple hem to prevent fraying. This not only enhances the aesthetic appeal of your customized hoodie but also adds durability, especially if you plan to wear it frequently. Always remember to try on your hoodie after making adjustments to see if the comfort and fit meet your expectations. Taking the time to carefully remove the hood allows you to create a unique, personalized piece that reflects your individual style while maintaining the cozy chic vibe that hoodies are celebrated for.
Essential Tools for Your DIY Project
To transform your hoodie into a stylish masterpiece, having the right tools at your fingertips is essential. Whether you’re a seasoned DIY enthusiast or embarking on your first customization project, the right equipment can make the process smoother and more enjoyable. When it comes to cutting off a hoodie hood, here’s what you’ll need to ensure a successful endeavor.
Start with a sharp pair of fabric scissors. A sharp blade is crucial for making clean cuts, which helps prevent fraying and gives your DIY project a polished look. If your scissors are dull, you might end up jagged edges that could ruin the aesthetic of your revamped hoodie. Additionally, a ruler or measuring tape will help you precisely measure where to cut, ensuring both sides of the hoodie remain symmetrical.
Don’t forget to grab fabric pins or clips! These handy tools secure the fabric, keeping everything in place while you mark and cut. This will prevent any accidental shifts during the cutting process. Using chalk or a fabric marker to draw your cutting line is also a smart move. It allows for easy visibility without permanently altering your hoodie.
Lastly, you might consider having a sewing machine or needle and thread at your disposal for finishing touches. After cutting, you may want to ensure the edges are hemmed properly to prevent fraying, which not only adds durability but elevates the overall look of your custom piece. With these tools, you’re well-equipped to create a chic and personalized hoodie that speaks to your unique style!
Remember, personalization isn’t just about the end product; it’s about the joy of crafting something truly your own. Enjoy the process, and more importantly, have fun expressing your style!
Step-by-Step Guide to Cutting Off the Hood
To embark on the journey of transforming your hoodie, removing the hood can be both a simple and rewarding task. Not only does it create a fresh new look, but it’s also an opportunity to showcase your personal style! With the right approach and some patience, you can easily cut off the hood and elevate your wardrobe. Let’s dive into the detailed steps to make this customization as smooth as possible.
Start by laying your hoodie flat on a clean surface. Ensure that it is completely smooth to prevent any unwanted wrinkles that could mislead your cuts. Use a fabric marker or chalk to draw a cutting line along the seam where the hood attaches to the body of the hoodie. This line serves as your guide; however, feel free to adjust the height slightly if you prefer a snugger or looser fit after the hood is removed. It’s crucial to maintain a steady hand and make sure both sides are even for a symmetrical finish.
Next, grab your sharp fabric scissors and begin cutting along the marked line. Take your time with this part-steady, deliberate cuts will yield the best results and help you avoid frayed edges. If you’re feeling unsure, you can also use a rotary cutter and cutting mat for more precision, especially for curves. Once you’ve cut off the hood, it’s time to address those raw edges. To prevent fraying, you have a couple of options: you can sew a simple hem or use an overlock stitch if you have a serger. This will not only enhance durability but also give your hoodie that polished look.
As a finishing touch, inspect your newly adjusted hoodie. Sometimes, you might find lingering threads that need trimming or minor adjustments to achieve that perfect fit. If you’re feeling extra creative, this is an ideal time to add patches, embroidery, or even some fabric paint to customize further. Once you’ve successfully removed the hood, wear your new creation with pride, knowing that you’ve crafted something unique that reflects your individual style!
Tips for Achieving a Clean Finish
When reimagining your hoodie by cutting off the hood, achieving a clean finish is essential for creating a polished look that you can wear with confidence. The quality of your cut and how you treat the edges will determine whether your new design feels casual and stylish or unfinished. To help you nail this transformation, consider these practical tips that make all the difference.
Start with sharp fabric scissors or a rotary cutter-this is crucial for clean lines. Dull blades can rip or snag the fabric, leading to frayed edges. Before you cut, double-check that you’ve accurately marked your cutting line using fabric chalk or a marker. To further ensure precision, fold the fabric in half to compare both sides of the cut; this helps maintain symmetry. Remember, taking your time during the cutting process will pay off in the end!
After cutting, it’s important to address those raw edges to prevent fraying, which can detract from the overall look. You have a couple of options here: you can simply hem the edges with a straight stitch if you have a sewing machine, or employ an overlock stitch if you’re using a serger. For a no-sew option, consider using fabric fusion tape, which can securely bond the edges without the need for a needle and thread-perfect for those new to DIY projects!
Lastly, trim any loose threads that might remain after cutting. These small details often go unnoticed but can greatly affect the final appearance. Once you’ve done this, it’s an excellent opportunity to add your personal flair. Consider embellishing your newly cut hoodie with patches, embroidery, or fabric paint to showcase your style. By following these tips, you’ll ensure that your hoodie not only looks great but also feels uniquely yours!
Styling Your Reimagined Hoodie
Transforming your hoodie by cutting off the hood opens up a world of styling possibilities, allowing you to elevate your casual look while showcasing your unique personality. A reimagined hoodie can serve as a versatile staple in your wardrobe that perfectly pairs with various outfits and occasions. Whether you’re headed to a casual get-together or just lounging at home, here are some exciting ways to style your new creation.
Start by pairing your hoodless hoodie with high-waisted jeans or joggers for a relaxed, yet trendy silhouette. This style not only enhances comfort but also accentuates your natural waistline, creating a flattering look. For a bolder statement, layer a fitted turtleneck or long-sleeve shirt underneath the hoodie – this adds depth and dimension to your outfit. Don’t shy away from playing with color; a brightly colored hoodie can become the standout piece of your ensemble, while a neutral shade gives you a chic, understated vibe.
Accessorizing is key to making your reimagined hoodie truly shine. Consider adding a chunky knit scarf or a statement necklace to draw attention upward, highlighting your face and adding interest to your look. Hats, such as beanies or baseball caps, can also add a youthful touch. Footwear can further define your outfit-opt for sneakers for a street-smart appearance or ankle boots for a more polished finish.
Lastly, embrace the trend of layering by incorporating other outerwear. A denim jacket or oversized bomber jacket can add an edge, while a lightweight trench provides a sophisticated flair. As you navigate your styling options, remember that confidence is the best accessory. Wear your customized hoodie with pride, and it will quickly become a beloved item in your collection. Happy styling!
Care and Maintenance After Customization
Maintaining your newly customized hoodie is essential to keep it looking fresh and stylish while extending its lifespan. A well-cared-for hoodie can maintain its fit and flair, continuing to showcase your unique style for years to come. With the right approach, you can ensure that your DIY masterpiece remains a beloved part of your wardrobe.
Start by establishing a washing routine that suits your fabric type. Always check the care label for specific instructions, but here are some general guidelines:
- Machine Wash: Use cold water and a gentle cycle to prevent shrinking and color fading.
- Avoid Fabric Softener: This can break down fibers and reduce the hoodie’s breathability.
- Air Dry: Whenever possible, hang your hoodie to dry to keep its shape and avoid the heat that can damage fabric over time.
Additionally, addressing stains promptly is crucial for maintaining the aesthetic appeal of your hoodie. Blot any liquid stains without rubbing, as this can spread the mess. A mixture of mild detergent and water can work wonders for minor stains. For tougher spots, you might consider using spot treatment, applying it according to the manufacturer’s instructions, and re-washing afterward.
To keep your hoodie looking as good as new, consider incorporating embellishments or artistic touches that reflect your personality. Simple DIY projects like embroidery or tie-dye can add unique flair while also personalizing your piece. Ensure that any new materials are compatible with the original fabric to avoid any unexpected reactions during washing.
Lastly, store your hoodie properly by folding it instead of hanging it, which can sometimes distort the fabric, especially after customization. Creating a designated space in your wardrobe for special pieces can also prevent them from getting lost in the shuffle.
By following these care and maintenance tips, your customized hoodie will remain a standout item in your casual wardrobe, embodying both comfort and style for every occasion.
Creative Ways to Repurpose the Hood
Transforming an unused hoodie hood into a functional accessory not only conserves fabric but also allows for creativity to flourish. Once you’ve expertly cut off the hood, the opportunities for repurposing it are limited only by your imagination. Here’s how you can give that piece of fabric a second life!
A popular and practical use for a repurposed hood is turning it into a stylish tote bag. Simply fold the hood into a rectangular shape, stitch the sides together, and attach sturdy straps. This chic bag is perfect for carrying your books, groceries, or gym essentials, and it’s an eco-friendly alternative to conventional shopping bags. Another fun idea is to fashion the hood into a quirky headband or a hair accessory. Trim the hood down to a narrower strip, add some decorative fabric, or embroidery for a personalized touch, and you’ve got a unique headband that’s as functional as it is stylish.
Creative Accessories
- Pouches: Use the hood’s fabric to create small pouches or coin purses. Just sew the edges together, adding a zipper or a closure for secure storage.
- Pet Accessories: If you have pets, a repurposed hood can become a cozy blanket or a makeshift collar for your furry friends, depending on size. Get creative and customize it to suit their style!
- Wall Art: Extend the life of your hoodie by transforming the hood into wall art. Frame it, and embellish it with fabric paints or patches to create a statement piece for your room.
When considering embellishments or other enhancements for your repurposed items, think of techniques like tie-dye, stenciling, or even adding patches to bring more personality to your creations. The key is to experiment and enjoy the process, making it both a creative outlet and a practical way to breathe new life into your hoodie’s fabric. By doing so, you not only minimize waste but also celebrate your unique style, showcasing that second-hand can indeed be trendy!
Enhancing Your Hoodie with DIY Embellishments
Looking to add a personal touch to your hoodie’s look? DIY embellishments can transform your basic hoodie into a unique statement piece that reflects your individual style. Whether you’re a crafting novice or a seasoned pro, there are countless ways to express yourself through customization. With just a few materials and a little creativity, you can elevate your hoodie game to new heights.
One of the most popular methods for enhancing your hoodie is through tie-dyeing. Not only does this technique allow you to experiment with colors, but it also creates a vibrant, bohemian style that’s perfect for casual wear. To start, gather some fabric dye in your chosen colors, rubber bands, and protective gloves. Twist sections of the hoodie, secure them with rubber bands, and apply the dye according to your desired design. After letting it set, rinse, and watch your hoodie transform into a colorful masterpiece!
Another fantastic way to personalize your hoodie is through patches and embroidery. You can find a variety of patches at craft stores or online, ranging from quirky designs to meaningful symbols. Simply sew or iron them onto your hoodie to give it a unique flair. If you’re feeling extra creative, try your hand at embroidery. Personalize your hoodie with your favorite quotes, symbols, or even your name for a tailored look. This not only adds visual interest but can also be a fun and relaxing hobby.
Don’t forget about appliqué techniques! This method emphasizes layering different fabrics. Cut out shapes from another fabric and sew or glue them onto your hoodie, giving it a multi-dimensional touch. From hearts to stars, the possibilities are endless. Lastly, consider adding beads or rhinestones for a little sparkle. Simply sew or glue them onto specific areas, like the cuffs or around the neckline, to make your hoodie shine.
Remember, DIY customization is all about experimentation and fun, so don’t stress about making it perfect. Celebrate the process and enjoy the journey of creating a wardrobe piece that’s truly yours. Whether you opt for a bold statement or subtle enhancements, your reimagined hoodie will become a reflection of your unique style and creativity.
Choosing the Right Fabrics for Custom Projects
When embarking on the journey of customizing your hoodie, one of the most important aspects to consider is the fabric you choose for any additional elements or alterations. The right fabric can make a world of difference, not just in terms of aesthetic appeal but also in the comfort and functionality of your reimagined piece. Opting for materials that complement your hoodie can truly transform it into a personalized masterpiece.
First, let’s dive into some fabric options that work well for customization projects. Cotton is a staple choice, renowned for its softness and breathability. This material is ideal for patchwork, appliqué, and embroidery because it holds details beautifully and is comfortable against the skin. Fleece is another popular option, especially for inner linings or additional layers, and it adds warmth without compromising on style. For those looking to try their hand at dyeing, canvas and denim are both sturdy choices that can withstand the dyeing process, allowing for vibrant results.
Choosing Fabric Weight
When selecting fabric, pay attention to the weight as well. Lightweight fabrics might not offer the same level of durability as heavier options. Consider the following:
- Lightweight fabrics (e.g., cotton lawn): Ideal for layered looks, but they can lose shape over time.
- Medium-weight fabrics (e.g., standard cottons): Versatile and easy to work with for most customization projects.
- Heavyweight fabrics (e.g., twill or heavy canvas): Best suited for creating lasting embellishments that require structure.
Fabric Care Considerations
After customizing your hoodie, caring for it properly is essential to maintain its beautiful embellishments. Fabrics like cotton can usually be machine-washed, but always check the care labels, especially if you’ve added additional layers or unique fabrics. Here are some washing tips:
- Wash your hoodie inside out to protect the embellishments.
- Use cold water to prevent colors from fading, especially if you’ve used dyes.
- Avoid using bleach or harsh detergents on decorated areas.
By choosing the right fabrics, you empower yourself to bring your creative vision to life while ensuring that your customized hoodie remains a comfortable and stylish wardrobe staple. Whether it’s through dyes, sewing patches, or adding unique elements, the fabric you select plays a vital role in the success of your project. Enjoy experimenting with these materials as you create something truly uniquely yours!
Common Mistakes to Avoid When Cutting
One of the most exciting aspects of customizing your hoodie is cutting off the hood itself, but it’s easy to make missteps that can ruin your project. To ensure you achieve that perfect look while transforming your wardrobe, it’s vital to sidestep some common pitfalls that many DIY enthusiasts face. A little preparation and awareness can save you time, effort, and potentially your favorite hoodie!
First and foremost, not measuring properly is a mistake that can lead to uneven cuts. Always take the time to measure the area where you intend to cut; use a fabric ruler or measuring tape to avoid cutting too high or low, as this can leave jagged edges or an unbalanced appearance. You might want to mark your cutting line with tailor’s chalk for accuracy. Additionally, cutting in a single, smooth motion will help you maintain a clean line, as repeatedly sawing back and forth can distort the fabric.
Another frequent issue is using the wrong type of scissors. Standard scissors may not be sharp enough for the task, leading to frayed edges. Opt for fabric shears designed to make clean cuts through textiles. If you rely on dull blades, the outcome may be far from the tidy finish you envision. Moreover, always cut on a flat, stable surface to prevent any accidental slips.
Once you’re done, don’t forget about the cleanup process. Failing to trim loose threads thoughtfully can result in a messy look, defeating the purpose of your customization. Take a moment to snip any stray threads and consider using a serger or zigzag stitch on the raw edges to prevent fraying over time. This attention to detail can make all the difference in the final aesthetic of your reimagined hoodie.
Finally, embrace the creative side of cutting! While it’s essential to focus on precision, don’t shy away from personal flair-strategically frayed edges, for example, can add a trendy, distressed vibe to your hoodie. By steering clear of these common mistakes, you’ll not only enjoy creating your customized piece but also extend its life and style within your wardrobe.
Exploring Other Hoodie Customization Ideas
Taking your hoodie customization further can elevate your casual wear to a new level of creativity and personal expression. Beyond simply cutting off the hood, there are numerous exciting ways to reimagine your hoodie and make it uniquely yours. Whether you want to incorporate embroidery, experiment with dyeing techniques, or even convert it into a different garment entirely, the possibilities are endless!
One fun idea is to add unique designs through tie-dye. By applying different dye techniques, you can create vibrant patterns that transform a plain hoodie into a statement piece. Simply gather your dye supplies, twist or fold your hoodie in your desired pattern, secure it with rubber bands, and go wild with colors. Once you’ve achieved your perfect look, rinse and wash according to the dye’s instructions to reveal your masterpiece.
Another way to personalize your hoodie is through embellishments. You can sew or iron on patches that reflect your hobbies, interests, or favorite bands. This is not only a creative outlet but also a chance to revive old memories associated with each patch. For those who prefer a lighter touch, consider adding fabric paint. Create simple designs or quotes that resonate with you, allowing your personality to shine through in your everyday wear.
If you’re feeling particularly adventurous, consider transforming your hoodie into an entirely different piece of clothing! With some sewing skills, you could turn it into a stylish vest or even a crop top by cutting sections and resewing the remaining fabric. This transformation not only gives your hoodie new life but also keeps your wardrobe fresh and exciting.
In summary, there’s a vibrant community of DIY enthusiasts who embrace the art of customization. Engaging in these projects not only enhances your hoodie but also promotes sustainable fashion by making use of what you already have. Remember to care for your newly customized pieces by following proper washing instructions and handling them carefully, ensuring they remain a joyful part of your wardrobe for years to come!
Showcase Your Unique Style with Customized Hoodies
There’s no denying that customized hoodies are a canvas for personal expression, turning a basic wardrobe staple into a vibrant reflection of your individuality. By removing the hood, you’re already on your way to creating a unique piece that stands out from the crowd. To truly showcase your unique style, consider integrating various DIY techniques that further enhance your hoodie.
One exciting route is to experiment with tie-dye or fabric painting. Transform your hoodie into a statement piece by using bright colors or intricate patterns. For tie-dye, simply twist or fold your fabric, secure it with rubber bands, and apply your chosen dye to achieve eye-catching designs. If painting is more your style, use fabric paints to create personalized graphics or quotes that resonate with you, making your hoodie a true reflection of your personality.
Don’t overlook embellishments; they can add a touch of flair and character to your design. Consider sewing on patches that represent your interests, or even adding embroidered designs to give a textured and sophisticated finish. This not only reimagines your hoodie but also makes each piece one-of-a-kind. Plus, these small details can be conversation starters and help you connect with others who share similar tastes.
In addition to aesthetic enhancements, think about how you can style your newly transformed hoodie. Pair it with high-waisted jeans or a flowy skirt for a casual yet trendy look. Layer it under a tailored jacket for a mix of edgy and chic, or wear it with joggers for a comfortably relaxed vibe. Your options are endless, allowing you to express yourself in ways that feel authentic.
Lastly, be sure to care for your customized creation like a cherished item. Follow proper washing instructions-use cold water, gentle cycles, and air dry when possible-to keep your colors vibrant and your fabric intact. This way, your unique style can be showcased time and again, making your hoodie not just a piece of clothing, but a treasured personal statement.
The thrill of customizing your hoodie lies in the endless possibilities at your fingertips. From DIY projects to trendy styling, it’s all about creating something that feels uniquely yours.
FAQ
Q: How do I choose the right hoodie for customization?
A: When selecting a hoodie for customization, consider fabric type, fit, and color. Choose comfortable, durable materials like cotton or blends and ensure the fit suits your style. Refer to the section on “Choosing the Right Fabrics for Custom Projects” for more insights.
Q: Can I cut the hood off any hoodie?
A: While most hoodies can be modified, avoid those with complex designs or special stitching. Thicker fabrics may be more challenging to cut cleanly. Always test on less valued pieces first to decide if the DIY modification suits your style.
Q: What are some creative ways to repurpose the hood after removing it?
A: Removed hoods can be designed into unique accessories, like headbands or scarves. They can also be transformed into patches for other clothing or bags. Explore ideas in the “Creative Ways to Repurpose the Hood” section.
Q: What mistakes should I avoid when cutting off a hoodie hood?
A: Avoid cutting too close to the neckline, as this can ruin the hoodie’s fit. Don’t rush the process; take your time for clean cuts and even trimming. Check out the “Common Mistakes to Avoid When Cutting” for more tips.
Q: How can I maintain my hoodie after customizing it?
A: To keep your customized hoodie looking fresh, wash it inside-out on a gentle cycle. Avoid bleach and high heat. Refer to “Care and Maintenance After Customization” for detailed washing and stain removal tips.
Q: Should I pre-wash my hoodie before cutting it?
A: Yes, pre-washing your hoodie can prevent future shrinkage and fading. This ensures better results in modifications. For more preparation tips, see the section on “Step-by-Step Guide to Cutting Off the Hood.”
Q: What DIY embellishments can I add to my reimagined hoodie?
A: Consider adding fabric paint, embroidery, or patches for a personal touch. Tie-dye techniques can also create vibrant designs. Check out “Enhancing Your Hoodie with DIY Embellishments” for more creative ideas.
Q: How can I style a hoodie without a hood?
A: A hoodless hoodie can be styled with layering; pair it with jackets or accessories like scarves. Adding jewelry can also enhance the look. For more styling tips, see the section on “Styling Your Reimagined Hoodie.”
Wrapping Up
Now that you’ve learned how to cut the hood off your hoodie, it’s time to put your newfound skills into action and inject some unique flair into your wardrobe! Remember, customizing your clothing not only showcases your creativity but also enhances your personal style. If you’re excited to explore more DIY projects, check out our guides on tie-dye techniques and wardrobe styling tips.
Don’t forget to share your customized hoodie creations with us! We’d love to see how you’ve transformed your look. For a deeper dive into hoodie care and styling, delve into our care guides and find great washing tips to keep your hoodies looking fresh. Ready to take your hoodie game to the next level? Subscribe to our newsletter for exclusive content, DIY ideas, and more inspiring wardrobe transformations. Embrace your casual wear with confidence, and let your personal style shine!


