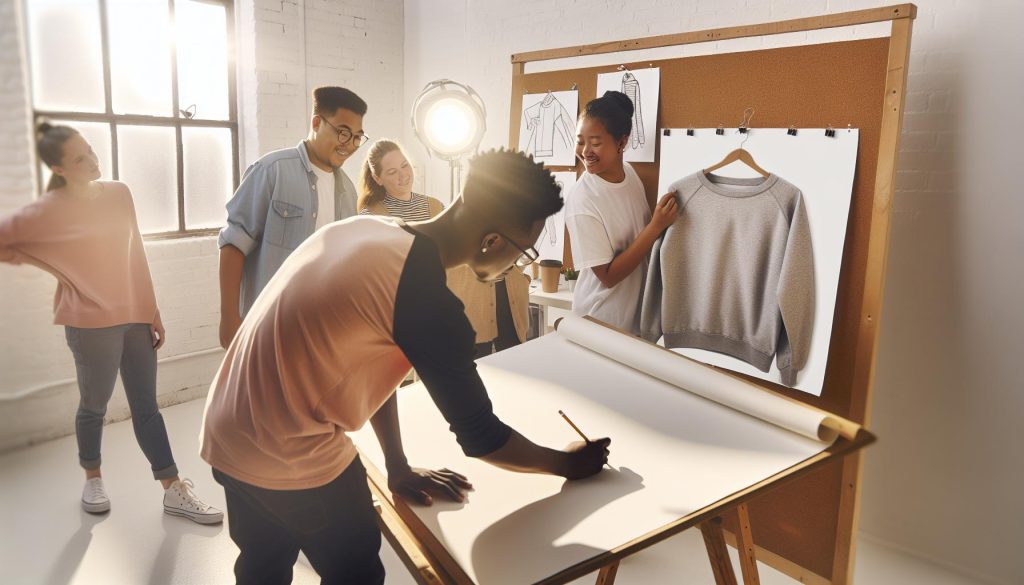
Did you know that sweatshirts have evolved from humble athletic wear to a mainstay of fashion, embodying comfort and style? Whether you’re an artist looking to enhance your drawing skills or simply want to capture your favorite cozy hoodie on paper, mastering how to draw a sweatshirt is not only essential but rewarding! In this step-by-step tutorial, we will guide you through the process, equipping you with the skills to illustrate everything from the classic cut to the intricate details like drawstrings and stitching. By the end, you’ll be ready to create personalized art that celebrates this beloved wardrobe staple. So grab your sketchpad and pencils, and let’s dive into the world of sweatshirt artistry!
How to Choose the Perfect Reference Image for Your Sweatshirt Drawing

Choosing the right reference image is crucial for capturing the essence of a sweatshirt in your drawing. A well-chosen reference not only guides your proportions and shapes but also brings an authentic feel to your artwork. Start by considering a range of styles, from classic crewnecks to trendy oversized hoodies. Look for images that showcase different angles and settings, as this variety will help you understand how the sweatshirt adapts to movement and wear. Online platforms such as Pinterest or fashion websites can be treasure troves for inspiration, offering real-life examples of sweatshirts in different environments.
When selecting your images, pay attention to the details that make each sweatshirt unique. Focus on elements like fabric folds, cuffs, and hems, which can add life to your drawing. For instance, if you’re drawing a sweatshirt with a kangaroo pocket, find a reference image that clearly shows how the fabric bunches and drapes around that feature. It’s also helpful to use high-resolution images; this allows you to zoom in and observe subtle textures and fabric patterns that might not be visible in lower quality pictures.
Types of Reference Images to Consider:
- Catalog images: Ideal for clear views of the garment.
- Street style photos: Great for seeing how sweatshirts are styled with other clothing.
- Close-ups: Useful for understanding fabric texture and detail.
- Fashion illustrations: Can provide a unique artistic take and inspire your own style.
Ultimately, the best references will resonate with your artistic vision. Choose images that excite you; this passion will be reflected in your work. A well-selected reference will not only guide your technical execution but also inspire your creativity, allowing you to infuse your unique flair into every line and curve of your sweatshirt drawing.
Essential Drawing Materials for Sweatshirt Sketching

Every artist knows that the right tools can elevate a project from good to extraordinary, and this is especially true when sketching sweatshirts. To start, you’ll need a set of quality drawing materials that can capture the unique characteristics of this versatile clothing item. A basic kit for sweatshirt sketching might include pencils, erasers, paper, and colored materials, but let’s delve into what makes these essentials particularly effective.
Begin with a range of drawing pencils (H for sharp lines, B for soft shading). Using pencils that span various hardness levels helps you achieve both precise details and softer, blended areas, crucial for representing the fold of fabric or the subtle curves of a hoodie. Sketch paper should be of medium weight so that your pencil lines can be clean and distinct without tearing or smudging. If you want to venture into color, A good quality colored pencil set can bring your drawings to life, allowing for vibrant hues that replicate the various sweatshirt fabric colors.
An eraser-especially a kneaded one-is invaluable for correcting mistakes and gently lightening areas that need refinement. Beyond these basics, having access to reference photos and fashion magazines can spark creativity and provide real-world insight into how sweatshirts are designed and worn. Adobe or other graphic software can also help if you want to refine your sketches digitally post-drawing.
For those looking to push their artistry further, consider incorporating markers and pastels for bold accents and texture contrasts. Markers can help add striking color blocks, while pastels can imitate fabric texture well. An array of fabric swatches can further enhance your understanding of the different sweatshirt materials, enabling you to create realistic texture in your sketches.
In summary, assembling a diverse range of drawing materials tailored specifically to sweatshirt sketching can empower you to explore textures, colors, and styles effectively. With the right tools in hand, you’ll be ready to capture the comfort and casual vibe that make sweatshirts an enduring wardrobe staple.
Step-by-Step Guide to Drawing the Basic Sweatshirt Shape

To begin your sweatshirt drawing journey, visualize the iconic silhouette that makes sweatshirts so beloved: their cozy, relaxed fit and invitingly soft fabric. Drawing the basic sweatshirt shape requires capturing these hallmark features in a way that’s both accurate and expressive. Whether you’re sketching for personal use or planning a custom design, following a structured approach will help you create a compelling representation from the start.
Start by outlining the basic structure with light pencil strokes. First, sketch a simple rectangular shape that represents the body of the sweatshirt. This rectangle should be wider at the shoulders and gently taper toward the hips to suggest a comfortable, slightly oversized fit. Next, draw two lines extending down vertically to form the sleeves, which should be wide and slightly bell-shaped at the ends. To indicate the neckline, create a soft curve at the top center of the rectangle-this will be the basis for the collar.
As you refine the shape, focus on adding detail to enhance the realism of your sweatshirt. Use smooth, flowing lines to connect the body to the sleeves, ensuring that they appear naturally blended. Pay attention to the proportions; the sleeves should not be overly long or too wide to maintain a balanced look. You can add a slight dip in the neckline for a modern touch, reminiscent of stylish crewnecks or hoodies. Once you’re satisfied with the overall silhouette, go over your lines with a darker pencil to finalize the outline.
With the basic shape established, you can start thinking about the additional details that make sweatshirts unique. These can include the ribbed cuffs and hems, drawstrings, and even kangaroo pockets. To achieve this, lightly sketch the cuffs at the end of each sleeve and a band along the bottom of the sweatshirt. Adding pockets can bring personality to your drawing, so consider positioning them symmetrically for a classic look.
Remember, practice makes perfect, so don’t hesitate to experiment with different styles and shapes until you find what resonates with you. Your sweatshirt drawing can become a canvas for your creativity, and each modification can help you better understand how to represent the casual charm of sweatshirts authentically. Embrace the process, and you’ll soon develop a knack for depicting this wardrobe staple with ease!
Adding Details: Drawing Cuffs, Hem, and Drawstrings
To breathe life into your sweatshirt drawing, attention to detail is crucial, especially when it comes to components like cuffs, hems, and drawstrings. These elements not only enhance the aesthetic appeal but also add layers of realism that can transform a simple sketch into a vibrant representation of hoodie culture. Did you know that the ribbed cuff on a sweatshirt not only provides a snug fit but also helps keep warmth in? Understanding their functionality can be just as important as their design.
Start with the cuffs. When sketching, envision how they wrap around the wrists. They typically have a ribbed texture that can be best represented through gentle, undulating pencil strokes. This ribbing can be highlighted by creating a series of parallel lines that slightly curve, suggesting stretch and elasticity. Make sure to keep the proportions correct-cuffs should not overshadow the sleeves. For added realism, consider shading underneath the cuffs to create depth; this simulates the effect of light falling on fabric.
Next, turn your attention to the hem. Like the cuffs, the hem often features a similar ribbed finish, providing a cohesive look. As you draw the hem, gently taper the lines to reflect the fabric’s natural fold and gather. A common mistake is to overlook the way fabric behaves; remember that hoods and sleeves cause fabric to bunch at the hem. Therefore, add subtle outlines where the hem meets the main body of the sweatshirt. Using a slightly darker pencil can help you differentiate these parts when you finalize your drawing.
When incorporating drawstrings, think about their placement and the material they would be made of, which often includes a flat or round shape encased in a fabric sleeve. Draw two lines for each string, ensuring they dangle naturally; they should appear to have weight. You can also add a small bobble at the ends to capture that authentic hoodie vibe. Consider using a fine-tipped pen for these details-this can help create a sharp contrast against the softer edges of your drawing.
As you refine these elements, remember: every detail tells a story. Your cuffs ensure comfort, your hem provides structure, and those whimsical drawstrings add a personal touch. Incorporating these features will not only enrich your drawing but also empower you to confidently represent the inherent charm of sweatshirts. So gather your pencils, channel your creativity, and turn your artistic vision into a cozy masterpiece!
Coloring Your Sweatshirt: Techniques for Realistic Effects
Coloring your sweatshirt drawing is one of the most exciting stages of the artistic process, transforming a monochrome sketch into a vivid representation of comfort and style. To effectively depict the soft and cozy nature of a sweatshirt, employing a variety of coloring techniques is vital. Here’s how you can make your sweatshirt illustration pop with realism and flair!
Begin by selecting your color palette. Sweatshirts often come in an array of colors, from muted pastels to bold tones. Consider the type of fabric as well; a cotton sweatshirt will have different color traits than a polyester blend. For instance, softer colors like light blue or peach create a relaxed vibe, while darker shades like navy or forest green can evoke a more classic or sophisticated look. Use colored pencils, markers, or watercolor to explore various effects. Each medium offers a unique finish; colored pencils may deliver a softer, blended look, while markers can provide intense, uniform color.
Shading and Highlights
To add depth and realism, incorporate shading and highlights. Identify where your light source is coming from. This will guide where you apply darker shades to create shadows. The areas under the arms, around the sides, and beneath the cuffs are typically darker since they receive less light. Use a slightly darker version of your main color for these regions. Conversely, for highlights, apply a lighter shade or white on areas such as the shoulders or upper parts of the sleeves, where light would naturally hit. This contrast between light and shadow will make your sweatshirt appear three-dimensional.
Texture Techniques
Texture is another essential aspect to consider when coloring your sweatshirt. To simulate the soft, fleecy fabric texture, use a stippling technique – create small dots or dashes to represent the fabric’s fibers. For a ribbed cuff effect, you can use fine lines to mimic the knitting. If you’re using watercolors, try wet-on-dry techniques to gradually build depth; this will allow the colors to blend beautifully while still maintaining a sense of the fabric’s texture.
Remember, practice makes perfect! Feel free to experiment with different techniques and materials to find what best represents your sweatshirt. Whether you’re going for a graphic look or focusing on realism, the right coloring methods will bring your drawing to life and celebrate the diverse world of sweatshirt culture!
Tips for Adding Texture and Fabric Patterns
Adding texture and fabric patterns to your sweatshirt drawings not only enhances their realism but also can infuse a unique personality into your artwork. Visual texture mimics the soft, cozy feel of actual fabrics, creating an inviting presence that draws the viewer in. Think about how sweatshirts are typically crafted from different materials, such as cotton, fleece, or blended fabrics, each conveying distinct looks and feels. Accentuating these differences in your drawings can make all the difference!
To start adding texture, focus on the stroke techniques that best represent the materials. For a cotton sweatshirt, consider using smooth, flowing lines that mimic the softness of the fabric. You can create a plush effect by layering soft pencil strokes or light washes of color, adding dimension with soft blending techniques. If you’re detailing a fleece hoodie, employ a stippling technique with tiny dots or short dashes in varying tones to recreate the fluffy texture. This not only gives depth but also provides a three-dimensional feel that captures the essence of the material.
Incorporating fabric patterns can take your sweatshirt illustrations to the next level. Polka dots, stripes, and even graphic designs can be added for a touch of personality. Use light sketching to outline your intended patterns before fully committing with your final strokes or colors. For instance, simple horizontal stripes on the sleeves can suggest a sporty vibe, while a whimsical graphic might lend a playful feel to the overall design. When drawing patterns, ensure they conform to the garment’s shape, as this will make them look more natural and integrated.
Finally, don’t forget to consider how light interacts with different textures. Shadows play a crucial role in defining the fabric’s contour; therefore, carefully place darker shades where fabric folds and creases occur. Remember to maintain a contrast with the highlights, which can be painted lightly on the parts that catch the most light. This attention to detail will enhance the realism of your sweatshirt drawings, infusing them with both character and comfort, embodying the spirit of sweatshirt culture!
Incorporating Stylish Graphics and Designs
In the world of sweatshirt design, stylish graphics and striking designs can transform a simple piece of clothing into a statement of personal identity. Whether you want to express your love for music, art, or simply showcase your creativity, incorporating unique graphics can make your sweatshirt drawing stand out. Start by brainstorming the themes or motifs that resonate with you. Look for inspiration in pop culture, nature, or even abstract art. This exploration not only enhances your artistic vision but also sets the foundation for a vibrant design.
When you’re ready to introduce graphics into your drawings, consider using digital tools or traditional media to sketch your ideas. If you’re working digitally, programs like Adobe Illustrator or Procreate can help you create clean, sharp lines and easy-to-manipulate graphics. For traditional sketching, use fine-tip pens or markers for details, and colored pencils or watercolors to add vibrancy. Ensure that your graphics complement the sweatshirt’s shape; for instance, a logo might work well centered on the chest, while a pattern could wrap around the sleeves.
Tips for Effective Graphic Design
- Simplicity is Key: Sometimes, less is more. A well-placed graphic can make a more powerful statement than a busy design filled with too many elements.
- Use Personal Elements: Incorporate personal symbols or quotes that hold significance to you. This not only adds depth but also makes your artwork meaningful.
- Think About Color: Choose colors that not only capture attention but also harmonize with the overall aesthetic of your sweatshirt. Remember that contrasting colors can help certain designs pop.
Finally, don’t shy away from experimenting. Try layering different graphics or combining various textures to see how they interact. For instance, a bold graphic paired with a soft watercolor background can create a stunning visual effect. If you’re feeling adventurous, consider incorporating DIY methods like tie-dye or stenciling for an edgy twist on your design. Embrace your creativity; the goal is to produce a design that not only reflects your style in your sketches but resonates with your love for comfortable, stylish casual wear. Your sweatshirt is a canvas-make it unique!
How to Customize Your Sweatshirt Drawing with Personal Flair
Creating a sweatshirt drawing that reflects your unique style is all about infusing personal flair into your design. This can be as simple as using specific colors that resonate with you or as elaborate as incorporating intricate patterns inspired by your interests. Start by considering what makes you feel comfortable and confident-whether it’s a color palette reminiscent of your favorite seasons, or patterns that reflect your personality, like geometric shapes or floral motifs. This foundational concept will guide your artistic choices and ensure your sweatshirt feels like an extension of yourself.
To customize your drawing further, consider employing various techniques that add texture and depth. Incorporating fabric patterns can give your design a more realistic feel. For example, applying a soft, plush texture for areas like cuffs or the hood can enhance the overall look. You might chain stitch elements of your design with embroidery or use fabric paint for bold statements. Additionally, textures like tie-dye or block printing can transform a basic sketch into a vibrant work of art. Experimenting with layering techniques, such as combining watercolor washes under more defined lines, allows you to explore the creative potential in your designs.
Don’t forget about the power of personalization. Adding small details such as your initials, a favorite quote, or symbols that have special meaning to you can make your sweatshirt uniquely yours. Think about how popular brands often include subtle touches in their designs-these elements can inspire you in your work. You can position a small icon on the sleeve or create a playful graphic that reflects your interests, whether it’s music, art, or nature. The key is to make sure these additions complement the overall look rather than clutter it.
Finally, always revisit your creation during the sketching process. Stay flexible; sometimes, the best ideas come to you mid-drawing. Feel free to embrace unexpected alterations that enhance your initial concept. Remember, your sweatshirt drawing is not just a design-it’s a canvas that tells your story!
Common Mistakes to Avoid When Drawing Sweatshirts
Creating a standout sweatshirt drawing is an exciting endeavor, but even experienced artists can stumble upon common pitfalls that detract from their designs. One such misstep is neglecting to study the anatomy and structure of a sweatshirt. Many artists jump straight into drawing without fully understanding the unique shape and fit of sweatshirts, which can lead to awkward proportions. To avoid this, take the time to observe actual sweatshirts or use reference images to grasp how sleeves, the body, and hems interact. Pay attention to how the fabric drapes and folds, as this will ultimately influence your drawing’s dynamics.
Another frequent error is overcomplicating details. While it’s tempting to incorporate every stitch and pattern, sometimes simplicity speaks louder than complexity. Consider using implied details rather than intricate lines-this can create a more polished and visually appealing look. Focus on suggesting texture and depth through shading and highlights instead of detailing every seam.
Moreover, don’t forget about the importance of color choice and application. Poor color selections can make your design appear flat or incoherent. Use a color palette that enhances the sweatshirt’s personality without overwhelming it. A balanced approach to coloring can breathe life into your drawing. Experiment with blending techniques to achieve that soft, comfortable vibe typically associated with hoodies, which can elevate your artwork.
Lastly, always remember to step back and evaluate your work periodically. Artists often become so engrossed in minute details that they lose sight of the overall composition. Taking breaks can help you return with fresh eyes, allowing you to identify any discrepancies in your drawing before finalizing it. By remaining mindful of these common mistakes and actively working to avoid them, your sweatshirt drawings can confidently capture comfort, style, and personality.
Inspiration: Popular Hoodie Styles and Trends
The versatility of hoodies is unmatched, and they have evolved into wardrobe staples that combine comfort with a sense of style. From casual hangouts to more fashion-forward looks, there are a plethora of hoodie styles to inspire your drawings. Understanding these trends can help you create designs that resonate with contemporary aesthetics.
One of the most popular styles is the oversized hoodie, which has garnered a massive following among both men and women. Characterized by its loose fit, this design exudes a relaxed vibe and is often paired with skinny jeans or leggings for a balanced silhouette. When sketching this style, pay attention to the drape and how the fabric falls around the body, allowing for movement and flow.
Another trend gaining momentum is the crop hoodie, which offers a more youthful and trendy alternative. This design often features a snug fit at the waist, which can highlight high-waisted pants or skirts. For your drawings, focus on the proportion and make sure to emphasize the cropped silhouette while including details like drawstring adjustments at the hood and cuffs.
Incorporating graphic designs onto your hoodies can also elevate your artwork. Graphic hoodies often feature bold logos, artistic prints, or pop culture references that make the garment stand out. Consider how these designs can interact with the basic hoodie shape; explore unique placements or layering effects in your sketches to add depth and interest.
Lastly, don’t overlook the DIY badge of honor that many hoodie enthusiasts proudly display through customization. Whether it’s through tie-dye techniques, embroidery, or even fabric patches, personal flair can transform a standard hoodie into a canvas for self-expression. For your drawings, you might include elements that suggest these textures or embellishments, using color and pattern to convey individuality.
By embracing these popular styles and trends, your sweatshirt drawings will not only reflect current fashion but also celebrate the culture and creativity surrounding comfortable casual wear. Whether you’re aiming for a minimalist approach or a flamboyant, eye-catching design, the world of hoodies is ripe for artistic exploration.
Advanced Techniques for Professional Sweatshirt Illustrations
Creating professional sweatshirt illustrations goes beyond simple shapes or colors; it involves mastering advanced techniques that can truly bring your designs to life. One of the most powerful tools at your disposal is the understanding of fabric behavior and how it interacts with movement. Real garments drape differently based on their cut, the type of fabric, and how they fit the body. If you can capture that essence in your drawings, your work will resonate with authenticity. Observe real sweatshirts-notice how they gather at the sides, the way thicker materials hold their shape, or how lightweight fabrics flow. Creating dimension and movement in your illustrations can elevate a standard design to an impressive artwork.
To add depth to your drawings, consider using various shading techniques, such as cross-hatching or stippling. Start with a light base and gradually build up darker tones where shadows naturally fall, such as under the arms or at the cuffs. Additionally, highlight areas that catch light, like the shoulders or rounded edges of the hood. Using gradients can also enhance your designs, so feel free to experiment with digital tools to achieve smooth transitions or textures. Don’t forget to explore the use of color; trying different palettes can change the mood of your design significantly, from vibrant, playful tones to muted, sophisticated shades.
Another essential technique involves the integration of patterns and textures. A well-executed tie-dye effect can turn a simple sweatshirt into a piece of art. Consider incorporating fabric patterns that define the aesthetic of the hoodie-whether it’s a classic plaid, flashy graffiti, or a minimalist stripe. When illustrating these details, layers are crucial; outline the main design first, then add patterns by drawing over them with transparent lines to simulate texture. This layering creates a sense of realism, allowing viewers to visualize how these designs would translate into wearable garments.
Lastly, don’t underestimate the importance of personalization and storytelling in your illustrations. Every hoodie can carry a narrative, whether through custom graphics, embroidery, or unique embellishments like patches. Focus on incorporating these personal elements thoughtfully into your drawings. They can be as subtle as a stitched motif on the cuff or as bold as a graphic on the front. Remember, your illustrations are not just representations of fashion; they are expressions of creativity and individuality. Embrace the culture around sweatshirts and use it as inspiration to push your artistic boundaries.
Showcasing Your Sweatshirt Artwork: Presentation Tips
When it comes to sharing your sweatshirt artwork, presentation is just as crucial as the drawing itself. Think of your artwork as a reflection of your creativity and personal style. By showcasing it effectively, you not only capture the attention of your viewers but also enhance the overall appeal of your designs. One captivating method to present your work is through high-quality photography. Make sure to take your images in good lighting and from different angles to showcase the details, such as cuffs, hems, and any unique embellishments you’ve added. A neutral background helps your artwork pop, drawing focus to the intricate elements of your design.
You might also consider creating a cohesive portfolio or an online gallery. This allows your audience to see a collection of your work in one space. Use an organized layout, dividing your pieces into categories according to style or technique, which can make it easier for viewers to explore your creations. If you’re sharing your work on social media, utilize platforms like Instagram or Pinterest where visual storytelling thrives. Engaging your audience with behind-the-scenes content-like short clips of the drawing process or the inspiration behind a design-can deepen their connection to your work, making it more memorable.
Don’t overlook the power of mock-ups as a presentation tool. Using mock-up templates, you can superimpose your designs onto images of actual sweatshirts. This provides potential buyers or fans with a real-life context of your artwork, helping them visualize how it would look when worn. Additionally, consider including details like dimensions and fabric types on product images, which can aid customers in making decisions if you plan to sell your designs.
Lastly, embrace storytelling as a part of your showcasing strategy. Share the inspiration and motivation behind each piece, whether through written narratives or voiceovers in video presentations. Every design has a story, and sharing that can help foster a connection with your audience-transforming a simple artwork into a conversation starter. Remember that showcasing your artwork is an essential step towards building your personal brand in the world of fashion illustration, so be creative and enthusiastic about presenting your unique perspective on sweatshirt culture!
Frequently asked questions
Q: What are the best materials for drawing a sweatshirt?
A: The best materials for drawing a sweatshirt include high-quality sketch paper, graphite pencils for outlines, colored pencils or markers for coloring, and blending stumps for smooth transitions. These tools will help you achieve realistic shading and texture in your drawing. For more tips on materials, refer to the “Essential Drawing Materials for Sweatshirt Sketching” section.
Q: How can I make my sweatshirt drawing look realistic?
A: To make your sweatshirt drawing look realistic, focus on lighting and shadow effects. Use darker pencils to create shadows in creases and folds, and lighter colors for highlights. Incorporating textures like fleece or cotton patterns will also enhance realism. For techniques, check out “Coloring Your Sweatshirt: Techniques for Realistic Effects.”
Q: What are common mistakes to avoid when drawing a sweatshirt?
A: Common mistakes include neglecting proportions, overlooking fabric folds, or not using reference images. Ensure your drawing captures the garment’s structure and detail by carefully observing your reference. You can learn more about this in the section on “Common Mistakes to Avoid When Drawing Sweatshirts.”
Q: How do I draw realistic fabric patterns on a sweatshirt?
A: To draw realistic fabric patterns, start with light outlines of your design, then layer colors slowly for depth. Use a blending tool to achieve smooth transitions between colors. Patterns like stripes or graphics can be incorporated through stencils for precise designs. For tips on this, refer to “Tips for Adding Texture and Fabric Patterns.”
Q: What techniques can I use to add texture to my sweatshirt drawing?
A: Techniques to add texture include using cross-hatching for depth and shading, stippling for dotted effects, and smudging with your finger or a blending stump for soft finishes. These techniques will enhance the overall look of your drawing, especially in the “Tips for Adding Texture and Fabric Patterns” section.
Q: How should I start my sweatshirt drawing?
A: Begin your sweatshirt drawing by sketching a rough outline to establish proportions and basic shapes. Focus on getting the silhouette right before adding details like cuffs and drawstrings. This foundational step is crucial for a successful drawing. More guidance can be found in the “Step-by-Step Guide to Drawing the Basic Sweatshirt Shape” section.
Q: What are some creative ways to customize my sweatshirt drawing?
A: Get creative by incorporating personal elements like unique graphics, custom colors, or personalized logos. Experiment with different styles such as tie-dye effects or embroidery patterns. The section on “How to Customize Your Sweatshirt Drawing with Personal Flair” offers more inspiration for your artwork.
Q: How can I present my sweatshirt artwork effectively?
A: Present your sweatshirt artwork effectively by choosing good lighting for photos, using a clean background, and framing your artwork properly. Highlight the details that make your drawing special. Explore “Showcasing Your Sweatshirt Artwork: Presentation Tips” for detailed strategies to showcase your creations attractively.
The Conclusion
Now that you’ve learned how to draw a sweatshirt, it’s time to bring your artistic vision to life! Remember, practice makes perfect, so don’t hesitate to revisit this guide whenever you need a refresher. If you’re eager to expand your drawing skills further, check out our tutorials on creating stylish hoodies with unique designs or dive into our DIY customization tips that celebrate hoodie culture.
Don’t forget to join our newsletter for exclusive tips on hoodie care, including washing instructions and stain removal that keep your creations looking fresh. Your feedback matters-let us know in the comments how your sweatshirt drawing turned out or share your tips with fellow artists! Ready to explore more? Click on our links for insights into styling tips and technical details that enhance your creative journey. Your next masterpiece awaits!


