Have you ever noticed how a simple sweatshirt can transform your style and express your individuality? Custom printing on sweatshirts allows you to tell your unique story while embracing the cozy, laid-back vibe that hoodies offer. In this guide, we’ll explore various DIY methods to print your desired designs, empowering you to create one-of-a-kind pieces that reflect your personality. Whether you’re looking to elevate your casual wear, gift a personalized hoodie, or simply enjoy a creative project, this journey into the world of sweatshirt printing will open up endless possibilities. Get ready to roll up your sleeves and bring your ideas to life with practical techniques and tips that will make your sweatshirts truly stand out!
Understanding Different Printing Methods for Sweatshirts
When it comes to customizing sweatshirts, understanding the various printing methods available is essential for achieving the desired look and durability. Each technique has its unique strengths and is suitable for different projects. Whether you’re looking to create bold designs, detailed images, or simple text, knowing which method to use can make all the difference in the final product.
One of the most popular methods is screen printing, which involves creating a stencil (or screen) and using it to apply layers of ink onto the fabric. This method is perfect for vibrant, long-lasting designs, especially when printing in bulk. However, it can become costly and time-consuming for small runs or highly detailed images due to the setup process.
Direct-to-Garment (DTG) printing is another innovative choice. This method uses specialized inkjet technology to print directly onto the fabric, making it ideal for intricate graphics and full-color images. DTG works best on cotton fabrics and is great for small orders or one-off designs, offering excellent detail and color variation.
For a more DIY approach, iron-on transfers allow you to print your design onto transfer paper, which is then applied to the sweatshirt with heat. While this technique is user-friendly and accessible, it may not be as durable as screen printing or DTG.
Heat transfer vinyl (HTV) is another method that involves cutting designs out of colored vinyl, which are then heat-pressed onto the fabric. HTV is particularly suited for bold, graphic designs and is excellent for solid colors. It’s an excellent choice for those looking to personalize sweatshirts for events or gifts, allowing for a unique touch.
Finally, sublimation printing offers a unique advantage for polyester fabrics, where the dye is infused into the fabric itself. This technique allows for vibrant color and complex designs but is limited to synthetic materials.
In summary, the best printing method for your sweatshirt depends on your specific needs, the design complexity, and material choice. Understanding these options enables you to make an informed decision that will enhance your DIY customization experience while ensuring your final product is stylish and durable.
Essential Materials for DIY Custom Designs
Creating personalized sweatshirts can be a fun and fulfilling way to express your individuality or showcase your creativity. The right materials play a crucial role in ensuring that your designs come out looking professional and last long, whether you’re going for a vibrant screen-printed logo or a subtle embroidered detail. Here’s what you’ll need to embark on your DIY sweatshirt customization journey.
To start with, consider the sweatshirt itself. Look for a quality fabric blend, ideally 100% cotton or a cotton-polyester mix, as these materials take to printing and embroidery beautifully. A mid-weight fabric, around 8-10 ounces, offers a nice balance between comfort and durability.
Next, gather a variety of supplies tailored to your chosen method of customization:
Essential Supplies for Different Techniques
- Screen Printing:
- Screen printing frames and mesh
- Ink (water-based or plastisol)
- Emulsion and sensitizer
- Squeegee
- Transfer tape
- Protective gear (gloves, apron)
- Iron-On Transfers:
- Iron-on transfer paper (compatible with your printer)
- A household iron or heat press
- Design software or printer for creating designs
- Heat Transfer Vinyl (HTV):
- Heat transfer vinyl sheets
- Cricut or silhouette cutter for design cutting
- Weeding tool for removing excess vinyl
- Heat press or iron for application
- Sublimation Printing:
- Sublimation printer and ink
- Sublimation paper
- Heat press
- Polyester or polyester-blended sweatshirts
- Embroidery:
- Embroidery machine (or hand embroidery supplies)
- Embroidery thread (color options based on design)
- Stabilizer material
- Needles appropriate for your fabric
Additional Creative Supplies
Beyond the primary equipment, you might want to include creative tools like fabric paints for a splash of color, stencils for shaping designs, and a sewing kit for adding unique touches through hand-stitched patterns or patches. Don’t forget about the importance of planning your design on paper beforehand to estimate colors and layout, preventing any unnecessary mishaps during the actual application.
Finally, it’s crucial to know how to care for your custom creations to keep them looking fresh. Always wash printed sweatshirts inside out with cold water and avoid harsh detergents that can fade colors. Line drying is preferable, as it helps maintain the fabric’s integrity and print quality.
Embrace the joy of customization, knowing that with the right materials and a sprinkle of creativity, your sweatshirts can transform into stunning, one-of-a-kind pieces that reflect your personal style!
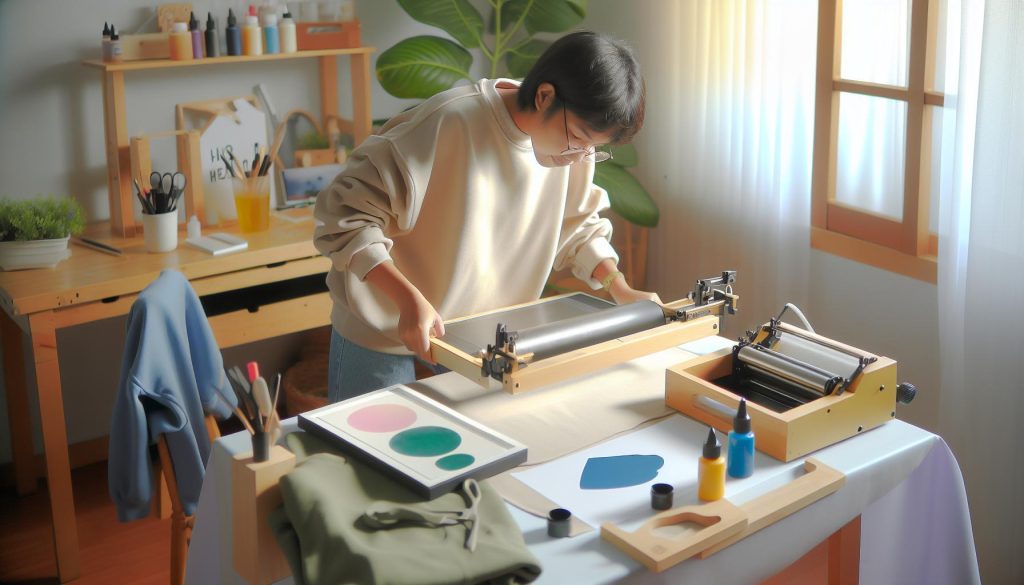
Step-by-Step Guide to Screen Printing
The world of screen printing opens up endless possibilities for customizing sweatshirts, transforming them into wearable art that showcases your unique style. Not only does this method provide vibrant colors and intricate designs, but it’s also an intriguing process that can be mastered with a bit of practice. Whether you’re looking to make a statement with bold graphics or want to create subtle, elegant patterns, screen printing might just be the perfect avenue for your creativity.
To get started, the first step is to prepare your design. Choose graphics or text that resonate with you, and make sure they are appropriately sized for the area you wish to print. Using design software, adjust the colors and layers according to your vision. Remember, each color will require a separate layer in your screen printing setup, so plan accordingly. Once your design is finalized, print it onto a transparency sheet, as this will serve as your stencil.
Next, gather your screen printing supplies. You’ll need a screen printing frame fitted with mesh, which acts as the platform for your artwork. Coat the mesh with emulsion and let it dry in a dark place. After the emulsion has cured, place your printed transparency on the screen and expose it to UV light. This process hardens the emulsion where the light hits, leaving behind a stencil where ink can flow through. After exposure, wash the screen with water to reveal your design, and allow it to dry completely.
With your prepared screen, it’s time to print! Lay your sweatshirt flat on a clean, stable surface. Position the screen over the sweatshirt, ensuring it’s aligned correctly. Use a squeegee to pull the ink across the screen, pressing it through the openings of your stencil. Lift the screen carefully, and admire your first print! Remember to clean your screen immediately after printing to maintain its integrity for future use. Once printed, let the ink dry according to the manufacturer’s instructions, and heat-set it if necessary to ensure durability.
As you become more comfortable with the technique, experiment with layering colors and different ink types to create even more dynamic prints. Embrace the process and have fun with it-your sweatshirts are bound to be one-of-a-kind masterpieces that truly reflect your personal flair!
Creating Custom Sweatshirts with Iron-On Transfers
Iron-on transfers are one of the simplest and most accessible ways to add a personal touch to your sweatshirts, making them not just comfortable, but uniquely yours. This method allows for a wide variety of designs-whether you want to showcase a favorite quote, a memorable image, or a custom logo-iron-on transfers can bring your creative ideas to life in a matter of minutes. The best part? You don’t need specialized skills or equipment; if you can operate an iron, you can create stunning custom sweatshirts!
To start, gather your materials. You’ll need iron-on transfer paper, which is available for both inkjet and laser printers, depending on your home setup. Additionally, make sure to have a high-quality printer, scissors, an iron, and a clean, flat surface to work on. Once you have your artwork or design ready-remember to flip it horizontally if it includes text-print it onto the transfer paper according to the manufacturer’s instructions. Allow the ink to dry completely before proceeding.
Applying the Transfer
Once you have your printed transfer, it’s time to apply it to your sweatshirt. Here’s a quick step-by-step:
- Prepare Your Sweatshirt: Iron the area where you plan to apply the transfer to remove any wrinkles or moisture and ensure strong adhesion.
- Position the Transfer: Carefully place the transfer face down on the sweatshirt, ensuring it’s positioned exactly where you want it.
- Iron It On: Set your iron to the appropriate temperature (typically medium to high, without steam). Firmly press the iron onto the transfer, applying consistent pressure for about 30 seconds to a minute. Avoid sliding the iron back and forth; just press straight down.
- Peel Away: Allow the transfer to cool slightly before gently peeling off the backing. Be cautious during this step; if any part of the transfer seems to lift with the backing, simply place it back down and reapply the iron.
Now you have a bright and beautiful design that can take your sweatshirt from ordinary to extraordinary with little effort!
Care for Your Customized Sweatshirt
To keep your newly decorated sweatshirt looking fresh, follow these care tips:
- Wash it inside out on a cold cycle to protect the design.
- Avoid bleach and fabric softeners, as they may degrade the transfer.
- Hang dry whenever possible; if you must use the dryer, choose a low heat setting.
- Iron on the reverse side if necessary, using a cloth to protect the design.
With iron-on transfers, you have the power to express your personal style in an easy, affordable way. Whether for yourself or as a thoughtful gift, customizing sweatshirts allows you to wear your creativity proudly!
Mastering the Art of Sublimation Printing
Imagine transforming your favorite sweatshirt into a personalized masterpiece that showcases your unique style! Sublimation printing is the perfect method to achieve vibrant, long-lasting designs that feel like part of the fabric itself. Unlike traditional printing methods that layer ink on top of the material, sublimation printing uses heat to transfer dye directly into polyester or specially coated fabrics, creating a seamless and durable finish. This technique is ideal for intricate designs, bright colors, and photographic images, making it a popular choice for custom apparel.
To get started with sublimation printing, you’ll need specific materials. Firstly, ensure you have a sublimation printer and sublimation ink, which are different from regular inkjet printers. Next, procure sublimation paper and a heat press machine, as this method requires controlled heat and pressure to embed the dye into the fabric. It’s essential to choose a polyester sweatshirt or one with a high polyester content-this is crucial, as sublimation only works on synthetic materials or specially coated surfaces.
The Sublimation Process
Here’s a step-by-step breakdown of how to master sublimation printing for your sweatshirts:
- Create Your Design: Use graphic design software to create or choose a design. Remember, the design will be mirrored when printed, so flip it horizontally if it contains text.
- Print Your Design: Load your sublimation paper into the sublimation printer and print your design using the correct settings for sublimation ink.
- Prepare the Sweatshirt: Ensure the surface of the sweatshirt is clean and wrinkle-free. A lint roller can help remove any dust or particles that might interfere with the transfer.
- Transfer the Design: Place the printed sublimation paper face down on the sweatshirt, and using the heat press, apply heat and pressure according to the machine’s instructions. Typical settings are around 385°F for 40-50 seconds, but this may vary based on the fabric and machine.
- Peel Off the Paper: Carefully remove the sublimation paper after pressing. If done correctly, the design will now be vibrantly embedded into the fabric!
Caring for Your Sublimated Sweatshirt
After creating your custom sweatshirt, proper care is crucial to maintain the vibrancy of the design:
- Wash your sweatshirt inside out in cold water to protect the print.
- Avoid harsh chemicals and fabric softeners, as they can break down the print over time.
- To dry, air drying is preferred; if you use a dryer, opt for a low heat setting.
- Ironing should be done on the reverse side; using a cloth to prevent direct heat on the design is recommended.
By mastering sublimation printing, you’re not just creating sweatshirts-you’re crafting wearable art that highlights your personality and creativity. Embrace this exciting method and wear your designs with pride!
Exploring Heat Transfer Vinyl Techniques
One of the most popular and accessible methods for customizing sweatshirts is through heat transfer vinyl (HTV). This technique allows for precise designs and vibrant colors, making it a favorite among DIY enthusiasts. With HTV, you can cut intricate designs that adhere to your sweatshirt’s fabric using a heat press or even a household iron, giving your garments a professional touch. Whether you want to add a motivational quote or a fun graphic, heat transfer vinyl can bring your vision to life in a simple yet effective way.
To get started with heat transfer vinyl, you’ll need a few essential materials. Firstly, choose a quality HTV that suits your project; there are various types available, including matte, glossy, and specialty finishes like glitter or flock. Next, you’ll require a cutting machine, such as a Cricut or Silhouette, which can accurately cut out your designs. Don’t forget a heat press or iron to apply heat and pressure needed to secure the vinyl onto the fabric. Finally, have a weeding tool handy to remove the excess vinyl from your design before application.
The Application Process
Applying heat transfer vinyl to your sweatshirt involves a few straightforward steps:
- Design and Cut: Use design software compatible with your cutting machine to create your design. Remember to mirror your design before cutting, as it will be applied in reverse.
- Weeding: After cutting, carefully weed away the unwanted vinyl, leaving only the design on the carrier sheet.
- Placement: Place your design on the sweatshirt, making sure it’s positioned correctly. Consider using a ruler or measuring tape for precise placement.
- Heat Application: Use your heat press or iron to apply heat according to the HTV’s specifications (usually around 305°F for 10-15 seconds). Ensure to cover the vinyl with a Teflon sheet or parchment paper to protect it and your iron.
- Cool and Peel: Allow the vinyl to cool slightly, then gently peel away the carrier sheet. If necessary, press again to ensure complete adhesion.
Caring for Your HTV Sweatshirt
To keep your heat transfer vinyl designs looking fresh, proper care is vital. Here are some tips:
- Wash your sweatshirt inside out in cold water to protect the vinyl.
- Avoid harsh detergents and fabric softeners, as they can degrade the vinyl over time.
- Line dry when possible, or use a low heat setting if using a dryer.
- When ironing, avoid direct contact with the vinyl; use a cloth to shield the design.
By mastering heat transfer vinyl techniques, you can express your personality through unique designs, adding a creative spin to your casual wear. The flexibility and ease of application make HTV an excellent choice for anyone looking to personalize their sweatshirts with flair and style!
Innovative DIY Tie-Dye Ideas for Sweatshirts
There’s something inherently captivating about tie-dye-it embodies creativity, fun, and a unique way to express yourself! This vibrant technique allows you to transform a plain sweatshirt into a wearable work of art. Whether you’re reminiscing about the ’60s or just want to add some color to your wardrobe, DIY tie-dye projects can be tailored to your style and imagination.
To get started, you’ll require a few essential materials: a cotton or cotton-blend sweatshirt (natural fibers work best for color adherence), fabric dye in your choice of colors, rubber bands or strings, plastic squeeze bottles for applying dye, gloves to keep your hands clean, and plastic wrap to contain your project while you wait for the dye to set. Now, the real fun begins!
Choosing Your Technique
Before you dive into the dyeing process, consider which tie-dye technique you want to use. Some popular methods include:
- Spiral: Pinch the center of your sweatshirt and twist it into a spiral shape. Secure with rubber bands in a crisscross pattern for a classic look.
- Bullseye: Create several sections by pinching and banding areas of the fabric. Apply different colors to each section for a striking bullseye effect.
- Stripes: Fold your sweatshirt in an accordion style and secure with rubber bands. Apply dye in alternating colors for a simple yet striking striped pattern.
The Dyeing Process
Once you’ve chosen your technique, it’s time to apply the dye. Follow these steps:
- Prepare Your Sweatshirt: Soak the sweatshirt in a mix of water and salt for about 20 minutes to help the dye set.
- Apply Dye: Using your squeeze bottles, carefully apply your chosen colors to the sections of fabric, being mindful of color saturation and overlap for unique blends.
- Wrap It Up: Place your dyed sweatshirt in plastic wrap to prevent it from drying out and to allow the colors to meld beautifully. Let it sit for at least 6-8 hours or overnight for best results.
Finishing Up
After the dyeing process, rinse your sweatshirt in cold water until the water runs clear, and then wash it separately with mild detergent to remove any excess dye. It’s essential to air dry the sweatshirt to maintain the integrity of the colors.
With these innovative tie-dye ideas, you can create a stunning array of custom sweatshirts that speak to your personal style. Embrace the creative process, experiment with colors and techniques, and enjoy the satisfaction of wearing something uniquely yours! Don’t forget to share your creations with friends and family-they’ll be thrilled to see the colorful flair you’ve brought into your casual wardrobe.
How to Embroider Your Sweatshirt Design
Elevating a standard sweatshirt with embroidery is not just a way to personalize your outfit but also a chance to showcase your creativity and skill. Whether it’s for a gift, a team event, or simply to express your style, embroidered designs can add a unique touch that sets your hoodie apart from the rest. The best part? You don’t need to be a seasoned embroiderer to get started-just a few basic supplies and techniques will have you stitching your way to custom creations.
To begin, gather your materials: a sweat-friendly embroidery hoop, embroidery floss in your chosen colors, a needle (ideally one suitable for fabric), and stabilizer to support the fabric while you work. You may also want to use a removable fabric marker to sketch your design on the sweatshirt before you start stitching. This preparation will guide your needle and ensure your design is just where you want it.
Choosing Your Design
Consider what type of design you’d like to create. Popular options include:
- Text: A catchy phrase, your name, or an inspirational quote can instantly jazz up your hoodie.
- Graphics: Simple shapes or motifs, such as hearts, stars, and flowers, can be very effective.
- Logos: If you’re creating for a team or event, consider stitching the logo for a cohesive look.
Stitching Techniques
Once you have your design in mind, it’s time to learn a few basic stitches that will form the foundation of your embroidery:
- Straight Stitch: Perfect for simple lines, just pull the needle through the fabric in one direction.
- Backstitch: Great for outlines; it gives a clean and defined edge to your design.
- French Knot: This adds texture and dimension; simply wrap the thread around the needle and pull it through the fabric.
Begin by placing the stabilizer beneath the hoodie to prevent any bunching. Start embroidering your design, keeping tension even in your stitches for a polished appearance. Take breaks as needed to ensure precision and avoid fatigue.
Once you have completed your embroidery, it’s vital to care for your custom design. Hand wash your sweatshirt in cold water and air dry it to maintain the quality of your handiwork. If you need to remove any stabilizer, do so gently to avoid damaging the fabric.
By following these tips and techniques, you can easily transform a plain sweatshirt into a personalized piece that reflects your personality or serves as a cherished gift. So grab your needle and thread and let your imagination run wild-your next favorite hoodie is just a few stitches away!
Washing and Care Tips for Custom Printed Sweatshirts
When it comes to preserving the vibrant designs and comfortable feel of custom-printed sweatshirts, proper washing and care are essential. You might think that once you’ve adorned your hoodie with your favorite graphic or DIY masterpiece, the hard part is done, but maintaining its quality will ensure you continue to enjoy your creation for years to come. Whether it’s a screen-printed design, an embroidered piece, or a fun tie-dye project, there are specific practices that can keep your sweatshirt looking fresh and fantastic.
Start with a gentle wash cycle. Always opt for cold water, as hot water can fade and shrink your sweatshirt faster than you’d think. For printed designs, flipping your sweatshirt inside out before washing can protect the artwork from abrasion against other garments. Additionally, using a mild detergent will help maintain the integrity of both the fabric and the print. Avoid fabric softeners, as they can leave a residue that interferes with the design’s longevity.
Stain Removal Tips
Should you encounter any stains, addressing them promptly is key. Never scrub; instead, gently blot the area with a cloth and cold water. For tougher stains, a paste of baking soda and water can work wonders. Apply it directly to the stain, let it sit for about 30 minutes, and rinse it off gently.
Drying Your Sweatshirt
After washing, air drying is the best option. Lay your sweatshirt flat on a clean towel or hang it up away from direct sunlight to prevent fading. If you’re short on time and using a dryer is necessary, use a low heat setting and remove your sweatshirt while still slightly damp to help maintain its shape.
By following these care tips, your custom sweatshirt will not only showcase your creativity but also enjoy a longer life, maintaining the vividness of its design and the softness of its fabric. Treat your hoodie well, and it will continue to be a go-to piece in your wardrobe, reflecting your unique style and personal flair!
Troubleshooting Common Printing Mistakes
When diving into the world of custom sweatshirt printing, there’s a thrill in DIY creativity-but it can also feel overwhelming, especially if things don’t go as planned. Don’t let common printing mistakes discourage you. Instead, consider them stepping stones on your way to kimono-level mastery in hoodie design! Whether you’re using screen printing, heat transfer vinyl, or any other method, being aware of potential pitfalls can help you achieve the perfect finish.
One of the most frequent issues is misalignment of designs. When printing, make sure to measure and mark where your design will go on the sweatshirt. Use a ruler and a fabric marker to outline the area. This small step can save you from having a design that’s too high or low, or skewed to one side. If your technique of choice involves layering, ensure that each layer, especially with heat transfer vinyl, is fully cooled before applying the next; otherwise, you risk bubbling or wrinkling.
Another common hurdle is inconsistent print quality. This often happens due to improper ink application. For fans of screen printing, a blotchy design may indicate that too much ink has been used or that the screen isn’t evenly pressed down. To combat this, practice using thinner layers of ink and ensure your squeegee technique is consistent. If you notice fading after washing, consider using high-quality inks designed for fabric to maintain vibrancy-a vital detail for color enthusiasts wanting their sweatshirts to pop for all seasons.
Occasionally, heat transfer projects can lead to a vinyl lift-off after the first wash, typically due to too low an application temperature or not enough pressure. Invest in a good heat press with adjustable settings to alleviate this issue. Additionally, always pre-wash your sweatshirts to eliminate any residual chemicals that might interfere with adhesion. And remember, patience pays off-waiting a while before wearing your freshly printed creation allows your design to set perfectly.
By understanding these common mistakes, you empower yourself to create stunning and durable custom sweatshirts. Every mishap is an opportunity to learn and refine your skills, ensuring that your creativity shines through in every piece you design. Happy printing!
Personalizing Sweatshirts for Gifts and Events
Creating custom sweatshirts can be a delightful way to express creativity while giving meaningful gifts or organizing memorable events. Imagine the joy on a friend’s face when they unwrap a sweatshirt featuring a design made just for them-be it a cherished quote, an inside joke, or a beautiful graphic that resonates with their personality. Personalizing sweatshirts can transcend the ordinary; it’s a remarkable opportunity to showcase thoughtfulness and care in your gift-giving endeavors.
When designing a sweatshirt, consider the recipient’s tastes and interests. Use methods like screen printing for bold graphics or embroidery for a more textured, high-quality finish. For quick customizations, iron-on transfers can be incredibly effective. They allow you to print intricate designs using your home printer and transfer them easily onto the fabric. Don’t forget to personalize the fit! You might choose a classic fit for a casual wear feel, or opt for a slightly oversized design for those relaxed, comfy vibes. Make sure to consider their favorite color and style rights-this attention to detail will not go unnoticed.
Custom sweatshirts aren’t just for individual gifts; they can also enhance the atmosphere of events. For weddings, matching sweatshirts can be a fun and cozy way for bridal parties to bond, or you can create unique designs for family reunions that express unity and belonging. Consider including the event’s date or a specific theme for an unforgettable touch. If you’re planning a corporate team-building event, sweatshirts with the company logo and uplifting slogans can foster camaraderie and pride among employees.
Lastly, washing and care instructions are crucial when gifting custom sweatshirts. Include care tips such as washing in cold water, avoiding bleach, and tumble drying on low to ensure that the design remains vibrant and the fabric retains its shape. By providing these small but essential pieces of knowledge along with your gift, you extend your thoughtfulness beyond the initial presentation, securing a future of lasting memories tied to your special custom piece. With the right approach, personalized sweatshirts can become cherished keepsakes, full of warmth and love for years to come.
Stylish Ways to Layer Sweatshirts in Your Wardrobe
Sweatshirts are the ultimate layering piece that effortlessly blends comfort with style, making them an essential part of any wardrobe. Whether you’re heading to a casual outing, lounging at home, or even dressing up for a night out, there are numerous stylish ways to incorporate sweatshirts into your outfits. With the right approach, you can transform a simple sweatshirt into a fashionable statement that reflects your unique personality.
One versatile method is to wear a fitted turtleneck or mock neck underneath a slightly oversized sweatshirt. This layering technique not only adds warmth during colder months but also creates a chic silhouette. Pair this combination with high-waisted jeans or a skirt, and finish the look with ankle boots or chic sneakers for an effortlessly stylish outfit. Additionally, using contrasting colors between the inner layer and the sweatshirt can create a striking visual effect that stands out.
Another trendy option is to layer a sweatshirt over a collared shirt. This gives the appearance of a preppy style while maintaining the relaxed vibe of a sweatshirt. Opt for a crisp white shirt for a classic look, or play with patterns for a bolder choice. To elevate the layer, accessorize with statement jewelry or a stylish scarf that can peek out from under the sweatshirt, adding a touch of personality.
For those who want to add dimension to their outfit, consider incorporating a longer sweatshirt as a dress. Pair it with leggings or bike shorts in colder weather, or wear it alone with knee-high boots for a cute, laid-back look. You can also use a belt to cinch the waist, giving the outfit a more tailored appearance. This method not only showcases your custom designs but also makes for a fashion-forward statement that’s comfortable enough for all-day wear.
No matter how you choose to layer your sweatshirts, remember to keep the color palette and overall vibe cohesive. Using a mix of textures and styles can add depth to your look. Lastly, don’t forget to pay attention to the materials: opt for breathable fabrics for warmer days and thicker, cozy upland fabrics for winter. Embracing creativity in how you layer sweatshirts will not only elevate your style but also celebrate the comfort that this timeless piece has to offer.
Frequently asked questions
Q: What types of ink are best for printing on sweatshirts?
A: Water-based and plastisol inks are ideal for printing on sweatshirts. Water-based inks are soft and breathable, while plastisol inks provide vibrant colors and durability. Choose based on your desired finish; for a vintage look, opt for water-based, and for bright, long-lasting designs, go with plastisol.
Q: How do I choose the right sweatshirt for printing?
A: Select a sweatshirt made from a cotton-polyester blend for optimal printing results. Cotton provides a smooth surface for ink adhesion, and the polyester adds durability. Check the weight; heavier fabrics typically hold ink better and resist wear during washing.
Q: Can I print on sweatshirts using a regular inkjet printer?
A: Yes, you can print on sweatshirts using a regular inkjet printer, but you need special inkjet fabric transfers. Print your design on the transfer paper and then apply it to the sweatshirt using heat. This method is great for short-run or home projects but may not be as durable for long-term use.
Q: How do I ensure my sweatshirt design stays vibrant after washing?
A: To keep your sweatshirt design vibrant, wash it inside out in cold water, and air dry when possible. Avoid bleach and fabric softeners, as they can fade prints. Always follow specific washing instructions based on the printing method used to ensure longevity.
Q: What is the best way to apply heat transfer vinyl to a sweatshirt?
A: First, cut your design out of heat transfer vinyl using a cutting machine. Weed the excess vinyl, then position the design on the sweatshirt. Use a heat press or iron to apply heat and pressure evenly. Allow it to cool before peeling the transfer liner for a clean finish.
Q: Can I design my sweatshirt with multiple colors?
A: Yes, you can design a sweatshirt in multiple colors using various methods like screen printing or heat transfer vinyl. Just ensure that each color is applied separately, and follow printing guidelines for the chosen method to achieve crisp and vibrant results.
Q: Is it possible to combine different printing methods on one sweatshirt?
A: Absolutely! You can mix and match printing methods for unique designs. For example, use screen printing for the main graphic and add vinyl text or patches. Just be mindful of the suitable temperatures and techniques for each method to prevent damage.
Q: How do I fix a printing mistake on my sweatshirt?
A: To fix a printing mistake, you can either carefully remove the ink with a specialized fabric ink remover or cover it with a patch or another design element. If the error is minor, embellishments like embroidery or fabric paint can also creatively mask the mistake.
Key Takeaways
Now that you’re equipped with everything you need to know about printing on sweatshirts, it’s time to unleash your creativity! Remember, whether you’re customizing for yourself or a fresh gift for a friend, every design tells a story. If you have any questions or want to share your own custom creations, drop a comment below-we love hearing from our fellow DIY enthusiasts!
For more inspiration, check out our guides on hoodie care tips and styling suggestions for your custom sweatshirts. Don’t forget to explore our embroidery projects for an extra flair on your designs! Ready to take the next step? Sign up for our newsletter to stay updated on the latest DIY trends, exclusive resources, and special offers. Your perfect sweatshirt awaits-let’s get started today!


