Are you tired of your plain sweatshirts and looking for a unique way to express your personal style? Bleaching a sweatshirt is not only a fun DIY project but also a fantastic method to achieve that trendy distressed look you’ve been seeing everywhere. With just a few simple materials, you can transform an ordinary hoodie into a fashionable statement piece that reflects your individuality. In this guide, we’ll explore the steps to successfully bleach your sweatshirt, ensuring you get it just right while also sharing helpful tips for customization and care. So, roll up your sleeves, and let’s dive into the creative world of DIY fashion! Your closet-and your style-will thank you.
Choosing the Right Sweatshirt for Bleaching
When diving into the world of DIY sweatshirt bleaching, choosing the right garment can make all the difference in your end result. Opt for sweatshirts made from natural fibers, such as cotton or a cotton-blend, as these materials respond better to bleach and allow for a more vibrant and engaging outcome. Avoid synthetic fabrics like 100% polyester, as the bleach may not lift color effectively and can produce unsightly results. Look for sweatshirts that have a solid, darker base color, which provides a striking contrast to the bleach and enhances the design.
Popular sweatshirt styles to consider:
- Crewnecks: These offer a classic look and ample surface area for your designs.
- Hoodies: With their drawstrings and kangaroo pockets, hoodies create interesting patterns based on where the bleach is applied.
- Oversized Fits: Not only are they trendy, but they also provide more fabric area to work with, allowing for larger or more intricate designs.
Keep an eye out for sweatshirts that are pre-washed, as this can help remove any chemicals that may hinder the bleaching process. Also, considering the fit and construction can make a difference; sweatshirts with a looser weave can more easily absorb the bleach, creating unique patterns and textures. Once you’ve selected the perfect sweatshirt, you’ll be ready to explore the exciting world of bleach designs, transforming your garment into a stylish, personalized piece.
Essential Tools for DIY Distressing
To successfully embark on your DIY sweatshirt distressing journey, having the right tools at your fingertips is crucial. It’s not just about the bleach; it’s about creating the right environment and using the right techniques to turn your sweatshirt into a stylish masterpiece. Each tool plays a pivotal role in ensuring your project runs smoothly and yields fabulous, one-of-a-kind results.
First and foremost, you’ll need bleach-look for a household sodium hypochlorite-based bleach for the best results. Mixing it with water can help dilute it so you can control how light the fabric gets. A clean spray bottle or squeeze bottle is perfect for application, allowing you to create different effects based on how you choose to apply the bleach. Additionally, gloves are a must; bleach can be harsh on your skin, so protect yourself with a sturdy pair.
Don’t forget about protective materials for your workspace! Spread out an old plastic shower curtain or a large garbage bag to catch any spills. You’ll also want to have old rags or paper towels handy for quick clean-ups. A few spray bottles of different sizes can assist you in achieving varied bleach concentrations and application techniques, from fine misting to larger splashes.
Lastly, consider tools for enhancing creativity. A small sponge or foam brush can give you more artistic control, allowing for dabbed effects, while a paintbrush can be useful for more intricate designs. Rubbing alcohol and a pair of scissors can also come in handy for additional customization after the bleaching process. With these tools, you’ll be well-prepared to channel your inner designer and craft a sweatshirt that’s truly your own!
Step-by-Step Guide to Bleaching Techniques
Transforming an ordinary sweatshirt into a stylish, distressed piece is not just rewarding; it’s also a fun way to express your creativity. Bleaching techniques can produce stunning results, and with the right approach, anyone can achieve an eye-catching look that embodies personal style.
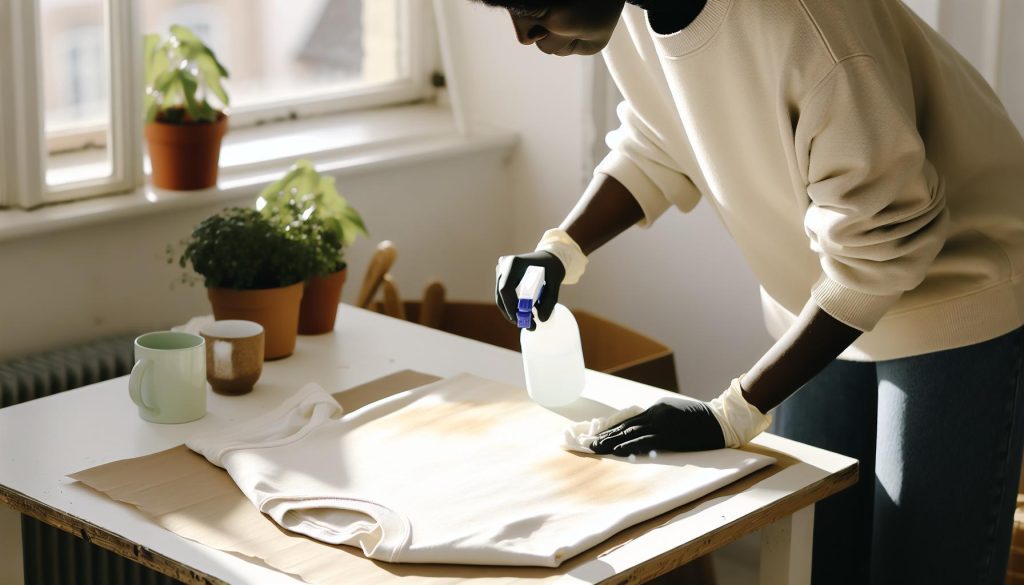
Begin your bleaching adventure by selecting an area to work in that is well-ventilated. Lay your sweatshirt flat on a protected surface to maintain control over your design. For controlled results, prepare a solution by mixing equal parts of bleach and water in a spray bottle. This dilution allows for more significant control over the bleaching effect, preventing your fabric from becoming too light too quickly. Remember, it’s essential to wear gloves to protect your skin from the harsh chemicals.
To create unique designs, consider using various application techniques. For a soft, faded look, hold the spray bottle about 8-12 inches away from the fabric and mist lightly over the areas you want to bleach. For more dramatic effects, get closer and apply the bleach in small bursts or even use a sponge or foam brush for precision. You can also experiment with painting the bleach onto the fabric with a brush for intricate designs or patterns. Don’t forget the classic tie-dye twist: twist or crumple sections of the fabric and secure them with rubber bands before applying bleach for a spiral or patterned effect.
After you’ve achieved your desired level of bleaching, allow the sweatshirt to sit for about 10-30 minutes, checking periodically to prevent over-bleaching. Once the fabric reaches your preferred shade, rinse it thoroughly under cold water to stop the bleaching process. Wash the sweatshirt alone or with similar colors on a cold cycle and let it air dry. This step ensures that any remaining bleach is neutralized and the fabric retains its softness. Enjoy your one-of-a-kind creation, and don’t hesitate to flaunt your personalized sweatshirt style with pride!
Creating Unique Patterns with Bleach
Creating stunning patterns with bleach can transform an ordinary sweatshirt into a unique work of art that reflects your personal style. Utilizing bleach allows for limitless creativity, as different techniques and application methods can yield an array of visually striking designs. Whether you’re looking to achieve a subtle fade or a bold, eye-catching motif, mastering a few techniques can elevate your DIY project to the next level.
One effective approach for creating unique patterns is the stencil technique. Make or purchase stencils in various shapes and sizes, placing them on your sweatshirt before applying bleach. Use a sponge or a spray bottle to apply bleach over the stencil. This method not only gives you clean lines but also allows for intricate designs, such as logos or floral patterns. Remember to secure the stencil well to prevent any bleach from seeping underneath, which can blur your design.
Another exciting technique is the tie-dye method, where you twist, fold, or crumple your fabric and secure it with rubber bands. This technique can yield beautiful, organic patterns reminiscent of classic tie-dye. The key is to ensure that you apply the bleach evenly while experimenting with different folding patterns. After applying bleach to the tied sections, you’ll reveal a stunning contrast against the fabric’s original color once the rubber bands are removed.
For those looking for more controlled designs, consider using a brush or a foam applicator to paint bleach directly onto the fabric. This allows for precision, enabling you to draw or create motifs with more detail. You might use this technique to create artistic designs, such as stripes or polka dots. Just make sure to work quickly, as the bleach will react with the fabric, and you want to achieve your desired look before the color change becomes too drastic.
Finally, don’t forget about layering techniques! For a more complex look, consider applying multiple methods together. After achieving one design, you can apply more bleach in different areas once the sweatshirt has dried. This cumulative layering can result in rich textures and overlapping patterns, giving your sweatshirt a multidimensional feel.
By experimenting with these techniques, you can create a truly one-of-a-kind sweatshirt that highlights your personal flair. Each design process is an adventure, so dive in, have fun, and wear your creativity proudly!
Safety Precautions for Bleaching Fabric
When diving into the creative world of bleaching your sweatshirt, safety should always be a top priority. While transforming an ordinary piece of clothing into a unique, stylish statement is exciting, using bleach can pose certain risks if precautions aren’t taken. Bleach is a powerful chemical, and handling it with care can make the DIY process both enjoyable and safe.
Start by ensuring you work in a well-ventilated area. Proper airflow minimizes the inhalation of bleach fumes, which can be irritating to the lungs. If you’re indoors, open windows and doors, or better yet, set up your workspace outside if the weather permits. Next, it’s essential to protect your skin and clothes. Invest in disposable gloves to keep your hands safe from chemical burns, and wear old clothing to avoid any accidental stains. Consider also donning an apron or smock that covers your outfit entirely, ensuring that your favorite hoodie remains bleach-free.
Additionally, gather all the materials you’ll need beforehand to reduce the chance of spills or accidents. Create a designated space for your bleach project, and keep paper towels or a microfiber cloth close by for any unwanted drips. It’s wise to have a spray bottle filled with water nearby to neutralize any unwanted bleach on surfaces or your hands immediately.
Finally, always read the labels and follow the manufacturer’s instructions for the bleach you’re using. Different products may have varying safety instructions and concentrations, and being aware of these can help you avoid mishaps. By approaching your DIY bleaching project with caution and care, you can unleash your creativity while keeping yourself and your surroundings safe!
How to Achieve an Even Distressed Look
Achieving a perfectly distressed look on your sweatshirt is an art that can elevate your DIY fashion game to a new level. The goal is to create a balanced aesthetic with an intentional, uniform bleach pattern that enhances the casual vibe of your favorite hoodie. To start, consider the technique you’ll be using. A combination of spray bottle application, dip dyeing, and sponge techniques can yield beautifully varied yet cohesive results.
Firstly, to ensure an even distribution of bleach, mix your bleach solution: Typically, a 1:1 ratio of bleach to water works well. Always test your mixture on a scrap piece of fabric to see how it interacts with the sweatshirt material. Once you’ve found the right balance, you can begin the application. When using a spray bottle, hold it about 6-12 inches away from the fabric. This distance allows for a fine mist that can disperse evenly, avoiding overly concentrated spots that can result in uneven patching. As you spray, rotate the sweatshirt in your hands to create a consistent pattern throughout.
Another effective method is the dip dye technique. To do this, fill a container with your bleach solution and submerge only the bottom half of your sweatshirt for a few seconds. Gradually pull it out to allow the fabric to drip, creating a fade effect. Remember to rotate the sweatshirt during this process to avoid any harsh lines. If you’re looking for more texture, consider using a sponge to dab bleach onto specific areas. This will create an organic, sun-faded look that mimics natural wear.
Finally, patience is key when achieving that perfect distressed look. Let the bleach sit for a few minutes before rinsing to ensure you get the desired color. Once you’re happy with the outcome, rinse the sweatshirt thoroughly with cold water to stop the bleaching process and then wash it separately on a gentle cycle. The result? A unique, stylish sweatshirt that embodies individuality and creativity while keeping that comfy hoodie charm intact.
Tips for Maintaining and Caring for Bleached Sweatshirts
Taking care of your newly distressed sweatshirt is essential to keep it looking fresh and stylish while preserving the unique patterns you’ve created. The right maintenance can extend the life of your bleached garment, ensuring that it remains a go-to piece in your wardrobe. One golden rule is to always wash your bleached sweatshirt separately from your other clothes-this helps prevent the risk of any unwanted dye transfer.
Washing Instructions:
When it’s time to clean your sweatshirt, opt for a gentle cycle with cold water to protect the fabric and colors. Avoid bleach when washing; this might sound ironic, but harsh chemicals can cause the already treated fabric to deteriorate faster. Instead, use a mild detergent, which will help maintain the integrity of your bleach designs. Furthermore, line drying is preferable to preserve the sweatshirt’s shape and minimize wear caused by the dryer. If you must use a dryer, select the low heat setting to avoid damaging the fibers.
Stain Removal Tips:
If your bleached sweatshirt experiences a spill, act quickly! Blot the stain with a clean, dry cloth instead of rubbing it, which can spread the stain and damage the lightened areas. For most stains, a bit of cold water and a mild detergent should do the trick. If the stain persists, consider using a fabric-safe stain remover, but be sure to conduct a patch test on an inconspicuous area first.
Storage Tips:
When it’s time to tuck your favorite sweatshirt away, keep in mind how you store it can greatly influence its longevity. Fold your sweatshirt neatly and place it in a cool, dry area. Avoid hanging it up, as this can stretch out the fabric, especially if it’s made from cotton or a cotton blend.
Embracing your bleached sweatshirt means embracing a unique style statement! With proper care, you can celebrate your DIY creation, ensuring it retains its flair while remaining a cozy favorite in your casual wear rotation. Remember, your bleached sweatshirt tells a story, so give it the attention it deserves!
FAQs About Bleaching Sweatshirts
Have you ever thought about the transformative power of bleach on a simple sweatshirt? This versatile tool not only creates stunning patterns but can also breathe new life into garments that might otherwise sit untouched in your closet. Whether you’re a seasoned DIYer or a beginner looking to customize your wardrobe, questions about the process are common. Here’s a helpful guide to address some frequently asked questions about bleaching sweatshirts, ensuring you can approach your project with confidence and creativity!
Can Any Sweatshirt Be Bleached?
While many fabric types accept bleach well, it’s best to use 100% cotton or cotton-blend fabrics for consistent results. Synthetic materials like polyester may not take up bleach as effectively, often resulting in uneven or unsatisfactory outcomes. Always check the fabric content labeled inside your sweatshirt before starting your project!
What Safety Precautions Should I Take?
Bleach is a powerful chemical, so it’s essential to prioritize safety. Always work in a well-ventilated area to avoid inhaling fumes, and consider wearing gloves to protect your skin. Additionally, using a face mask can provide extra safety if you’re sensitive to strong odors. Keep some water nearby-just in case-and avoid splashing bleach on surfaces that you don’t want to discolor.
How Can I Ensure Even Bleach Patterns?
Achieving even patterns requires practice and technique. A good tip is to use a spray bottle for fine misting or a sponge brush for more controlled application. When you start applying bleach, do it gradually and from a distance to prevent globbing. Test your methods on scrap fabric first to see how the bleach reacts over time, as the setting can influence the final look.
Can I Repair Mistakes After Bleaching?
Absolutely! If you’ve accidentally bleached too much in one area, consider turning the mistake into a design feature. You can add embellishments, such as patches or fabric paint, to distract from the bleached section. If you prefer not to cover it, simply distress the whole area further using sandpaper or more bleach to create a cohesive look.
By engaging with the fascinating process of bleaching your sweatshirts, you not only create unique pieces but also immerse yourself in the DIY culture that celebrates individuality. Remember, experimentation is key! Be bold in your choices and enjoy expressing your style through personalized customizations. Happy crafting!
Exploring Other DIY Sweatshirt Customizations
There’s so much you can do beyond bleaching to personalize your sweatshirts and make them truly yours. DIY sweatshirt customizations can transform a simple garment into a statement piece that reflects your unique style and creativity. Whether you want to jazz up an old hoodie or create something entirely new, the possibilities are endless.
One popular technique is tie-dye, which adds colorful swirls and patterns to your sweatshirt. All you need is some fabric dye in various colors, rubber bands, and a spray bottle for unique creation methods. To tie-dye, simply twist sections of the fabric and secure them with rubber bands before applying dye. After dyeing, let your creation sit for a few hours to set the color, then rinse and wash it as directed. The vibrant colors and patterns can elevate any outfit while also giving you a fun, retro vibe.
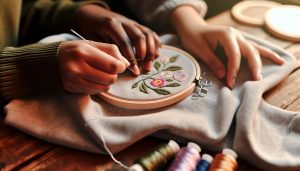
Adding embroidery is another fantastic way to enhance your hoodie. Whether you choose to embroider a meaningful quote, a fun graphic, or even simple stitches along the seams, this customization adds texture and a personal touch. You can pick up embroidery kits at local craft stores or online. If you’re new to embroidery, start with simple designs or monograms, and progressively work your way up to more intricate patterns.
Another trend is to integrate appliqué, where you sew or glue fabric patches onto your hoodie. Choose patches that resonate with you, whether they are shapes, animals, or symbols, and attach them using iron-on methods or traditional sewing. This technique not only adds visual interest but can also be a conversation starter! You can even swap out patches when you feel like a change, keeping your style fresh and current.
Lastly, don’t underestimate the power of simply distressing your sweatshirt. Using tools like scissors or sandpaper, you can create frays and rips that add a laid-back, vintage look. Remember to be strategic-focus on areas like the hem or cuffs for a balanced distressed effect, ensuring it looks intentional rather than accidental.
With these ideas in mind, embrace your creativity and enjoy the process of customizing your hoodies. Remember, the only limit is your imagination. Happy crafting!
Inspiring Examples of Distressed Sweatshirt Styles
Injecting creativity into your wardrobe can be as simple as distressed sweatshirts, an embodiment of style blended with comfort. From minimal fraying to bold bleach patterns, the world of DIY customization offers a canvas for personal expression. These sweatshirts not only reflect individuality but also provide a cozy experience perfect for any casual outing.
Consider the striking look of a bleach-splattered sweatshirt. Picture a solid black hoodie transformed with artistic splashes of white bleach, creating an edgy contrast that stands out. To achieve this look, use a spray bottle filled with a bleach solution, and lightly spritz the fabric while keeping a safe distance. For a subtler effect, consider a gradual gradient where the lower half of the sweatshirt is more heavily bleached, fading to a deeper color at the top. This not only looks intentional but adds depth to your overall outfit.
Layering and Styling Tips
The beauty of distressed sweatshirts is their versatility. They can be dressed up or down, making them suitable for various occasions. Here are some ways to style your newly customized piece:
- Layer with Jackets: Pair your bleached sweatshirt with a denim or leather jacket for a fantastic layered look that exudes effortless style.
- Pants and Footwear: Match with high-waisted jeans or cargo pants, and complete the ensemble with chunky sneakers or combat boots.
- Accessorize: Don’t forget accessories! A beanie or crossbody bag can elevate your outfit and bring it all together.
Lastly, remember that the allure of a distressed sweatshirt lies not just in its design but also in its comfort. Maintaining the fabric through proper washing-using cold water and avoiding the dryer-will keep it looking fresh longer. Whether you’re embracing a grunge aesthetic or adding flair to your everyday wear, you can create a statement that perfectly encapsulates your unique style while enjoying the cozy embrace of a beloved piece of clothing.
Troubleshooting Common Bleaching Mistakes
When embarking on a DIY bleaching project for your sweatshirt, mistakes can happen, but they don’t have to ruin your creative vision! One common issue many encounter is uneven bleaching, which can occur due to variations in fabric thickness or inconsistent application of the bleach solution. To combat this, always test your bleaching method on a small, inconspicuous area first. This will give you a preview of how the fabric responds to the bleach and allow you to adjust your technique accordingly.
Another frequent mistake is using too much bleach at once, leading to harsh lines or overly light areas. Instead, opt for a gradual application by using a spray bottle or sponge, allowing for better control over the process. If you find that a particular spot has become too light, consider layering the bleach application for a more uniform look. Remember, especially with dark fabrics, you want to avoid a patchy appearance, so take your time and adjust as needed.
Bleach can also behave unpredictably, especially if it doesn’t mix well with the fabric’s dye. If you notice undesirable colors surfacing during the process, it might be due to chemical reactions between the bleach and the specific dyes used in your sweatshirt. A simple way to avoid this mishap is to ensure that the fabric is 100% cotton, as synthetic blends can produce unforeseen results. If you experience streaks or spots you don’t like, don’t despair! Rinsing the area right away can sometimes restore more of the original color.
Finally, once your sweatshirt is beautifully bleached, improper care can lead to fading or damage over time. Always wash your new creation in cold water and hang it to dry to maintain its vibrant design. To avoid any fading or potential dye transfer, wash your sweatshirt separately for the first few washes. By taking these precautions, you’ll not only enhance the longevity of your stylish distressed piece but also enjoy the satisfaction of a job well done!
Q&A
Q: How do I choose the right sweatshirt for bleaching?
A: To choose the right sweatshirt for bleaching, select one made of 100% cotton or a cotton blend. These fabrics absorb bleach evenly, ensuring vibrant patterns. Avoid synthetic materials, as they may not respond well to bleach. For more tips, check the “Choosing the Right Sweatshirt for Bleaching” section.
Q: What safety precautions should I take when bleaching a sweatshirt?
A: When bleaching a sweatshirt, always work in a well-ventilated area and wear gloves to protect your skin. Use a mask if necessary to avoid inhaling bleach fumes. For more detailed safety tips, refer to the “Safety Precautions for Bleaching Fabric” section in your guide.
Q: Can I bleach a sweatshirt with designs on it?
A: Yes, you can bleach a sweatshirt with designs, but results may vary. Test a small area first to see how the material reacts with bleach. This can create unique looks, enhancing the design. Learn more about achieving effects in the “Creating Unique Patterns with Bleach” section.
Q: How do I maintain my bleached sweatshirt?
A: To maintain your bleached sweatshirt, wash it in cold water and avoid fabric softeners to preserve its look. Always turn it inside out before washing to prevent fading. For detailed care tips, check the “Tips for Maintaining and Caring for Bleached Sweatshirts” section.
Q: What is the best way to store a bleached sweatshirt?
A: Store your bleached sweatshirt in a cool, dry place, preferably folded to avoid creasing. Hang it if you want to maintain its shape, but ensure it’s in a breathable garment bag to prevent dust accumulation. For more storage tips, look into related DIY sweatshirt care content.
Q: Can I use bleach to create patterns other than a distressed look?
A: Yes, bleach can be used for various patterns like tie-dye effects or stencils. Experiment with different techniques, such as spraying or sponging bleach, to achieve unique designs. For specific techniques, refer to the “Creating Unique Patterns with Bleach” section.
Q: How long should I let the bleach sit on my sweatshirt?
A: The bleaching time can vary depending on the desired effect and fabric type. Typically, let the bleach sit for 5 to 30 minutes, checking frequently to avoid over-bleaching. More timing insights can be found in the “Step-by-Step Guide to Bleaching Techniques” section.
Q: Are there alternative methods to distress a sweatshirt without bleach?
A: Yes, you can distress a sweatshirt using sandpaper, scissors, or by washing it multiple times to fray the fabric. Tie-dye techniques or fabric paint can also add unique styles. For other customization ideas, explore the “Exploring Other DIY Sweatshirt Customizations” section.
Key Takeaways
Congratulations on creating your own stunning DIY distressed sweatshirt! By following this tutorial, you’ve unlocked a unique way to express your style while giving new life to an old favorite. If you’re eager to keep the creative momentum going, check out our guides on how to personalize further with embroidery and tie-dye techniques, or explore our tips on proper hoodie care and maintenance to keep your designs looking fresh.
Don’t forget, if you loved this project, sign up for our newsletter to receive exclusive tips, project ideas, and updates straight to your inbox! Share your own creations in the comments below or on social media – we’d love to see how you styled your sweatshirt. And remember, crafting doesn’t stop here; dive into more DIY home decoration ideas and get inspired for your next project. Your perfect hoodie awaits-let’s keep the creativity flowing!