✨ This article was AI edited. Editorial responsibility: CoolestHoodies.com.
Produced with AI. This article was artificially generated. Editorial responsibility: CoolestHoodies.com.
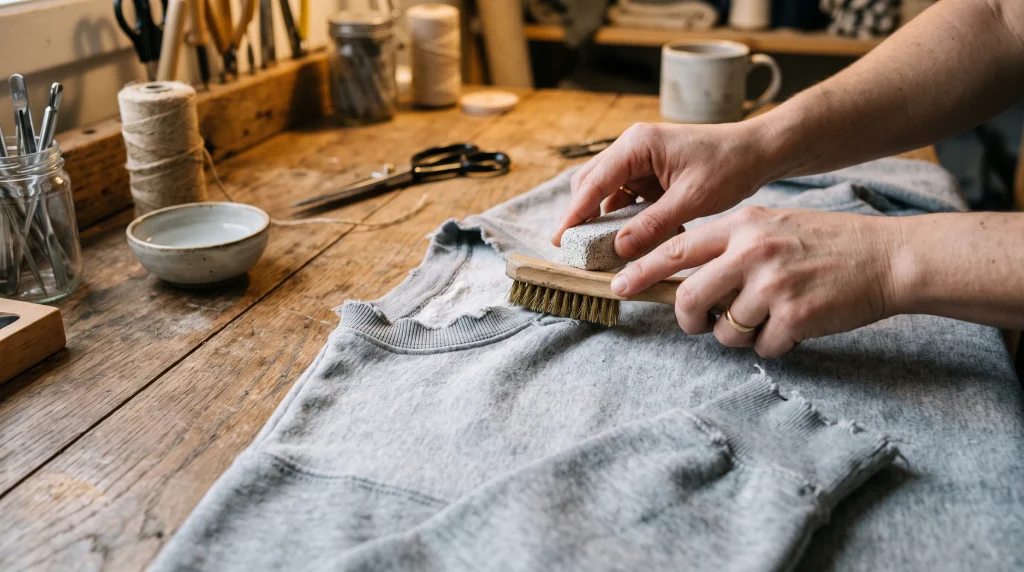
How to distress a sweatshirt? You can distress a sweatshirt by abrading the collar and cuffs with 80-grit sandpaper, nicking seams with a razor blade, softening fabric loops with a pumice stone, and applying a diluted bleach mist to create an authentic sun-faded vintage finish without ripping core structural seams.
The Aesthetic of the Lived-In Crewneck: Why Distressing Works
There is an undeniable allure to a perfectly weathered vintage sweatshirt. Unlike brand-new fleece blanks that feel stiff and look uniform, an authentically aged crewneck exhibits organic softness, nuanced edge frays, relaxed ribbing, and subtle sun-faded highlights. Streetwear designers and heritage fashion houses routinely capitalize on this aesthetic, selling pre-distressed crewneck sweatshirts for upwards of $400.
However, mass-produced factory distressing often suffers from robotic symmetry. Machine-made laser cuts and repetitive sandpaper strikes look artificial to the discerning eye. By executing the distressing process manually at home, you can customize every scuff, ladder tear, and faded gradient to match your exact personal style, creating a one-of-a-kind garment that looks like a prized 1980s thrift-store grail.
Essential Tools for Precision Sweatshirt Distressing
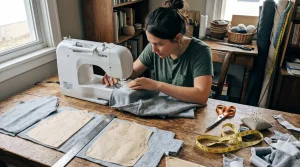
Distressing is an exercise in controlled physical abrasion. Using the wrong tools—such as kitchen carving knives or dull scissors—creates ragged, unwearable tears. Equip your craft table with these purpose-selected tools:
| Distressing Implement | Primary Target Area | Mechanical Effect |
|---|---|---|
| 80-Grit Sandpaper | Collar fold, wrist cuffs, bottom waistband | Severing outer surface knit loops to expose fluffy core cotton fringe |
| 150–220 Grit Sandpaper | Chest, elbows, shoulder seams | Softening transition borders and creating subtle textile fatigue |
| Volcanic Pumice Stone | Body panels, kangaroo pocket face | Gradual fiber thinning and realistic vintage hand-feel breakdown |
| Single-Edge Utility Razor | Ribbed neckline, cuff edges, hem seams | Micro-nicking and horizontal thread laddering |
| Wooden / Cardboard Insert Board | Inside torso and sleeves | Prevents blades from accidentally slicing through the opposite side |
| Diluted Bleach Mist Bottle | Shoulder yokes, chest, hood/neck opening | Sun-faded solar patina mimicking years of ultraviolet exposure |
Fabric Selection: Why 100% Cotton is Non-Negotiable
Before touching any tool to fabric, inspect the interior care label of your sweatshirt. The chemical and physical behavior of textiles under stress is governed by fiber content:
- 100% Cotton French Terry or Fleece: The ultimate substrate. Cotton fibers break into soft, natural, organic white and heather-grey fringe when abraded. When laundered, raw cut cotton curls tightly into clean vintage rolls.
- 80% Cotton / 20% Polyester: Highly acceptable. The 20% polyester core provides tensile strength, preventing accidental tears from ripping completely across the garment, while the outer cotton face distresses cleanly.
- 50% Cotton / 50% Poly or 100% Polyester: Avoid completely. Synthetic polyester melts when friction-sanded, creating scratchy, blackened plastic burrs rather than soft fringe. Furthermore, polyester resists chlorine bleach fading.
Step-by-Step Sweatshirt Distressing Methodology
Step 1: Crewneck Collar Deconstruction
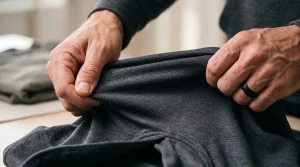
The circular collar of a crewneck sweatshirt is its defining architectural feature. Stiff factory ribbing immediately signals a brand-new garment. Weathering the collar establishes the vintage foundation:
- Place your wooden backing board firmly underneath the collar inside the neck hole.
- Take a folded piece of 80-grit sandpaper and scrub the folded outer ridge of the neckband ribbing. Work around the entire circumference in brisk, short strokes.
- To create natural wear notches, take a single-edge razor blade and gently scrape downward along the collar edge at a 30-degree angle until tiny 1/8-inch gaps appear in the ribbing.
- For a more relaxed vintage drape, use curved embroidery scissors to make a tiny 1/2-inch vertical V-notch in the center front of the collar directly below the throat. When washed, this notch curls into a relaxed retro collegiate neckline.
Step 2: Wrist Cuff and Waistband Fraying
Sleeve cuffs and bottom waistbands experience continuous abrasion against tabletops, jacket sleeves, and trouser waistbands:
- Slide your backing board inside the sleeve opening.
- Grip the wrist cuff tightly and use the coarse sandpaper to scrub vigorously along the rim. Focus extra abrasion on the posterior side of the cuff (the side that rests against desks when typing).
- Repeat the process on the bottom hem ribbing, concentrating on the side seams where trouser hardware causes natural friction.
Step 3: Creating Authentic Elbow and Body Wear
Natural garment holes rarely occur in clean geometric shapes. Replicating authentic elbow wear requires the Pinch-and-Snip Technique:
- Put the sweatshirt on and bend your arms to identify where your elbow point sits. Mark the spot lightly with tailor’s chalk or a pencil.
- Take off the sweatshirt and insert the backing board into the sleeve.
- Pinch a small 1/4-inch horizontal fold of fabric at the chalk mark and make a micro-incision with scissors.
- Insert your fingers into the tiny slit and tug horizontally with moderate force. This pops the knitted loops along the horizontal grain without creating an unsightly square hole.
- Scrub a pumice stone or coarse sandpaper vigorously over the slit. This exposes the horizontal white warp threads, creating an authentic distressed window.
Step 4: Sun-Bleached Solar Fade Gradient
To simulate five summers of direct sun exposure on dark hoodies and sweatshirts:
- Mix 1 part standard liquid bleach with 4 parts cold water in a spray bottle.
- Lay the sweatshirt flat outdoors on a warm, sunny day.
- Mist the spray bottle lightly across the top of the shoulders, the upper chest, and the top ridges of the sleeves from a distance of 18 to 24 inches. Avoid spraying the lower stomach or armpits, which are naturally shaded from the sun.
- Monitor the color transformation every 60 seconds. On black cotton, the fabric will shift from dark plum to warm rust to caramel.
- Once the desired color is reached, immediately submerge the sweatshirt into a basin of cold water containing 2 cups of white vinegar or hydrogen peroxide. This halts the chemical reaction instantly, preserving fiber integrity.
The Essential Stabilization Wash
Never wear a freshly distressed sweatshirt immediately after cutting and sanding. Unstabilized raw fibers will shed lint and unravel unpredictably. Complete the process with an essential post-treatment cycle:
Machine wash the distressed sweatshirt in cold water on a standard agitation cycle with mild detergent. The agitation washes away loose particulate dust and prompts raw cotton edges to curl inward into durable, tubular vintage hems. Tumble dry on medium heat for 20 minutes. Inspect all cuts: if any tear is expanding too far, place a tiny drop of clear fabric sealant on the backside corners to lock the fibers permanently.
Frequently Asked Questions About Distressing Sweatshirts
Can you distress a graphic print sweatshirt without ruining the graphic?
Yes. In fact, lightly scuffing a screen-printed graphic with 220-grit sandpaper creates authentic vintage cracking. Sand in light, circular motions until fine hairline cracks appear across the ink layer.
How do I crop the bottom hem of a sweatshirt cleanly?
Lay the sweatshirt completely flat, measure 2 inches below your natural waistline, mark a straight line with a ruler and chalk, and cut in one continuous pass using sharp tailor shears. Leave the cut raw; it will curl into a stylish roll after washing.
Will chlorine bleach weaken the sweatshirt fabric?
Bleach weakens cotton cellulose if left active for too long. Always dilute bleach with at least 3 to 4 parts water and neutralize the chemical immediately with vinegar or hydrogen peroxide within 8 minutes of application.
Get our latest guides, news, and insights highlighted in your Google Search & AI Overviews.