✨ This article was AI edited. Editorial responsibility: CoolestHoodies.com.
Produced with AI. This article was artificially generated. Editorial responsibility: CoolestHoodies.com.
A broken zipper does not mean your favorite sweatshirt is destined for the donation bin. Whether your zipper splits open behind the slider, gets hopelessly jammed on internal fleece fuzz, or has lost its metal pull tab, executing a professional hoodie zipper repair restores seamless functionality in less than ten minutes without needing a tailor.
Most people assume that when a zipper separates or stops interlocking, the teeth themselves are broken and the entire zipper must be unpicked and replaced. In over 85% of cases, however, the teeth are perfectly intact—the actual culprit is a worn or spread slider body that can be adjusted or swapped out in minutes. Below is the definitive, field-tested troubleshooting guide for repairing every major class of hoodie zipper failure.
Zipper Anatomy and Failure Diagnostics
To fix the issue correctly, identify which component has failed:
| Symptom Encountered | Underlying Mechanical Cause | Permanent Remedy | Repair Time |
|---|---|---|---|
| Zipper Splits Open Behind Slider | Slider mouth has widened from tension; teeth not interlocking | Pliers crimp technique or slider replacement | 3 minutes |
| Slider Jammed on Fleece | Brushed fleece fibers wedged between slider flange and coil | Lubrication and needle extraction | 5 minutes |
| Broken or Missing Pull Tab | Metal eyelet sheared off from pull fatigue | Keyring, paracord loop, or universal replacement pull | 2 minutes |
| Slider Slips Off Top Track | Top metal or plastic stop missing | Crimp new top stop or thread whipping | 5 minutes |
Method 1: The Pliers Crimp (Fixing Separated Zipper Teeth)
When you pull the slider up but the zipper teeth remain open or split apart behind the slider, the slider’s metal side plates have widened over time from pulling across your torso. Because the slider is too loose, it fails to compress the teeth together at the precise angle required for the pin-and-groove mechanism to lock.
- Slide to the Base: Pull the zipper slider all the way down to the bottom retaining box. If it is stuck halfway, gently wiggle it downward while pinching the teeth closed beneath it.
- Inspect the Gap: Look closely at the rear “mouth” of the slider (the end where the two tracks exit joined together). You will notice the top and bottom metal plates are bowed outward.
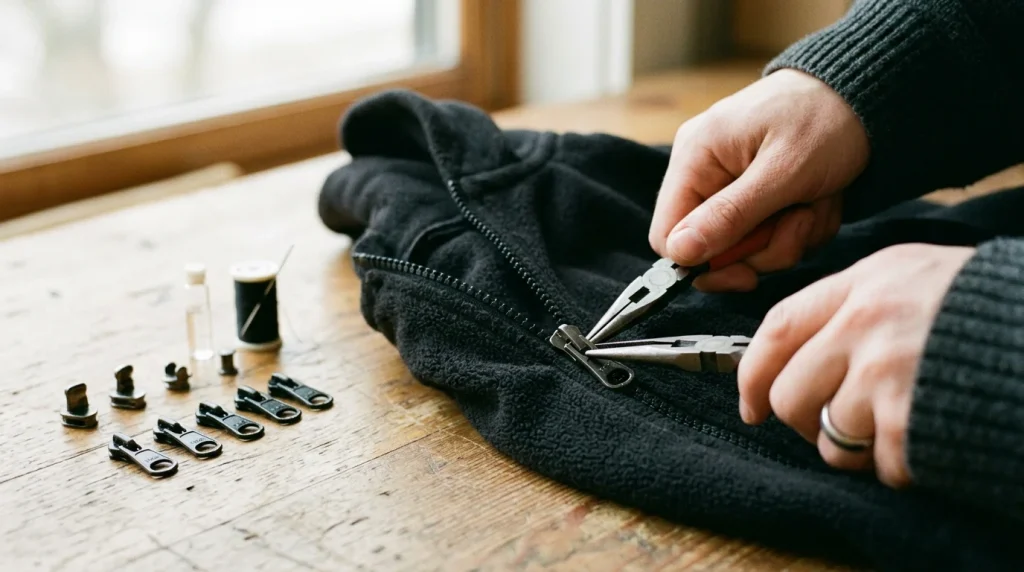
- Apply Gentle Pressure: Take a pair of needle-nose pliers. Place the jaws over the top and bottom plates of the slider on one side. Squeeze gently with light pressure. You only need to move the metal fractions of a millimeter.
- Crimp the Opposite Side: Repeat the gentle squeeze on the opposite side of the slider. Do not squeeze the bridge (the center bar holding the pull tab), as this will crush the slider.
- Test the Glide: Zip the hoodie up. The slider should now guide the teeth together with a firm, satisfying click, keeping the zipper securely closed.
Method 2: Replacing a Broken or Worn Slider
If crimping fails or the slider has cracked, replacing the slider is much easier than replacing the entire zipper tape. You do not need to sew:
- Identify Slider Size: Look at the back of your existing slider. You will see an embossed number (typically #5 on hoodies, occasionally #8 on heavy workwear). Check whether the teeth are plastic molded (Vislon) or nylon spiral coil. Purchase a matching replacement slider kit.
- Remove the Top Stop: Pry off the small metal stop at the top collar edge of the zipper track using pliers or wire cutters. If the top stop is molded plastic, gently snip it off with craft nippers.
- Slide Off the Old Slider: Pull the old slider upward and off the top edge of the zipper track.
- Thread the New Slider: Slide the replacement slider onto the track from the top, ensuring the narrow end points downward toward the waist. Guide the teeth into the slider grooves.
- Install a New Top Stop: Clamp a new metal top stop (included in replacement kits) over the top teeth using pliers. This prevents the new slider from flying off when zipped up to the neck.
Method 3: Freeing a Stuck Zipper (Without Tearing Fabric)
Knit fleece easily snags inside the internal flanges of zipper sliders:
- Never Force It: Yanking a jammed zipper tears the fleece knit, creating permanent holes along the placket.
- Apply Dry Lubricant: Rub the lead of a graphite #2 pencil or a piece of natural beeswax directly over the teeth above and below the jam. Graphite is an exceptional dry micro-lubricant that will not stain fabric. Avoid cooking oil or WD-40, which leave dark oil rings on cotton fleece.
- The Gentle Wiggle: Grip the trapped fabric behind the slider with one hand. With the other hand, pull the slider in the direction of the jam while gently wiggling the trapped fleece outward with a dull tapestry needle.
Emergency Pull Tab Replacements
If the pull tab snaps off in your fingers, leaving an impossible-to-grip slider nub, use these three immediate hacks:
| Quick-Fix Solution | Aesthetic Rating | Durability | Installation Method |
|---|---|---|---|
| Small Keyring (15mm) | Industrial / Casual | Indestructible | Thread the split ring through the slider eyelet loop |
| Paracord Pull with Knot | Technical / Tactical | High | Loop 3mm cord through eyelet; finish with barrel knot |
| Snap-On Universal Pull | Factory OEM match | High | Clips into slider eyelet with spring-loaded retaining wire |
Frequently Asked Questions
Can a zipper with missing teeth be repaired?
If a separating zipper has missing teeth in the middle of the track, the teeth cannot be individually glued back on; the zipper must be replaced. However, if teeth are missing only at the very top 2 inches near the collar, you can install a new top stop immediately below the missing section, preserving the rest of the functional zipper.
How do I prevent my hoodie zipper from rippling after washing?
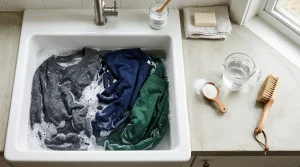
Always zip the hoodie completely closed before washing. This keeps the zipper tape aligned and prevents the teeth from twisting or snagging on other clothes during high-speed spin cycles.
What type of lubricant is safe for plastic vislon zippers?
Natural beeswax or dry bar soap is ideal for plastic zippers. Simply rub the dry wax along the plastic teeth, then run the slider up and down several times to distribute the film evenly.
Long-Term Garment Care and Construction
Mastering quick zipper repairs keeps your favorite outerwear in prime daily rotation. If you ever need to replace a full zipper or install an adaptive closure into a pullover, review our step-by-step masterclasses on how to put a zipper in a hoodie and converting pullovers to full-zips. To protect your repaired sweatshirts from shoulder seam sagging during storage, see our advice on whether you should hang or fold hoodies.
Get our latest guides, news, and insights highlighted in your Google Search & AI Overviews.