✨ This article was AI edited. Editorial responsibility: CoolestHoodies.com.
Produced with AI. This article was artificially generated. Editorial responsibility: CoolestHoodies.com.
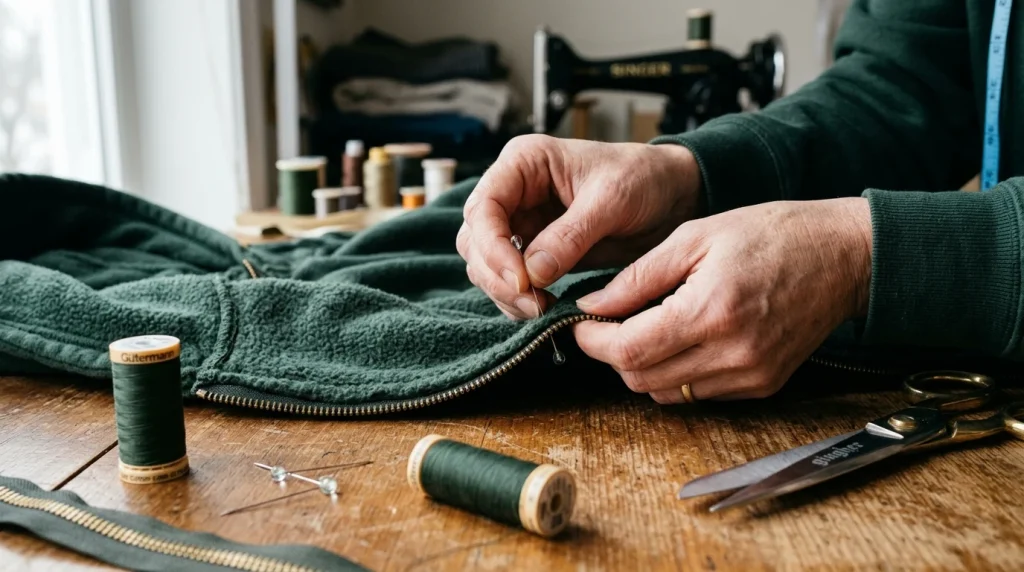
Whether you want to insert an adaptive full-length closure into a cozy pullover or replace a broken nylon coil zipper on an existing favorite, mastering how to put a zipper in a hoodie is one of the most rewarding tailoring skills you can develop. A clean zipper installation instantly increases garment versatility, offering effortless temperature regulation and flexible layering.
However, sewing a rigid zipper tape into stretchy, plush cotton-polyester fleece presents distinct technical challenges. Without proper edge stabilization and feed dog management, the knit fabric easily ripples, resulting in an unsightly wavy front placket. Below is our definitive step-by-step masterclass on inserting a durable, professional-grade separating zipper into any hooded sweatshirt.
Hardware and Equipment Specifications
Success starts with choosing hardware calibrated to the weight and thickness of sweatshirt fleece. Standard dressmaking zippers fail quickly under heavy fleece tension.
| Tool / Material | Technical Specification | Functional Purpose |
|---|---|---|
| Separating Zipper | #5 Molded Plastic (Vislon) or Antique Brass (24″–30″) | Detaches fully at the base; large teeth glide easily through fleece fuzz |
| Fusible Knit Stay Tape | 1-inch wide bias or stretch fusible interfacing | Prevents knit loops from stretching out of shape under sewing pressure |
| Needle Type | Ballpoint / Jersey needle (Size 90/14 or 100/16) | Slips cleanly between knitted yarn loops without cutting or puncturing fibers |
| Presser Foot | Standard narrow zipper foot or walking foot | Allows close stitching beside teeth while feeding thick fleece layers evenly |
| Thread | 100% Core-Spun Polyester (Gutermann Mara 70 or 100) | High tensile strength with micro-elastic recovery under torso movement |
Phase 1: Center Marking and Slitting Preparation
Precision alignment ensures that your finished zipper sits perfectly vertical and does not twist across the chest:
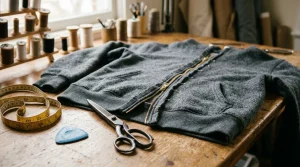
- Mark the True Center Line: Spread the hoodie completely flat on a wide cutting mat. Match up the left and right shoulder seams, armpit junctions, and side seams. Use a rigid acrylic ruler and tailor’s chalk to draw a straight reference line from the center intersection of the hood neckline down through the kangaroo pocket to the exact center of the bottom waistband.
- Secure the Kangaroo Pocket: If the hoodie features a front pouch pocket, pin both layers of the pocket to the underlying sweatshirt body along the center chalk line. Sew a parallel stay-stitch line 1/4 inch to the left and 1/4 inch to the right of your chalk line across the pocket. This permanent stay-stitching anchors the pocket pouch so it will not separate or bunch when the center is cut.
- Cut the Center Front: Using sharp tailor’s shears or a 45mm rotary cutter along your acrylic straightedge, cut smoothly down the chalk line from the top neckband ribbing to the bottom waistband hem.
Phase 2: Stabilizing the Cut Raw Fleece Edges
Never skip interfacing. Knit fleece contains open loops that stretch permanently under presser foot friction, producing permanent wavy plackets:
- Cut two 1-inch wide strips of lightweight fusible knit interfacing matching the total front length of your hoodie.
- Place the fusible tape along the wrong (interior) side of each raw cut fleece edge, aligning the tape edge flush with the cut fabric edge.
- Using a dry iron on medium heat (wool setting), press firmly down for 10 to 12 seconds along the entire strip using a damp pressing cloth. Do not slide the iron back and forth; lift and press vertically to avoid stretching the warm fleece.
- Allow the fabric to cool completely on your work table before moving it, allowing the thermal adhesive bond to cure fully.
Phase 3: Sizing and Pinning the Separating Zipper
Measure the exact vertical distance along your stabilized edge from the neckline collar seam down to the bottom edge of the waistband ribbing:
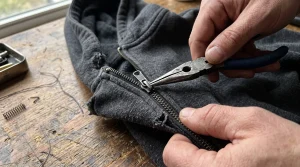
- Shortening the Zipper (If Necessary): If your zipper is longer than your garment measurement, shorten it exclusively from the top. Never cut the bottom pin and box retaining mechanism. Use needle-nose pliers to pull off excess plastic or brass teeth 1 inch above your top mark, and fold the excess fabric tape into the neckline seam allowance.
- Uncouple the Zipper: Unzip the zipper into its two separate left and right halves.
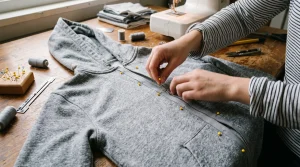
- Pin Right Side: Place the right zipper half face down onto the right front edge of the hoodie (right sides facing together). The zipper teeth must face inward toward the garment body, with the edge of the zipper tape aligned with the stabilized cut fabric edge.
- Pin Placement: Insert tailor’s pins every 1.5 to 2 inches, perpendicular to the teeth. Ensure the bottom stop sits exactly flush with the lower waistband ribbing edge.
- Mirror Alignment for Left Side: Zip the left half into the right half temporarily. Use tailor’s chalk to transfer the exact horizontal heights of the kangaroo pocket top edge and waistband seam onto the opposite zipper tape. Unzip, and pin the left zipper tape so those chalk marks match the corresponding garment features with millimeter accuracy.
Phase 4: Sewing and Clean-Edge Topstitching
- Baste or Sew First Pass: Mount your zipper foot on the sewing machine. Set stitch length to 2.8 mm to 3.0 mm. Sew straight down the zipper tape 1/4 inch away from the teeth. When you approach the zipper pull slider, drop your needle into the fabric, lift the presser foot, slide the pull past the foot, lower the presser foot, and resume sewing.
- Zip and Test Alignment: Before trimming or topstitching, zip the hoodie fully closed. Stand back and examine the kangaroo pocket line and waistband hem. Both must align horizontally across the zipper. If one side is higher, unpick that section, adjust your pins, and re-stitch before continuing.
- Press Seam Allowance Flat: Fold the zipper tape inward toward the garment interior so the teeth extend outward along the front edge. Lightly steam the seam flat from the right side using a pressing cloth.
- Edgestitch Topstitching: Topstitch 1/8 to 1/4 inch away from the zipper teeth through both the outer fleece and the internal zipper tape. This locks the internal seam allowance flat, giving the placket structural stability and preventing fleece fibers from jamming inside the zipper slider.
Troubleshooting Common Zipper Insertion Mistakes
| Observed Defect | Underlying Cause | Permanent Remedy |
|---|---|---|
| Wavy, Undulating Placket | Omitted fusible interfacing or pulled fabric during sewing | Rip out stitches, steam-press fleece back into original shape, fuse stretch tape, and let feed dogs pull fabric naturally. |
| Misaligned Pocket Seams | Fabric shifted while sewing second zipper half | Baste pocket seams by hand with contrasting thread before running under machine presser foot. |
| Broken Needles on Teeth | Needle struck molded metal zipper coils | Use hand wheel rotation when sewing near top zipper stops to ensure needle clears metal hardware safely. |
| Fleece Caught in Slider | Topstitching placed too far from zipper teeth | Maintain topstitching within 3/16 inch of teeth to keep fleece edges tightly bound to the zipper tape. |
Frequently Asked Questions
What is the difference between a #3 and a #5 zipper for hoodies?
The number indicates the width of the closed teeth in millimeters. A #3 zipper has 3mm teeth, making it suitable for lightweight dresses or thin activewear. Hoodies require a sturdy #5 zipper (5mm teeth) or #8 zipper to withstand the physical bulk of 300+ GSM fleece and heavy daily wear.
Can I install a quarter-zip instead of a full zipper?
Yes. For a quarter-zip (or half-zip) conversion, cut your center slit only 8 to 12 inches down from the neckline. You will need to sew a small bottom stop tab out of matching fleece or twill tape to anchor the base of the zipper teeth before topstitching the placket.
Should I pre-wash the zipper tape before installation?
Most modern polyester zipper tapes do not shrink. However, you must always pre-wash and dry your hoodie before installing a zipper, as natural cotton fleece will shrink up to 5% on its initial laundry cycle, which would cause an unwashed garment to buckle around the zipper.
Garment Care and Long-Term Durability
Once your zipper is installed, keep it running smoothly by zipping the hoodie completely closed before machine washing in cold water. For detailed guidance on pullover conversion techniques, explore our step-by-step tutorial on putting a zipper on a hoodie. To learn advanced construction methods, see our guide on how to sew a sweatshirt, and protect your tailored sweatshirt from shoulder sagging by checking whether you should hang or fold hoodies.
Get our latest guides, news, and insights highlighted in your Google Search & AI Overviews.