✨ This article was AI edited. Editorial responsibility: CoolestHoodies.com.
Produced with AI. This article was artificially generated. Editorial responsibility: CoolestHoodies.com.
Converting a pullover hoodie into a full-zip sweatshirt is one of the most practical garment alterations you can undertake. Whether you want easier temperature regulation, need adaptive front-opening clothing, or simply want to refresh an oversized fleece favorite, installing a separating zipper creates a versatile, dual-function outerwear piece.
The process requires splitting the front center seam and kangaroo pocket, stabilizing the raw knit fleece edges to prevent wavy distortion, and stitching an open-end separating zipper. Below is the complete step-by-step methodology using standard home sewing equipment.
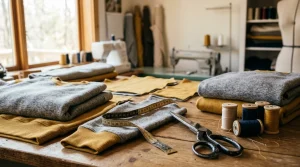
Essential Tools and Materials Specification
Knit fleece expands under sewing machine feed dogs. Using the correct stabilizer and zipper type prevents rippling along the front placket.
| Tool / Material | Specification | Purpose |
|---|---|---|
| Separating Zipper | #5 Molded Plastic or Brass (24″–28″ depending on torso length) | Front closure that completely detaches at the bottom hem |
| Fusible Knit Interfacing | 1-inch wide bias or stretch tape (Pellon EK130 or equivalent) | Stabilizes cut edges against stretching and wave distortion |
| Sewing Machine Needle | Ballpoint or Stretch needle (Size 80/12 to 90/14) | Penetrates loopback French terry and fleece without cutting fibers |
| Thread | 100% Polyester all-purpose thread (Gutermann Mara 100 or Coats) | Provides high tensile strength with subtle natural give |
| Marking & Cutting | Clear acrylic ruler, tailor’s chalk, rotary cutter or fabric shears | Ensures straight, perpendicular vertical center alignment |
Phase 1: Measuring and Marking the Center Line
- Find the Exact Center: Lay the pullover hoodie flat on a large cutting mat. Smooth out wrinkles along the front torso, shoulders, and side seams. Align the center front point of the hood neck seam with the center bottom of the ribbed waistband.
- Measure the Kangaroo Pocket: Measure the width of the kangaroo pocket opening and top edge. Mark the exact center of the pocket with tailor’s chalk.
- Draw the Cut Line: Using a long acrylic ruler, draw a continuous straight chalk line from the inside neck seam collar down through the pocket center to the bottom waistband hem. Double-check symmetry by measuring distance to each armpit seam.
Phase 2: Prepping the Kangaroo Pocket and Cut Edges
- Stay-Stitch Pocket Layers: Before cutting, sew a straight stay-stitch 1/4 inch on both the left and right sides of your chalk line across the kangaroo pocket. This holds the pocket pouch firmly against the front sweatshirt body so layers do not shift.
- Cut Down the Center: Using sharp shears or a rotary cutter against an acrylic straightedge, cut directly along the center chalk line from waistband edge up through the neck seam.
- Apply Fusible Interfacing: Press a 1-inch strip of lightweight fusible interfacing tape along the wrong (interior) side of both cut edges, spanning from the top neckline to the bottom waistband. This step is mandatory; without interfacing, stitching a zipper onto stretchy knit cotton produces unsightly undulating plackets.
Phase 3: Sizing and Pinning the Separating Zipper
Measure your hoodie’s total front length from the neckline collar seam to the very bottom of the ribbed waistband:
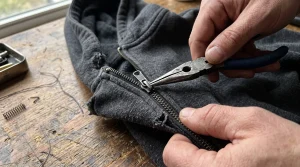
- If your separating zipper is longer than the measurement, shorten it from the top by removing excess teeth with needle-nose pliers and clamping new zipper stops or folding the excess tape into the neckline seam allowance. Never cut the bottom pin-and-box retaining mechanism.
- Unzip the zipper completely into two separate halves.
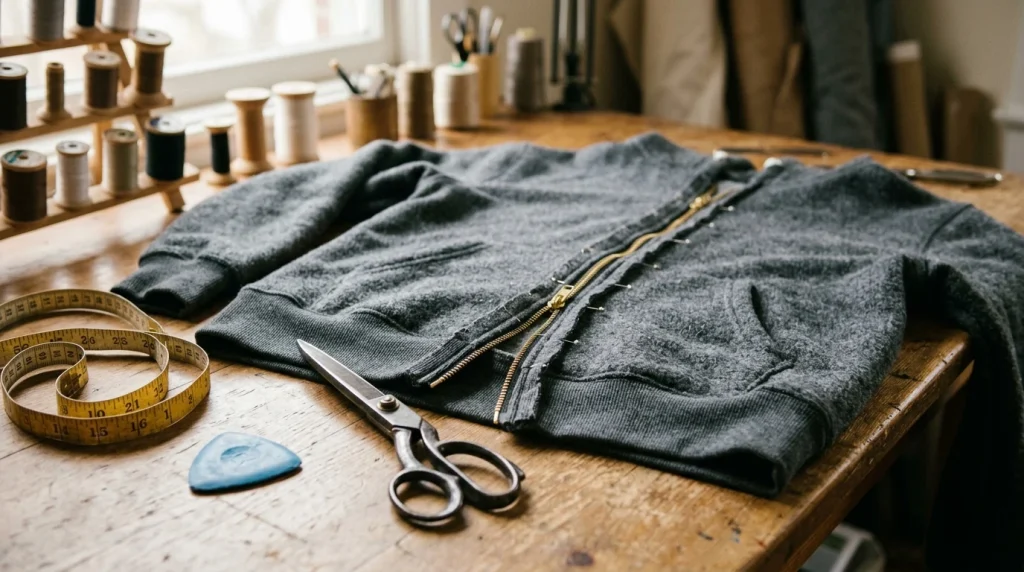
- Place the right half of the zipper face down onto the right front edge of the hoodie (right sides together). The zipper teeth should face inward toward the garment body, with the edge of the zipper tape aligned with the raw stabilized fabric edge.
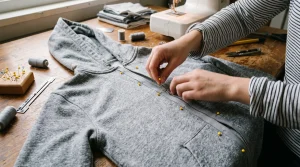
- Pin or baste every 2 inches. Ensure the bottom zipper stop aligns flush with the lower waistband hem and the top stop aligns with the neckband seam.
- Repeat for the left zipper half, matching horizontal stripes, pocket seams, and waistband ribs precisely.
Phase 4: Sewing and Topstitching the Zipper
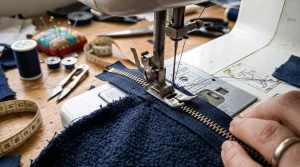
- Attach Zipper Foot: Mount a standard zipper foot on your sewing machine. Position the needle close to the zipper coils.
- Initial Stitching: Sew using a straight stitch (length set to 2.8 mm to 3.0 mm to accommodate fabric thickness). Stitch from the waistband upward. When approaching the zipper pull slider, lower the needle into the fabric, raise the presser foot, slide the pull past the foot, lower the foot, and continue sewing smoothly.
- Verify Alignment: Zip the hoodie closed. Inspect the kangaroo pocket top edge and the waistband bottom edge. Both must align horizontally without stepping. If misalignment exceeds 2 millimeters, unpick the affected section and adjust before proceeding.
- Clean Finish Topstitching: Turn the zipper tape toward the inside of the garment so the teeth project outward along the edge. Press lightly with a low-heat iron using a pressing cloth. Topstitch 1/8 to 1/4 inch away from the zipper teeth through both the outer fleece and the underlying zipper tape. This secures the seam allowance flat and prevents fabric from catching in the zipper teeth during daily wear.
Advanced Tailoring: Handling Heavy Fleece Bulk and Collar Clean Finishes
When working on heavyweight sweatshirts (over 350 GSM) or double-layered hoods, fabric bulk at the bottom waistband and neckline collar requires specialized handling:
- Trimming Seam Allowances: Trim the internal pocket lining seam allowance inside the placket to reduce ridge thickness. Layering (grading) the seam allowances prevents bulky lumps under the topstitching.
- Finishing the Neckline Collar: For an ultra-clean interior look, sandwich the upper zipper ends with a 3/4-inch strip of matching cotton twill tape. Stitch the twill tape over the raw zipper tape top edge, fold it over cleanly, and edgestitch it down across the inside back neck seam. This prevents raw plastic or metal zipper ends from scratching against your neck.
- Adjusting Presser Foot Tension: Heavy cotton fleece tends to bunch ahead of the presser foot. Reduce your sewing machine’s presser foot pressure slightly or use a walking foot (even feed foot) to ensure top and bottom fabric layers feed at identical speeds without dragging.
Troubleshooting Common Zipper Conversion Mistakes
| Issue Encountered | Root Cause | Corrective Action |
|---|---|---|
| Wavy / Rippling Zipper Placket | Stretching fabric while stitching; omitting fusible interfacing | Unpick stitches, press fleece with steam to restore recovery, fuse stretch interfacing tape, and sew with a walking foot without pulling. |
| Uneven Kangaroo Pockets | Pocket shifted during cutting or zipper pin placement | Baste pocket halves with contrasting thread prior to machine stitching; verify horizontal symmetry with zipper zipped closed. |
| Skipped Stitches on Fleece | Dull needle or wrong needle tip style | Switch immediately to a fresh Jersey/Ballpoint or Stretch needle size 90/14; avoid microtex or sharp needles that pierce and damage knit loops. |
| Zipper Slider Jamming | Topstitching placed too close to zipper teeth | Maintain a strict 1/4-inch margin between the teeth coil and topstitch seam line. |
Frequently Asked Questions
Can you install a zipper on a hoodie by hand without a sewing machine?
Yes, but it requires patience and a heavy-duty backstitch using strong waxed polyester thread. Hand-sewing allows exquisite control over tricky areas like thick waistband ribs, but you must still stabilize the cut fleece edges with iron-on interfacing tape to prevent raw knit edges from unraveling or curling over time.
What type of zipper is best for a fleece hoodie?
A #5 molded plastic (vislon) separating zipper is the industry standard for casual hoodies. Vislon zippers are lightweight, glide smoothly through fleece fuzz, and resist corrosion in the wash. For heavy workwear or rugged vintage looks, #5 antique brass separating zippers offer superior durability, though they add approximately 2 to 3 ounces of hardware weight.
Should I pre-wash the hoodie before cutting it open?
Absolutely. If the hoodie has not been washed multiple times, pre-wash and dry it following standard garment care instructions. Cotton fleece shrinks by 3% to 7% on initial washes; installing a non-shrinking synthetic zipper tape onto unwashed cotton causes massive puckering after the first laundry cycle.
Maintenance and Long-Term Care
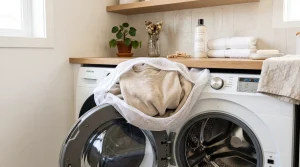
Once converted, treat your zipped sweatshirt with proper maintenance to preserve zipper teeth alignment. Zip the garment fully closed before machine washing inside out on a gentle cycle with cold water. For comprehensive construction methods, review our guide on how to sew a sweatshirt. To keep your newly modified hoodie in peak condition without stretching the shoulders, see our recommendations on whether you should hang or fold hoodies.
Get our latest guides, news, and insights highlighted in your Google Search & AI Overviews.