✨ This article was AI edited. Editorial responsibility: CoolestHoodies.com.
Produced with AI. This article was artificially generated. Editorial responsibility: CoolestHoodies.com.
A functional drawstring is the mechanical heart of any hooded sweatshirt. It transforms a loose, open neck into a storm-resistant barrier against frigid winds, snow, and rain. Yet, everyday wear and aggressive laundry cycles frequently compromise drawstrings: the cord slips deep into the circular tunnel, loses its plastic aglet, or stretches into an uneven nuisance. Knowing how to fix a hoodie drawstring using proven textile techniques restores your garment to peak performance in minutes.
Whether you need to thread a cord back through tight eyelets, install modern spring-loaded toggle cord-locks, or fix a ripped metal grommet, this comprehensive guide covers the technical mechanics of drawstring channels, repair tools, and preventive hardware upgrades.
Anatomy of the Hood Drawstring Channel
To repair a drawstring efficiently, understand how the casing is built:
| Structural Element | Construction Specification | Common Failure Point |
|---|---|---|
| Tubular Fabric Casing | Folded self-fleece or jersey rib hem stitched with 3/4″ clearance | Internal seam twists or narrow choke points at center back |
| Exit Eyelets / Grommets | Two 6mm–8mm brass grommets or dense buttonhole stitching | Grommet teeth pulling out from fleece tension |
| Drawstring Cord | Braided polyester-cotton core or flat woven herringbone tape | Frayed aglet ends jamming inside the casing |
| Aglet Caps | Clear cellulose acetate heat-shrunk or crimped metal | Cracking in electric dryer heat |
Method 1: The Bodkin and Safety Pin Insertion Protocol
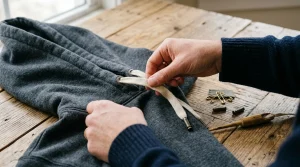
If your cord has retracted completely out of the hoodie, you cannot push it through with your bare hands. Fabric friction inside looped French terry will stop limp cord within two inches. You need a rigid leading guide:
- The Anchor Step: Take a sturdy, medium-to-large 2-inch safety pin. Pierce through the cord 1/2 inch from the aglet tip, close the clasp, and wrap a tiny piece of Scotch tape over the latch to prevent it from accidentally opening inside the fleece tunnel.
- Entering the Channel: Push the head of the safety pin through one of the front eyelets into the hood casing.
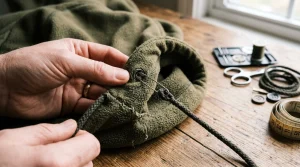
- The Caterpillar Feed Motion: Bunch the fabric of the hood forward over the pin. Grip the pin firmly through the gathered fabric with your dominant hand. With your other hand, pull the gathered fleece backward over the trailing cord.
- Navigating the Center Back Seam: The center back seam of the hood is often the tightest point where seam allowances overlap. Wiggle the pin gently at a 45-degree angle to slip past the internal seam ridges.
- Exit and Centering: Guide the pin out through the opposite eyelet. Pull the cord through until both exposed tails measure identical lengths.
Method 2: Installing Spring-Loaded Cord Lock Toggles
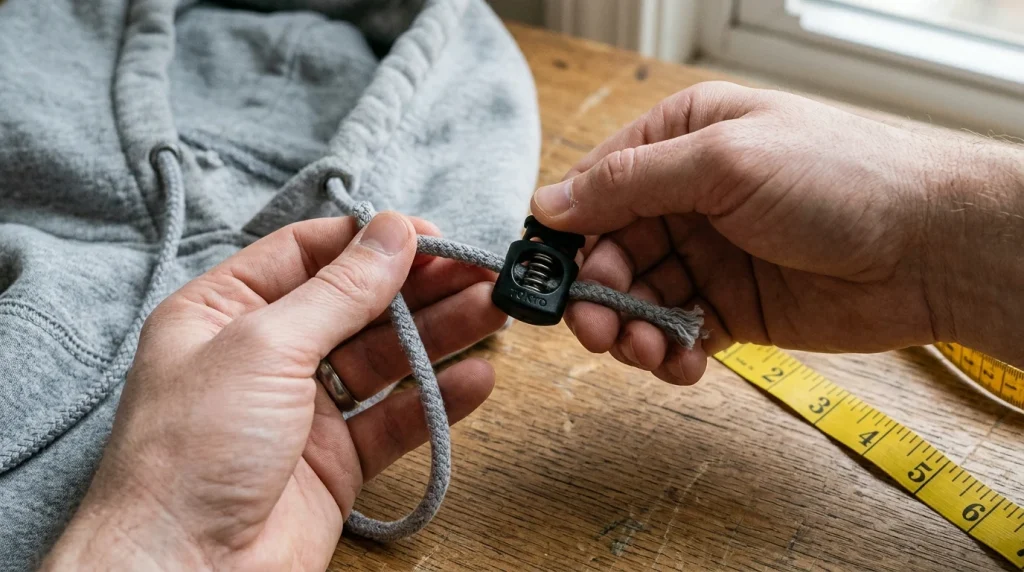
Tired of drawstrings constantly slipping loose or having to tie awkward knots every time the wind picks up? Upgrading to spring-loaded toggle cord-locks gives you one-handed cinching:
- Choose Your Hardware: Select high-durability acetal plastic or metal barrel cord-locks with internal stainless steel compression springs designed for 4mm to 6mm cords.
- Depress the Plunger: Squeeze the top plunger of the toggle firmly between your thumb and index finger to align the internal holes.
- Thread the Aglet: Push one drawstring end through the opening. Release the plunger. The spring-loaded internal teeth will lock firmly onto the braided cord.
- Repeat on Opposite Side: Install a matching cord-lock on the second tail. Now you can cinch your hood tightly against wind in a split second and release tension with a single press.
Method 3: Repairing Torn Grommets and Frayed Openings
When heavy washer agitation yanks on a knotted cord, the metal grommet can rip free from the fleece, leaving an unsightly shredded hole:
- Reinforce with Fusible Web: Turn the hood inside out. Iron a 1.5-inch circular patch of heavy-duty fusible knit interfacing over the torn area to stabilize the damaged fleece yarn.
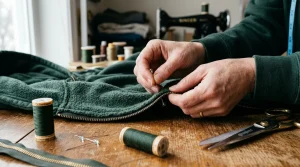
- Hand-Stitch a Reinforced Eyelet: Using an embroidery needle and thick polyester thread, sew dense buttonhole stitches around the raw hole circumference. This creates a soft, indestructible fabric eyelet that will never scratch skin or rip out like cheap metal grommets.
Safety and Compliance: Drawstring Rules for Children’s Apparel
If you are repairing or modifying a hoodie for children or toddlers, you must observe federal child safety regulations:
- CPSC Federal Safety Standard (16 CFR Part 1120): The US Consumer Product Safety Commission strictly prohibits drawstrings on children’s upper outerwear in sizes 2T to 12. Drawstrings present severe strangulation hazards on playground equipment and school bus doors.
- Safe Alternatives for Kids: If repairing a child’s sweatshirt, completely remove the hood drawstring and do not replace it. If closure tension is required, replace the cord with soft, enclosed elastic stitched flat at the center back, or use hook-and-loop (Velcro) collar tabs.
Custom Drawstring Replacements: Elevating Aesthetics
If your original cord is permanently stained or worn out, aftermarket cord replacements offer superior durability and unique streetwear styling:
| Cord Replacement Style | Material Texture | Ideal Aesthetic | Key Benefit |
|---|---|---|---|
| Braided Heavy Cotton | Soft, natural, matte finish | Classic vintage collegiate | Breathable, washes cleanly, zero static |
| 3M Reflective Paracord | Dense woven nylon with reflective tracer | Techwear & athletic outerwear | Nighttime safety visibility; 550 lb breaking strength |
| Flat Herringbone Twill | Wide 1/2-inch flat ribbon weave | Luxury streetwear loungewear | Lies flush against the chest without rolling or twisting |
| Elastic Bungee Shock Cord | Rubber core with polyester jacket | Tactical & alpine hiking gear | Continuous dynamic tension; pairs with toggle locks |
Preventive Maintenance: Washing Machine Protection
To ensure you never have to re-thread your hoodie again:
| Preventive Habit | How It Works | Effectiveness |
|---|---|---|
| Loose Bow Tie | Tying cords together creates a wide loop that cannot enter an eyelet | 95% |
| Figure-Eight Stopper Knot | Tied 1 inch above aglet; too large to pass through 8mm grommet | 99% |
| Zippered Mesh Bag | Isolates garment from central washer agitator friction | 100% |
Frequently Asked Questions
Can I replace a round drawstring with a flat cotton lace?
Yes. Flat 1/2-inch cotton herringbone laces fit easily into standard hoodie channels. Flat laces distribute tension more evenly against the neck and provide a vintage collegiate athletic look.
How do I fix a cord that is twisted inside the hood?
Locate the twisted section by feeling along the casing. Grip the cord on either side of the twist, apply tension, and roll the fabric casing between your palms. The rolling motion coaxes the flat or braided cord to untwist inside the tunnel.
What do I do if the cord aglet is too thick for my eyelet?
If you purchased aftermarket metal aglets that are wider than your grommets, thread the bare cord through the hood channel first, and install the metal aglet tips onto the ends afterward.
Related Tailoring and Sweatshirt Maintenance
Keeping your drawstrings in top mechanical shape preserves the cozy comfort and utility of your sweatshirt. For step-by-step techniques to balance uneven cords or fix frayed tips, see our guide on how to fix hoodie strings. If you want to shorten overly long factory cords or customize your tips, check out drawstring shortening and aglet replacement. To keep your hoodies properly shaped in your closet without stretching the neckline, review whether you should hang or fold hoodies.
Get our latest guides, news, and insights highlighted in your Google Search & AI Overviews.