✨ This article was AI edited. Editorial responsibility: CoolestHoodies.com.
Produced with AI. This article was artificially generated. Editorial responsibility: CoolestHoodies.com.
Few wardrobe annoyances are more universally frustrating than pulling a favorite sweatshirt from the laundry only to find the drawstring tangled in knots, retracted deep into the hood casing, or hanging completely uneven with one side six inches longer than the other. Understanding how to fix hoodie strings restores both the aesthetic symmetry and practical wind-cinching functionality of your sweatshirt.
Hoodie drawstrings operate through a simple tubular fabric channel sewn around the perimeter of the hood, exiting through two metal grommets or embroidered eyelets. When agitator friction in a washing machine grabs one end of the cord, it easily shifts or snags inside the fleece hem. Below is the complete repair manual for untangling, balancing, re-tipping, and permanently securing your hoodie cords.
Diagnostic Matrix: Identifying Your Drawstring Issue
Choose the correct repair protocol based on how your hoodie string has failed:
| Drawstring Failure Mode | Primary Root Cause | Required Tools | Repair Difficulty |
|---|---|---|---|
| Uneven Lengths | Unequal tension during washing or wearing | None (Manual finger massage) | Easy (2 minutes) |
| Internal Tangle / Bunching | Cord twisted on itself inside the fleece tunnel | Safety pin or chopstick | Easy (3 to 5 minutes) |
| Frayed or Missing Aglet | Plastic sheath crushed or cracked off | Heat-shrink tubing, lighter, or superglue | Moderate (5 to 10 minutes) |
| Cord Fully Pulled Out | Washer spin cycle pulled string completely through | Large safety pin, drinking straw, or wire hanger | Moderate (5 to 8 minutes) |
Method 1: Equalizing Uneven Hoodie Strings
If one side of your drawstring has retracted partially into the eyelet while the other end hangs near your waist, do not yank aggressively on the short side. Pulling without releasing internal tension can cause the opposite end to disappear entirely into the casing.
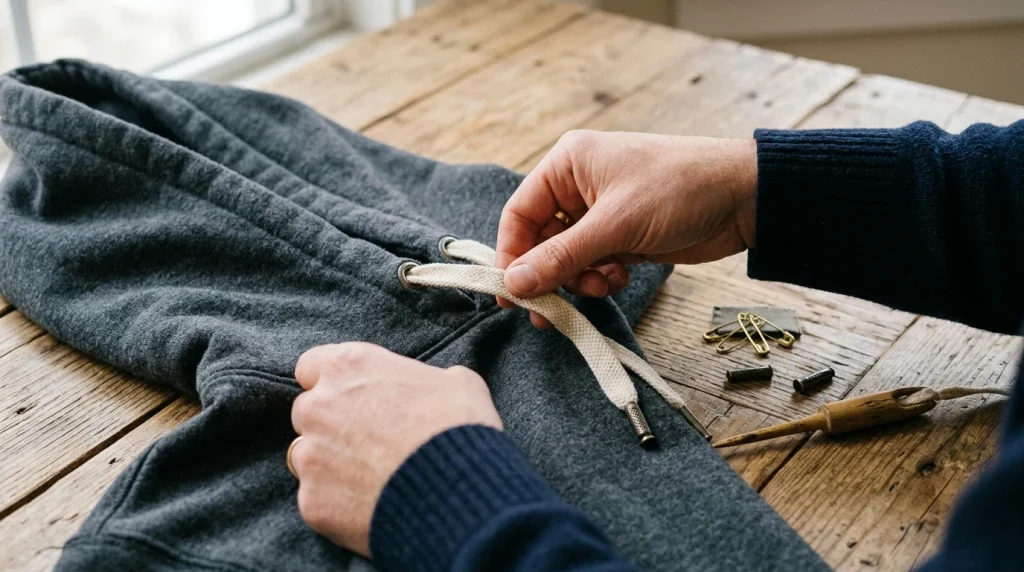
- Locate the Internal Slack: Lay the hoodie flat on a table. With your fingertips, feel along the curved hood casing from the center back of the neck toward the side with the short cord. You will feel where the cord is bunched or bunched against the fleece lining.
- Pinch and Slide: Pinch the thickest part of the casing where the cord is gathered. With your other hand, push the gathered fabric backward away from the short eyelet toward the back of the hood.
- Hold and Release: Grip the cord through the fabric behind the gather, then pull the fabric forward. This “inchworm” motion feeds slack forward toward the short eyelet until both cord ends measure exactly equal length from the grommets.
Method 2: Fixing and Replacing Frayed Aglets (Cord Tips)
The clear or metallic tip at the end of a drawstring is called an aglet. Once an aglet cracks or falls off, the braided fibers quickly fray into a mop of loose yarn that cannot pass through eyelets.
Technique A: The Heat-Shrink Tubing Method (Factory Finish)
This is the cleanest and most durable DIY repair method:
- Purchase 4mm or 5mm polyolefin heat-shrink tubing from a hardware or electronics store.
- Cut a 3/4-inch piece of tubing.
- Trim the frayed yarn ends cleanly with sharp tailor’s shears.
- Slide the heat-shrink tube over the trimmed cord tip until 1/16 inch of cord protrudes from the end.
- Hover a lighter flame or heat gun roughly 1 inch away from the tubing, rotating it continuously for 5 seconds. The plastic will shrink tightly around the fibers, creating a stiff, permanent aglet indistinguishable from an original factory tip.
Technique B: Metal Crimp Aglets (Premium Streetwear Look)
For an elevated aesthetic matching luxury brands like Fear of God or Champion, purchase a set of brass, gunmetal, or matte black metal crimp aglets:
- Trim the frayed cord tip squarely and wrap a single layer of clear tape around the cut edge to keep strands compact.
- Insert the cord end into the metal aglet cylinder.
- Use smooth needle-nose pliers (or an aglet crimping tool) to compress the metal tabs firmly into the cord fibers.
- Add a micro-drop of fabric glue inside the cylinder before crimping for an unbreakable permanent bond.
Understanding Drawstring Cord Weaves and Materials
Different hoodie manufacturers utilize distinct cord constructions, each requiring specific maintenance considerations:
| Drawstring Type | Material Construction | Key Characteristic | Fray Resistance |
|---|---|---|---|
| Flat Woven Tape | 100% Cotton twill or herringbone weave | Lies flat against the chest; classic vintage aesthetic | Moderate (prone to edge unraveling if aglet is lost) |
| Braided Round Cord | Cotton core with polyester braided outer sheath | Dense, heavy drape, high durability under friction | High |
| Tubular Knit Jersey | 100% Cotton knit rolled seam | Stretches with movement; matches garment dye exactly | Low (curls easily when laundered) |
| Nylon Shock Cord | Elastic rubber core with woven nylon jacket | Technical utility look, cinches with plastic toggle cord-locks | Maximum (heat-sealable with flame) |
Repairing Torn Eyelets and Stretched Grommets
When a knotted drawstring is yanked violently, the metal grommet can rip out of the fleece hood, leaving an unsightly jagged hole. Here is how to reconstruct the aperture:
- Stabilize the Tear: Cut a 1.5-inch circular patch of medium-weight iron-on interfacing. Press it against the inside of the hood casing directly over the torn eyelet using a warm iron.
- Hand-Stitch a Buttonhole Eyelet: Thread an embroidery needle with heavy-duty topstitching thread. Sew dense blanket stitches or buttonhole stitches in a tight circle around the hole. This traditional tailor’s technique reinforces the edge permanently without requiring metal replacement hardware.
- Re-Seat a Metal Grommet (Optional): If you prefer the metal look, install an eyelet repair washer on the backside of the stabilized fleece before clamping a new two-piece brass eyelet using a setting punch.
Method 3: Preventing Drawstrings from Disappearing in the Wash
Prevention eliminates the need for repeated repairs. Before tossing your hoodie into the laundry cycle, employ these three protective habits:
- The Loose Bow Tie: Tie both drawstring tails together in a gentle bow or square knot directly in front of the neck collar. A joined loop cannot physically fit through an individual 8mm eyelet.
- The Figure-Eight Stopper Knot: Tie a figure-eight knot on each individual cord end directly above the aglet. A figure-eight knot creates a wide, non-jamming stopper that is too bulky to be pulled through the metal grommet under normal washer agitation.
- Use a Mesh Laundry Bag: Washing your hoodies inside a zippered mesh delicates bag isolates the cords from twisting around the central agitator or snagging on jeans zippers.
Frequently Asked Questions
Why did my hoodie string shrink shorter than the hood?
If the drawstring is constructed from 100% un-mercerized raw cotton while the hoodie body is 80/20 cotton-poly fleece, the cord will shrink at a higher rate when washed in hot water. To restore cord length, soak the removed drawstring in warm water with a tablespoon of hair conditioner for 15 minutes, then gently stretch it lengthwise on a towel and allow it to air dry.
Can I replace my hoodie string with paracord?
Yes. 550 nylon paracord makes an exceptionally durable, weather-resistant replacement drawstring. Because paracord is 100% nylon, you can melt the cut ends cleanly with a lighter to create fray-proof aglets. Use metal crimp aglets for an elevated streetwear aesthetic.
How do I untangle a knot stuck inside the hood casing?
Work a small drop of liquid dish soap or fabric softener into the fabric casing directly over the knot. Massage the casing gently between your thumbs to loosen the cord fibers until the knot slips open inside the tunnel.
Complete Care and Maintenance
Maintaining crisp, functional drawstrings keeps your favorite hoodies looking intentional and polished. If your cord has pulled out entirely, follow our companion walkthrough on how to re-thread a lost hoodie string using household tools. For comprehensive storage techniques that protect hood structure and shoulder seams, read our guide on whether you should hang or fold hoodies.
Get our latest guides, news, and insights highlighted in your Google Search & AI Overviews.