✨ This article was AI edited. Editorial responsibility: CoolestHoodies.com.
Produced with AI. This article was artificially generated. Editorial responsibility: CoolestHoodies.com.
How to distress a hoodie? You can distress a hoodie at home using four controlled physical techniques: sandpaper abrasion on pocket hems, razor nicking along cuff seams, pumice stone washes for surface fading, and diluted bleach spray for sun-bleached vintage patinas without tearing core structural seams.
The Appeal of Distressed Streetwear: Crafting Authentic Vintage Wear
Distressed fashion has evolved from a counter-culture punk and grunge statement into a dominant aesthetic across modern luxury streetwear. High-end fashion houses like Balenciaga, Maison Margiela, Yeezy, and Fear of God charge upwards of $800 for factory-distressed hoodies that boast frayed ribbing, gentle raw-edge cuts, micro-tears, and sun-faded color washes.
However, factory distressing often looks repetitive and unnatural. Achieving an authentic, naturally aged patina on a brand-new sweatshirt requires an understanding of how textiles physically abrade over decades of real-world friction. When executed methodically at home, DIY distressing allows you to customize the exact intensity, placement, and character of the wear patterns while preserving the garment’s structural longevity.
Essential Tools for Controlled Distressing
Never begin hacking into your sweatshirt with kitchen knives or oversized scissors. Sloppy implements will create gaping, irreversible tears that unravel in the wash. Gather these dedicated craft tools:
| Distressing Tool | Primary Application | Recommended Specifications |
|---|---|---|
| Silicon Carbide Sandpaper | Surface scuffing, edge fraying, fuzzing | Medium-Grit (80–120 grit) and Fine-Grit (220 grit) |
| Single-Edge Safety Razor Blade | Micro-nicks, ribbed hem fraying, collar weathering | Standard utility razor or disposable shaving razor |
| Cheese Grater / Microplane | Aggressive puncture abrasions and cluster holes | Stainless steel coarse box grater |
| Pumice Stone | Soft gradual fiber breakdown and elbow wear | Natural volcanic foot pumice stone |
| Rotary Craft Cutter or Nail Scissors | Precision incision cutting and seam splitting | Small, sharp curved embroidery scissors |
| Wooden Scrap Board | Internal barrier preventing accidental back-panel cuts | 1/4-inch plywood or thick cardboard slab |
Anatomical Stress Mapping: Where Natural Wear Occurs
The most common mistake amateur distressing enthusiasts make is placing cuts randomly across the middle of the chest or stomach. Natural garment aging follows specific friction zones where human anatomy repeatedly rubs against external surfaces:
- Collar and Neckline: Friction from daily donning and doffing creates minor splitting along the fold of the ribbed collar.
- Cuff Ribbing: Wrist cuffs continuously scrape against desks, keyboards, and pocket openings, causing horizontal fiber fraying at the extreme cuff edge.
- Kangaroo Pocket Trim: Hands sliding into pockets repeatedly wear down the diagonal top hem and lower pocket corners.
- Elbow Yoke: Bending and leaning causes fleece thinning and subtle hole clusters around the posterior elbow apex.
- Waistband Hem: The lower bottom ribbing rubs against belt buckles, pants rivets, and jacket linings.
Step-by-Step Distressing Methodologies
Method 1: Edge Fraying with Sandpaper (Subtle & Natural)
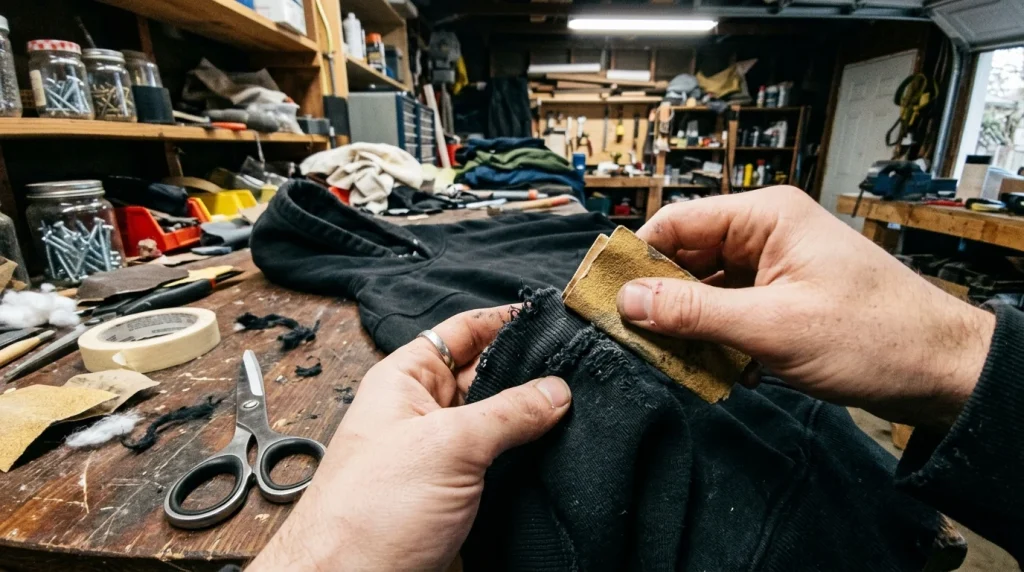
This is the safest foundational technique to start your project. It softens stiff factory ribbing and mimics 5 years of daily wear without creating gaping holes:
- Insert your wooden board inside the sleeve or body panel beneath the target area to create a firm, flat working surface.
- Take 80-grit coarse sandpaper and fold it into a small, rigid square.
- Vigorously scrub the folded edge of the wrist cuffs, collar, and bottom waistband at a 45-degree angle. Scrub horizontally along the edge rather than across the ribbing channels.
- After 2 to 3 minutes of friction, you will see white core threads emerging as the dyed outer cotton fuzzes up into soft, downy fringe.
- Switch to 220-grit sandpaper to blend and soften the boundary between abraded and intact fabric.
Method 2: Razor Scoring and Micro-Slitting (The Grungy Edge)
For more pronounced, intentional distressing along seams:
- Hold a fresh single-edge razor blade at a flat 30-degree angle against the ribbed cuff or kangaroo pocket seam.
- Lightly scrape the edge in rapid downward strokes. Avoid cutting through the fabric; instead, shave the surface fibers until the horizontal knit loops sever.
- To create small horizontal slit tears, make a tiny 1/4-inch nick with curved nail scissors. Then, use your fingernails to stretch and pull the fabric horizontally. Pulling forces the knit loops to curl inward, creating an authentic frayed slit with exposed laddering threads.
Method 3: Sun-Faded Bleach Wash Patina
If your hoodie is deep black, navy, or brown and you desire an aged, sun-bleached wash:
- Mix a solution of 1 part standard household liquid bleach to 4 parts cold water in a fine spray bottle.
- Lay the hoodie flat outdoors in natural sunlight.
- Lightly mist the solution across high-sun exposure zones: the top of the hood, shoulders, upper chest, and top of the sleeves. Keep the lower body and underarms untouched.
- Observe the color shift carefully. On black cotton, bleach transitions through dark burgundy, rust red, and golden honey within 3 to 8 minutes.
- Immediately plunge the garment into a bucket of cold water mixed with 1 cup of white vinegar or hydrogen peroxide. Vinegar neutralizes the chlorine reaction instantly, preventing the bleach from eating through the fibers.
Post-Distressing Stabilization: Washing and Sealing
Freshly cut and scraped knit fabrics will unravel uncontrollably if not properly stabilized. Once your distressing is complete, execute these essential post-processing steps:
Run the distressed hoodie through a standard machine wash cycle with cold water, followed by a 20-minute medium-heat tumble dry. The tumbling action fluffs up raw threads, rolls cut edges into neat organic curls, and knocks away loose fiber dust. If any tear begins expanding beyond your intended size, use a needle and matching thread to place two small hand-tack stitches at the lateral corners of the cut to anchor the tear securely.
Frequently Asked Questions About Distressing Hoodies
Will distressed cuts keep getting bigger every time I wash the hoodie?
Without stabilization, raw cuts in circular knit fabrics will gradually expand during wash cycles. Washing your distressed hoodie inside a mesh laundry bag and air-drying it flat prevents mechanical friction from widening cuts into giant tears.
Can I distress a polyester hoodie the same way as cotton?
No. 100% synthetic polyester does not respond well to razor scraping or bleach. Polyester melts and balls up into plastic beads rather than producing soft, authentic cotton fringe, and bleach will discolor polyester unevenly without softening the hand feel. Stick to 100% cotton or high-cotton (80/20) blends for optimal results.
How do I make the distressing look vintage rather than accidentally damaged?
The key is restraint and graduation. Never create large isolated holes without surrounding edge abrasion. Always sand down the cuffs, pocket hems, and collar before adding cuts, ensuring the entire garment exhibits a consistent, cohesive gradient of wear.
Get our latest guides, news, and insights highlighted in your Google Search & AI Overviews.