✨ This article was AI edited. Editorial responsibility: CoolestHoodies.com.
Produced with AI. This article was artificially generated. Editorial responsibility: CoolestHoodies.com.
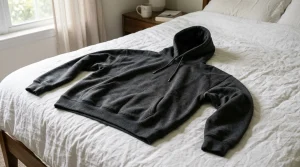
Mastering the craft of making a sweatshirt from raw knit fabric is one of the most fulfilling milestones for DIY sewists, streetwear creators, and custom apparel designers. A custom-made sweatshirt grants you complete command over textile weight, silhouette drape, ribbing recovery, and seam integrity—effortlessly outlasting commercial fast-fashion pieces that distort after a single laundry cycle. Whether you are building an ultra-heavyweight 450 GSM boxy crewneck or a breezy French terry raglan pullover, understanding fabric mechanics, pattern drafting geometry, stretch-stitch engineering, and collar rib calculations ensures store-quality, enduring results.
Essential Tools, Needles, and Equipment
Working with thick, high-density knit textiles demands proper cutting and stitching equipment to prevent skipped stitches, fabric tunneling, and wavy, stretched-out seams. Before slicing into your fleece, gather these fundamental tools:
- Rotary Cutter & Self-Healing Cutting Mat (45mm or 60mm): Far superior to standard fabric shears when working with thick fleece knits, ensuring crisp cuts without shifting the fabric layers.
- Ballpoint / Jersey Needles (Size 80/12 for lightweight knits, Size 90/14 or 100/16 for heavy fleece): The rounded point gently separates knitted yarn loops rather than puncturing and severing fibers, preventing future seam holes.
- High-Tensile 100% Polyester Thread: Polyester provides inherent micro-elasticity and high tensile strength essential for stretch seams under active tension.
- Sewing Clips (Wonder Clips) & Long Ball-Point Pins: Secure thick multi-ply seams and bulky neckline joins without bending or leaving permanent puncture marks in delicate ribbing.
- Clear Polyurethane Elastic or 3/8-Inch Cotton Twill Tape: Stabilizes the high-stress shoulder seams and neckline backings against gravity-induced sagging.
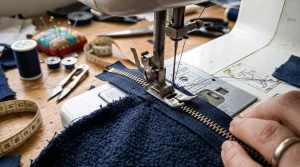
- 4-Thread Serger (Overlocker) or Domestic Sewing Machine with Stretch Stitch Capability: While an overlocker creates clean, encased factory seam allowances, a domestic machine utilizing a narrow lightning stitch or stretch twin needle is fully capable of constructing an indestructible garment.
Choosing the Right Fabric: Fleece, French Terry & Ribbing
The structural drape, insulation capacity, and tactile comfort of your handmade sweatshirt hinge directly on your choice of fabric weight (GSM — grams per square meter) and directional stretch percentage.
| Fabric Type | Weight (GSM) | Stretch % | Ideal Silhouette & Use Case |
|---|---|---|---|
| Brushed Back Cotton Fleece | 320 – 450 GSM | 15% – 25% (2-way) | Heavyweight winter crewnecks, boxy drop-shoulder hoodies, premium structured streetwear |
| French Terry (Loopback Cotton) | 240 – 340 GSM | 25% – 35% (4-way) | All-season layering pullovers, breathable athletic loungewear, tailored casual crewnecks |
| Cotton-Poly Microfleece Blend | 280 – 380 GSM | 20% – 30% (2-way) | Durable everyday loungewear with low shrink potential and high pill resistance |
| Heavy 1×1 or 2×2 Tubular Rib Knit (with 5% Spandex) | 320 – 420 GSM | 60% – 85% with 100% elastic recovery | Collar neckbands, wrist cuffs, and bottom waistband hems |
The Golden Rule of Ribbing: Always verify that your collar and cuff rib knit incorporates between 3% and 5% elastane/spandex. Pure 100% cotton ribbing lacks elastic recovery memory; it will rapidly stretch out into a loose, unsightly ripple around the neckline and wrists after initial wears.
Sweatshirt Pattern Geometry & Grainline Layout
A classic crewneck or hoodie sweatshirt consists of five primary pattern pieces:
- Front Bodice: Cut on the fold with a lower scooped neckline curve and calibrated chest-to-waist dimensions.
- Back Bodice: Cut on the fold with a shallower, higher neckline curvature designed to cup the base of the cervical spine.
- Sleeves (Symmetrical Pair): Tapered set-in or raglan sleeves with the longitudinal grainline aligned strictly down the center arm fold.
- Collar Neckband: A precision-calculated rectangular ribbing strip cut perpendicular to the greatest stretch direction.
- Wrist Cuffs & Bottom Hem Band: Folded tubular ribbing rectangles drafted to gather the garment openings securely.
Before cutting, locate your textile’s Direction of Greatest Stretch (DOGS). In almost all circular knits, the primary stretch runs crosswise from selvage to selvage. Always orient your front bodice, back bodice, and sleeve circumferences across this stretch axis so the garment expands naturally across your chest, shoulders, and elbows as you move.
Step-by-Step Sweatshirt Construction Sequence
Phase 1: Shoulder Seam Stabilization & Stitching
Align the front and back bodice panels right sides together at the shoulder seams. Because heavy fleece places continuous gravitational drag on the upper shoulders, sandwich a length of clear elastic or pre-washed cotton twill tape directly inside the back shoulder seam allowance. Stitch using a 4-thread balanced overlock stitch or a narrow lightning stretch stitch (0.5 mm width, 2.5 mm length). Press the completed seam allowances toward the back panel using a medium-hot steam iron and a tailor’s ham.
Phase 2: Flat Sleeve Insertion (The Professional Industrial Method)
While traditional tailored jackets set sleeves into a closed armhole in the round, industrial sweatshirt production utilizes the flat insertion technique. Open your joined bodice panels flat with the right side facing upward. Match the center sleeve cap notch to the shoulder seam line, right sides together. Pin or clip the sleeve curve along the armscye from underarm corner to underarm corner. Gently ease the sleeve head fullness without stretching the bodice armscye. Stitch the seam smoothly in a single arc and press the seam allowances outward toward the sleeve.
Phase 3: Continuous Underarm and Side Seam Construction
Fold the sweatshirt right sides together, bringing the front and back panels flush. Carefully align the cross-seam intersections at the armpits. To prevent bulky lumps, nest the seam allowances by pressing the front armscye seam toward the body and the back armscye seam toward the sleeve. Pin from the wrist opening, through the underarm junction, all the way down to the bottom hem. Sew both side seams in one continuous pass on each side. Press the side seams open or flat toward the back.
Phase 4: Neckband Calculation (The 85% Rule) & Quartering Technique
A puckered neckline that flutters or a tight neckband that chokes the wearer are the two most common pitfalls when making a sweatshirt. To guarantee a neckband that sits perfectly flat against the collarbone without gaping, apply the 85% mathematical formula:
- Measure the exact perimeter of the raw stitched neckline using a flexible tailor’s tape held on edge.
- Multiply that measurement by 0.85 (for standard 400 GSM 2×2 ribbing with 70% stretch) and add your seam allowance (typically 3/8 inch or 1.0 cm per end). For example, a 22-inch neckline perimeter equals 18.7 inches plus seam allowance = 19.5 inches total rib strip length.
- Cut your ribbing piece to this exact length by your desired finished height (usually 2.5 inches for a 1-inch finished collar).
- Stitch the short ends of the ribbing right sides together to create a continuous loop, and press the seam allowances open.
- Fold the loop in half lengthwise, wrong sides together, pressing the fold line crisp.
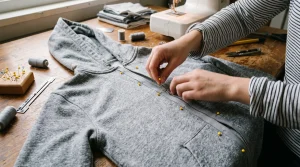
- Divide both the sweatshirt raw neckline opening and the folded ribbing band into four equal quadrants using pins (Center Back, Center Front, Left Midpoint, Right Midpoint).
- Match the quadrant pins of the neckband to the bodice neckline with right sides facing, aligning the neckband seam with the center back. Stitch in the round while gently stretching only the neckband between pins until the fleece fabric lays flat against the serger feed dogs.
Phase 5: Attaching Cuffs and Hem Band
Construct the wrist cuffs and bottom hem band following the same loop-and-quarter method as the neckband. Pin the folded rib loops around the sleeve wrists and the bottom hem opening. Stitch in the round, stretching the ribbing evenly to match the circumference of the fleece openings. Once stitched, press the seam allowances upward into the garment body.
Advanced Finishing: Neckline Topstitching & Twill Tape Binding
To give your bespoke sweatshirt an unmistakable retail finish, add a professional coverstitched or twin-needle topstitch along the neckline. Gently press the neckband seam allowance downward into the bodice. Using a stretch twin needle (4.0mm spacing) or a coverstitch machine, topstitch 1/8-inch below the collar seam on the right side of the garment. This locks the seam allowance flat against the chest, eliminates inner neck irritation, and prevents the collar from flipping upward after washing.
For ultimate luxury, stitch a strip of 1/2-inch herringbone cotton twill tape across the inner back neck seam from shoulder to shoulder, encasing the raw serged edge. This structural addition prevents neck stretching and mirrors high-end Japanese loopwheel and collegiate heritage sweatshirts.
Troubleshooting Common Sweatshirt Sewing Issues
- Rippled, Wavy Seams (The ‘Bacon’ Effect): Caused when the presser foot stretches the knit fabric as it feeds through. Fix this by decreasing presser foot pressure or increasing the serger’s differential feed ratio to 1.3 or 1.5, which lightly gathers the textile into the blade.
- Snapped Stitches When Putting the Garment On: Occurs when straight stitches or insufficient elasticity are used. Always utilize a dedicated 4-thread overlock, three-step zigzag, or woolly nylon thread in the bobbin for maximum stretch resilience.
- Bulky Underarm and Cuff Intersections: Trim away excess seam allowance at the cross-junctions and stagger the direction in which adjacent seam allowances are pressed to distribute bulk evenly.
Frequently Asked Questions
Can I make a high-quality sweatshirt on a standard domestic sewing machine?
Yes. A regular domestic sewing machine fitted with a size 90/14 ballpoint stretch needle and utilizing a narrow stretch stitch (lightning stitch) or narrow zigzag (0.5 mm width, 2.5 mm length) will produce strong, highly durable sweatshirt seams. Because knit fleece does not fray like woven fabric, raw internal edges will remain stable even without serging.
How much yardage do I need to make an adult sweatshirt?
For adult sizes XS through XL, you will need approximately 1.75 to 2.25 yards (1.6 to 2.0 meters) of 58-to-60-inch wide fleece or French terry fabric, plus 0.5 yards (0.5 meters) of heavy matching rib knit for the neckband, cuffs, and bottom hem. For oversized or floor-length custom drop-shoulder designs, allocate 2.5 yards.
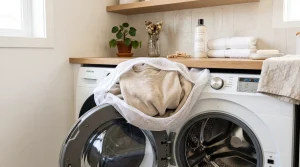
Why is pre-washing fleece mandatory before cutting?
Cotton-rich fleece and French terry fabrics experience between 5% and 12% shrinkage during their initial laundering cycle due to fiber relaxation. Pre-washing and tumble drying your yardage under the exact temperature conditions you plan to use for the finished sweatshirt ensures your garment retains its intended size and proportion after construction.
Get our latest guides, news, and insights highlighted in your Google Search & AI Overviews.