✨ This article was AI edited. Editorial responsibility: CoolestHoodies.com.
Produced with AI. This article was artificially generated. Editorial responsibility: CoolestHoodies.com.
A tight, shrunken, or constricting hoodie is one of the most frustrating wardrobe dilemmas. Whether an aggressive commercial laundry dryer reduced your favorite 100% cotton fleece by two full sizes or a new designer piece arrived with uncomfortably tight forearms and chest measurements, utilizing a hoodie stretcher method can restore or even expand your garment’s dimensions. Understanding textile polymer relaxation, mechanical tension frames, and chemical conditioning techniques empowers you to safely gain 1 to 2.5 inches of room across the chest, shoulders, torso length, and waistband without tearing seams or degrading fabric elasticity.
The Science of Fabric Shrinkage & Fiber Relaxation
To successfully stretch a hoodie without damaging it, you must understand why knit fabrics contract. Knit textiles are constructed from interlocking yarn loops rather than rigid perpendicular weaves. During manufacturing, yarn fibers are held under intense mechanical tension. When exposed to hot water and tumbling dryer heat, the tension releases, causing hydrogen bonds within the cellulose (cotton) chains to curl and tighten into a compacted state.
Reversing this shrinkage requires two simultaneous factors:
- Chemical Plasticization: Using lukewarm water and a cationic surfactant (such as hair conditioner or specialized fabric relaxers) to lubricate individual fiber strands and break temporary hydrogen bonds.
- Controlled Mechanical Tension: Applying continuous, uniform dimensional force along the fabric grain until the fibers dry and set in their newly expanded geometry.
Types of Hoodie Stretchers: Mechanical vs. DIY Methods
| Stretcher Method | Target Area | Expected Size Gain | Risk Level |
|---|---|---|---|
| Conditioner Soak & Manual Blocking | Full garment (Chest, Torso, Arms) | 1.0 – 2.0 inches (1 full size) | Very Low (Safest method) |
| Adjustable Garment / Sweater Stretcher Frame | Chest, Waist, Side Seams | 1.5 – 2.5 inches | Low (Even tension distribution) |
| Chair Back / Solid Object Mechanical Stretch | Chest & Pit-to-Pit Width | 1.0 – 1.5 inches | Low-Medium (Avoid over-stretching seams) |
| Steam Tension Ironing | Sleeves, Armholes, Body Length | 0.75 – 1.5 inches | Medium (Requires cotton press cloth) |
Step-by-Step Guide: The Ultimate Hoodie Stretching Protocol
Step 1: The Fiber Softening Submersion Soak
Fill a clean basin or sink with approximately 1 to 2 gallons of lukewarm water (around 30°C / 86°F). Never use scalding hot water, which can set synthetic polyester fibers permanently. Add 2 to 3 tablespoons of high-moisture hair conditioner, baby shampoo, or fabric softener. Whisk the solution thoroughly until the conditioner is completely dissolved without floating clumps.
Submerge the hoodie completely, pressing it down into the liquid so the water penetrates deep into the inner brushed fleece core. Allow the garment to soak undisturbed for 30 to 45 minutes. The conditioning agents coat the cotton fibers, dramatically reducing friction between adjacent yarn loops and preparing them for safe expansion.
Step 2: Water Extraction (The Towel Roll Technique)
Drain the basin. Crucial Warning: Do NOT wring, twist, or violently squeeze the wet hoodie. Wringing creates localized stress concentrations that snap serged seams and leave distorted, uneven hemlines. Instead, gently compress the hoodie against the side of the basin to expel excess water.
Lay a large, clean bath towel flat on a hard floor or table. Spread the damp hoodie on top of the towel. Roll the towel up tightly with the hoodie inside, like a jelly roll. Step on the rolled towel or press firmly with your hands for 60 seconds. The towel absorbs up to 70% of the remaining moisture, leaving the fabric damp and ready for precise mechanical stretching.
Step 3: Executing the Manual Stretcher Expansion
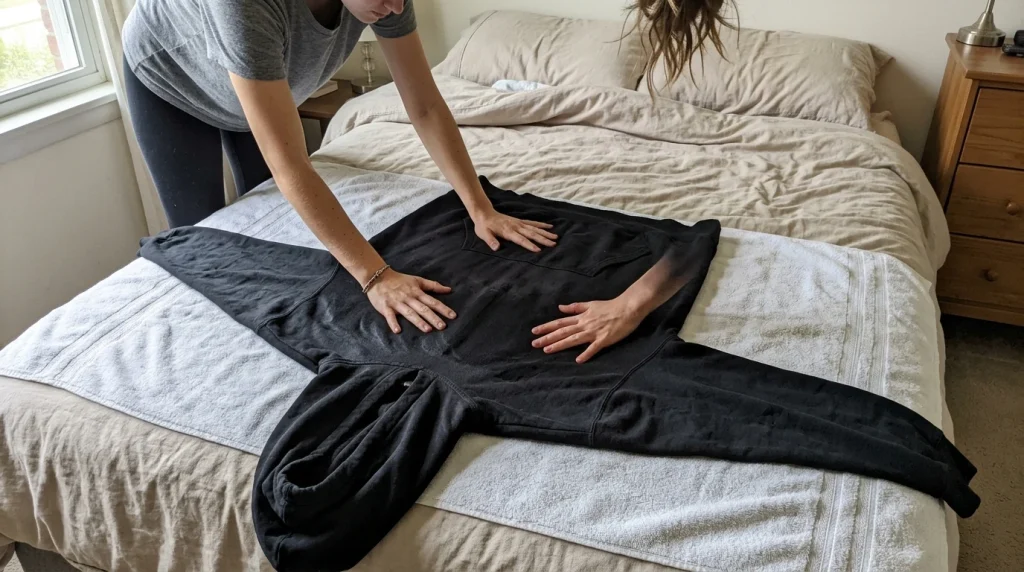
Unroll the hoodie and place it on a dry towel over a solid, flat surface. Work systematically through each zone:
- Chest & Pit-to-Pit Width: Place your hands inside the hoodie at the chest level. Push outward firmly in opposite directions using your forearms, working your way from the armpits down to the waist. Apply steady, even pressure along the horizontal grain.
- Torso Length: Anchor the top shoulder seams with one hand or clean heavy books, grasp the bottom hem with your other hand, and pull firmly downward in a steady motion.
- Sleeve Length & Bicep Width: Grasp the armscye shoulder seam with one hand and the wrist cuff with the other; pull outward to lengthen. Slide your forearm inside the sleeve to stretch the bicep diameter outward.
- Bottom Waistband Elasticity: If the rib hem feels constricting around your hips, gently pull the rib knit outward across your knees or over the back of a wide dining chair.
Step 4: Pinning & Blocking for Permanent Shape Setting
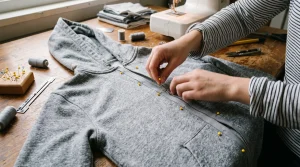
Once you have stretched the garment to your desired dimensions, use rust-proof T-pins on a foam blocking mat or heavy weights (like clean textbooks) along the perimeter of the garment to hold the expanded dimensions while it air-dries. Allow 24 to 48 hours for the hoodie to dry completely. As the cotton fibers dry under tension, the hydrogen bonds reform in their new, elongated configuration, making the size gain permanent.
How to Use an Adjustable Mechanical Stretcher Frame
Commercial adjustable sweater and hoodie stretchers consist of expanding stainless steel or plastic frames with locking wing nuts. To use a mechanical frame:
- Soak the hoodie following Step 1 and extract excess water.
- Insert the collapsed frame inside the body cavity of the damp hoodie.
- Expand the frame arms outward until the chest and waist reach your targeted inch measurement on the built-in ruler.
- Lock the adjustment nuts into place and suspend the frame in a well-ventilated room until completely dry.
What to Avoid: Common Hoodie Stretching Mistakes
- Attempting to Stretch 100% Synthetic Polyester: Polyester is a thermoplastic polymer. Unlike natural cotton, polyester fibers will not relax in warm water and cannot be permanently stretched without high-heat industrial remolding that risks melting the fabric.
- Over-Pulling the Ribbed Collar: Never apply violent force to the collar neckband, or you will create a permanently wavy, stretched-out neckline.
- Hanging a Heavy Wet Hoodie on a Wire Hanger: The heavy gravitational weight of wet fleece will pull the shoulders into permanent “hanger bumps” and distort the garment’s balance. Always dry flat or on a broad contoured frame.
Frequently Asked Questions
How many sizes can you stretch a hoodie?
Using the conditioner soak and mechanical blocking protocol, 100% cotton hoodies can reliably gain 1 to 1.5 full sizes (approximately 1.5 to 2.5 inches in chest circumference and 1 to 2 inches in torso length). Blended fabrics containing 20% to 40% polyester typically gain about 0.75 to 1.25 inches.
Will the hoodie shrink back to its smaller size after washing?
If you wash the stretched hoodie in hot water or place it in a hot tumble dryer, the fibers will contract back to their shrunken state. To maintain your newly expanded fit permanently, always wash the garment in cold water and air-dry flat.
Can you stretch just the tight waistband on a hoodie?
Yes. Dampen only the bottom ribbed hem with warm water and conditioner, gently stretch it over the back of a wide chair or ironing board, and let it dry under tension. This relaxes tight bottom elastic bands without altering the rest of the hoodie’s silhouette.
Get our latest guides, news, and insights highlighted in your Google Search & AI Overviews.