✨ This article was AI edited. Editorial responsibility: CoolestHoodies.com.
Produced with AI. This article was artificially generated. Editorial responsibility: CoolestHoodies.com.
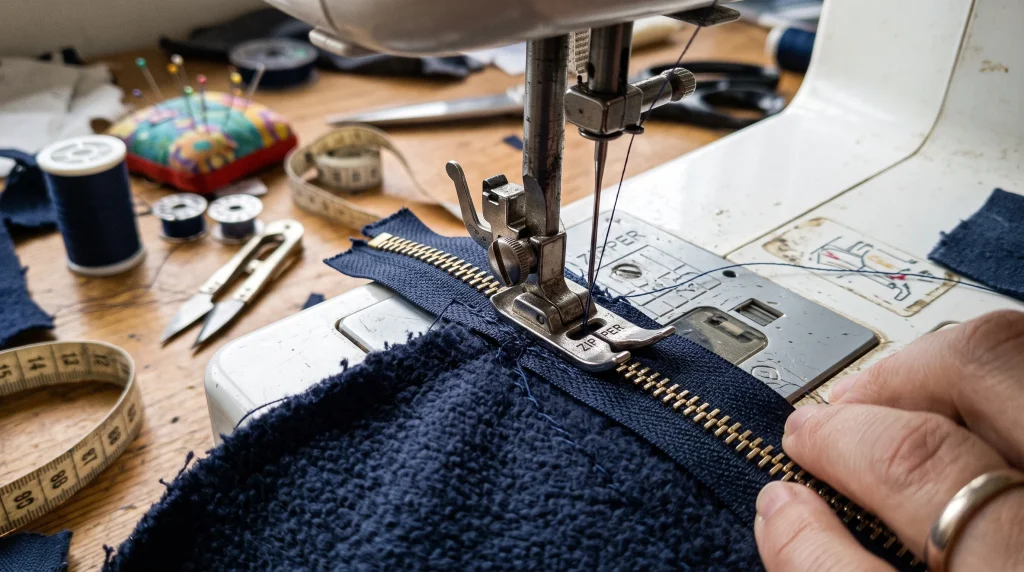
What is a ZipFix zipper foot? A ZipFix zipper foot is an adjustable sewing machine presser foot attachment designed to align sewing needles tightly against standard and invisible zipper teeth, enabling clean, puckering-free zipper installations and rapid repairs across heavy garments like hoodies and jackets.
The Essential Role of the Zipper Foot in Apparel Construction
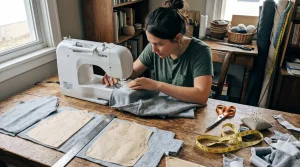
In garment sewing and apparel tailoring, standard all-purpose presser feet are designed to apply balanced, wide downward pressure across both feed dogs simultaneously. However, when attempting to sew a zipper onto a thick garment like a hooded fleece sweatshirt, work jacket, or pair of denim trousers, standard presser feet inevitably fail. Because the raised plastic or metal zipper teeth obstruct the wide base of the foot, the needle cannot track closely enough to the zipper coils, resulting in wavy seamlines, visible tape margins, bunched fabric, and uneven puckering.
Specialized hardware attachments like the ZipFix Zipper Foot solve this mechanical dilemma. By incorporating narrow foot blades, left-to-right lateral sliding adjustments, and notched underside grooves, the ZipFix foot rides smoothly alongside elevated zipper teeth without riding up over them, allowing the needle to stitch within fractions of a millimeter of the zipper teeth with absolute precision.
Key Features of the ZipFix Adjustable Zipper Foot System
Unlike basic fixed-width zipper attachments included in entry-level sewing machine starter kits, the ZipFix engineered foot provides advanced mechanical adjustability:
| Feature Component | ZipFix Specification | Standard OEM Presser Foot | Practical Benefit in Sewing |
|---|---|---|---|
| Lateral Adjustment Range | Continuous Sliding Thumb Screw (Left & Right) | Fixed Dual Snap Bars (Only 2 positions) | Micro-tune needle distance to exact millimeter needed |
| Foot Width Profile | Ultra-Narrow 6 mm Blade | Standard 12–16 mm Base | Fits snugly between zipper teeth and bulky fleece folds |
| Underside Clearance | Beveled Edge Relief Grooves | Flat Smooth Plate | Prevents foot from climbing over chunky #5 and #8 teeth |
| Mounting System | Universal Snap-On with Shank Adapter | Brand-Specific Snap-On Only | Compatible across Brother, Singer, Janome, Babylock |
| Material Construction | Hardened Die-Cast Zinc Alloy / Stainless Steel | Stamped Sheet Metal or Plastic | Zero flex when penetrating 4 layers of 400 GSM hoodie fleece |
Machine Shank Compatibility and Sizing Verification
Before ordering or installing any aftermarket sewing attachment, you must verify your sewing machine’s shank height. Installing a low-shank foot on a high-shank machine (or vice versa) will cause needle strikes, bent needle bars, and catastrophic timing misalignment.
How to Measure Your Machine Shank Height:
- Lower the presser foot lever completely so the foot is down against the needle plate.
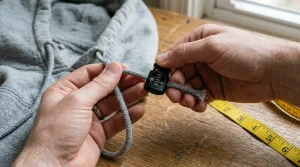
- Measure with a small ruler from the bottom of the presser foot base straight up to the center of the small thumb screw hole on the presser bar:
- Low Shank (Approximately 1/2 inch / 13 mm): The dominant standard used on 90% of modern domestic home sewing machines, including most Brother, Singer, Janome, Baby Lock, and modern Pfaff models. The ZipFix system attaches directly to standard low-shank snap-on adapters.
- High Shank (Approximately 1 inch / 25 mm): Found on older vintage commercial machines, select heavy-duty semi-industrial machines, and specialized models (like the Janome Memory Craft 6600). High-shank machines require a high-to-low shank adapter bracket to mount the ZipFix foot.
- Slant Shank: Characteristic of vintage Singer machines (like the 301, 401, 500 series) where the presser bar tilts forward. Requires a dedicated slant-shank adapter.
Step-by-Step Installation and Calibration Guide
Mounting and calibrating the ZipFix zipper foot takes less than two minutes when executed in proper sequence:
- Power Off the Machine: Always turn off the electrical power switch before working in the immediate vicinity of the needle bar to prevent accidental foot pedal activation.
- Remove Current Foot: Press the quick-release lever located at the rear of the presser bar ankle to drop the existing general-purpose foot.
- Snap On the ZipFix Foot: Place the ZipFix horizontal crossbar directly underneath the notch of the snap-on ankle. Lower the presser foot lever until the ankle clicks securely onto the bar.
- Loosen Adjustment Thumb Screw: Slightly untighten the small knurled thumb screw on the rear or side of the ZipFix slider arm.
- Slow Manual Handwheel Check (Critical): Manually rotate the machine handwheel toward you to slowly lower the needle. Slide the foot left or right until the needle enters the needle clearance notch cleanly without touching either metal foot edge. Never use the foot pedal until you have verified clearance by hand!
- Tighten Thumb Screw: Once the foot is positioned 1 to 2 millimeters from the target needle path, securely hand-tighten the thumb screw.
Pro Sewing Techniques: Installing Zippers on Thick Hoodie Fleece
Replacing or installing a full-zip closure on a heavy hooded sweatshirt presents unique mechanical obstacles due to fabric thickness and elasticity. Follow these professional tailoring guidelines:
1. Basting or Double-Sided Wonder Tape Application
Hoodie fleece has natural mechanical stretch. If you rely solely on straight pins, the presser foot will push the top fleece layer forward as you sew, causing the top collar of your hoodie to finish 1 inch higher than the other side. Apply 1/4-inch wash-away double-sided basting tape along the raw edge of the zipper tape before sewing. This anchors the zipper rigidly to the cotton fleece, eliminating stretch and puckering.
2. Needle and Thread Selection
Never sew a heavy hoodie zipper with a delicate #70/10 universal needle. Dense loopback fleece combined with woven polyester zipper tape requires a Size 90/14 or 100/16 Heavy-Duty Jeans/Denim Needle. The sharp, reinforced shaft pierces multi-layer seams without bending or skipping stitches. Pair with heavy-duty polyester core thread (Gutermann Mara 70 or Tera 60) for maximum tear resistance.
3. Clearing the Bulky Zipper Slider Body
When sewing down the track, the foot will eventually collide with the bulky zipper pull slider. When you reach 2 inches before the slider:
- Stop sewing with the needle down in the fabric.
- Raise the presser foot lever.
- Reach underneath the foot and carefully pull the zipper slider past the needle toward the already sewn section behind the machine.
- Lower the presser foot and continue sewing in a seamless straight line.
Troubleshooting Common Zipper Foot Complications
Problem: The needle repeatedly hits the metal edge of the foot
Fix: Your machine’s needle position may be set off-center. Check your machine’s stitch selection width dial; ensure the needle is set to the center straight stitch (or adjust the ZipFix slide bracket laterally to provide 2 mm of clearance around the needle stroke).
Problem: Stitches are skipping when sewing over the lower hem ribbing
Fix: When the foot approaches the ultra-thick ribbed waistband, the front of the foot tilts upward at a steep angle, causing the needle to deflect away from the bobbin hook. Place a folded cardboard “hump jumper” or clearance plate behind the needle underneath the rear of the foot to keep the foot level as it climbs the seam.
Frequently Asked Questions About the ZipFix Zipper Foot
Can the ZipFix foot install concealed or invisible zippers?
Yes. While dedicated invisible zipper feet feature two parallel tunnel grooves underneath, the ultra-narrow blade of the ZipFix foot can be positioned directly against the curled coil of an invisible zipper, rolling the teeth gently aside as the needle stitches along the ditch.
Will the ZipFix foot scratch metal zipper teeth?
No. High-quality ZipFix feet feature polished chamfered edge bevels that glide smoothly against brass, nickel, and plastic Vislon teeth without snagging or scratching the decorative finish.
Why does my fabric pucker under the zipper after sewing?
Puckering occurs when presser foot tension is set too tight for stretchy knit fleece. Reduce your machine’s presser foot dial pressure from 3 to 1 or 2, and increase your stitch length from 2.5 mm to 3.0 or 3.5 mm to accommodate fleece bulk.
Get our latest guides, news, and insights highlighted in your Google Search & AI Overviews.