✨ This article was AI edited. Editorial responsibility: CoolestHoodies.com.
Produced with AI. This article was artificially generated. Editorial responsibility: CoolestHoodies.com.
How do you make a DIY distressed hoodie? You can create a DIY distressed hoodie by combining sandpaper abrasion on seam edges, razor slitting along cuffs and kangaroo pockets, bleach splattering for sun-fade contrasts, and a hot wash cycle to roll raw edges into organic vintage curls.
The DIY Distressing Revolution: Customizing High-End Streetwear at Home
In high-end streetwear, distressing represents the intersection of luxury tailoring and rebellious counterculture. Garments from labels like Balenciaga, Fear of God, Saint Michael, and Yeezy feature hand-abraded cuffs, weathered hems, and sun-faded fabric treatments that command prices exceeding $600. Yet, beneath the runway branding, the underlying artisanal processes are remarkably straightforward physical alterations that anyone can master at home with basic household supplies.
Creating your own DIY distressed hoodie gives you total creative control over the intensity, location, and aesthetic mood of the aging. Whether you desire subtle raw-hem fraying for a relaxed everyday drape or aggressive, multi-layered punctures reminiscent of vintage 1990s grunge band merchandise, following a methodical, anatomical approach ensures your sweatshirt looks authentically time-worn rather than carelessly destroyed.
Essential Materials and Tools Checklist
Before making your first cut or scuff, prepare your dedicated workspace. Working on a sturdy table with a protective cutting barrier prevents accidental damage to furniture or rear garment panels:
| Equipment / Material | Specification / Type | Function in Distressing |
|---|---|---|
| Base Sweatshirt | 100% Cotton or 80/20 Cotton-Poly (350+ GSM) | Provides dense yarn loops that fray cleanly without melting |
| Cutting Barrier | Plywood board or rigid corrugated cardboard | Inserted inside sleeves/torso to prevent puncturing back panel |
| Coarse Sandpaper | 60–80 Grit Silicon Carbide | Rapid surface scuffing, edge fringe creation, seam fading |
| Fine Sandpaper | 180–220 Grit Wet/Dry | Softening raw edges and creating gradual wear gradients |
| Safety Razor / Utility Blade | Fresh single-edge stainless steel | Precision micro-nicks, seam splitting, horizontal ladder cuts |
| Fabric Shears / Curved Scissors | Sharp craft scissors | Controlled incision entry and hem cropping |
| Liquid Household Bleach & Spray Bottle | Standard 5% sodium hypochlorite | Organic sun-fade gradients and splatter bleaching |
| White Vinegar or Hydrogen Peroxide | 5% household acidity | Chemical neutralizer halting bleach fiber corrosion |
Phase 1: Selecting and Prepping the Base Sweatshirt
The success of your project hinges on fabric composition. Pure 100% cotton French terry or heavyweight fleece is the optimal canvas. Cotton yarns absorb bleach evenly, respond beautifully to abrasive friction, and produce soft, feathered white and grey core threads when scrubbed. Avoid 100% synthetic polyester hoodies: polyester fibers melt into hard, scratchy plastic beads when abraded and will resist bleaching completely.
Always wash and dry your base hoodie once before distressing. Unwashed commercial blanks often have industrial starch, silicone sizing, or water-repellent finishing agents on their surface that impede chemical absorption and prevent sandpaper from gripping yarn loops.
Phase 2: Anatomical Wear Mapping and Seam Distressing
Do not scatter random slashes across the center of the chest. Authentic distressing mirrors the physical friction points created by human movement over decades:
- Insert the Internal Barrier: Slide your wooden or cardboard insert into the torso or sleeve beneath the target area.
- Wrist Cuff Edge Fraying: Fold the 80-grit sandpaper into a tight 1-inch block. Hold the ribbed wrist cuff firmly against your board and rub vigorously along the folded outer edge in horizontal strokes. Within 90 seconds, the top dyed knit layer will sever, revealing fluffy internal core threads. Repeat until small 1/4-inch breaks appear along the edge.
- Collar Weathering: Using a fresh razor blade held at a low 20-degree angle, gently scrape the outer fold of the neck ribbing. Shave just enough to create tiny micro-frays without slicing entirely through the ribbed band.
- Kangaroo Pocket Abrasion: Hands constantly entering and resting in front pockets naturally wear down the diagonal top hem. Take your coarse sandpaper and work the pocket lip until the top seam stitching snaps intermittently, allowing the raw folded hem to curl open organically.
- Waistband Hem Cropping (Optional): If you want a modern boxy silhouette, use fabric shears to cut off the bottom waistband ribbing entirely, 1/2 inch below the pocket seam. The raw exposed bottom edge will roll naturally inward after the first wash cycle.
Phase 3: Creating Vintage Cluster Punctures and Ladder Tears
For more pronounced, statement distressing on the sleeves, shoulders, or lower back:
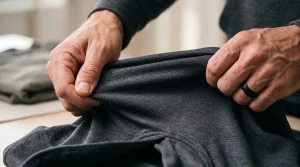
- Pinch a 1/2-inch fold of fleece between your thumb and forefinger over the cutting board.
- Use small curved scissors to snip a tiny 1/8-inch horizontal nick into the crest of the fold.
- Insert your thumbs into the nick and pull firmly horizontally (parallel to the knit grain). The knit loops will pop and separate, stretching the opening into a distressed slit without creating an unnatural scissor-cut square.
- Take a clean wire brush or coarse sandpaper and scrub directly over the slit. This pulls loose horizontal weft threads across the gap, creating a vintage “laddering” effect where white threads span across the dark opening.
Phase 4: Vintage Sun-Bleach Splatter and Fading
Adding subtle tonal fading elevates your hoodie from looking simply cut to looking genuinely aged through years of outdoor sun exposure:
- Mix 1 part bleach with 3 parts cold water in a fine-mist spray bottle. For splatter droplets, pour 2 tablespoons of bleach into a small ceramic bowl.
- Take an old toothbrush or paint brush, dip the tips into the bleach bowl, and flick the bristles with your thumb to fling tiny, random droplets across the lower torso and sleeves.
- For shoulder sun-fading, hold the spray bottle 18 inches away and mist a light haze across the hood crown and top shoulder yokes.
- Watch the color change carefully under bright lighting. Stop the reaction when the color reaches a warm rust or honey tone (usually 4 to 7 minutes).
- Submerge the hoodie in a bucket containing 2 gallons of cold water and 2 cups of white vinegar. The acid instantly neutralizes the alkaline bleach, preventing chemical rot from disintegrating the cotton fibers.
Phase 5: Laundering, Fluffing and Edge Stabilization
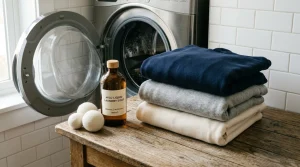
The final step brings the entire garment together. Machine wash the hoodie in cold water with gentle laundry detergent. As the washer agitates, the water and mechanical tumbling roll all raw cut edges into neat, tubular curls, fluff up the frayed threads, and wash away loose fiber debris.
Dry the sweatshirt on medium heat for 25 minutes. If any tears expanded more than desired during the wash, thread a needle with color-matched thread and place two small hidden lock-stitches at the extreme left and right corners of the tear to halt further expansion.
Frequently Asked Questions About DIY Distressed Hoodies
How do I stop cuts from growing into huge holes over time?
Apply a tiny dab of clear fabric glue (such as Aleene’s “Stop Fraying”) to the reverse side of the slit corners, or hand-sew small reinforcing bar tacks across the stress endpoints of the cut.
Can I dye my distressed hoodie after cutting it?
Yes. In fact, garment-dyeing with fiber-reactive dye (like Procion MX) after distressing stains the exposed white core threads in soft tonal gradations, producing an authentic luxury streetwear appearance.
What weight hoodie is best for DIY distressing?
Heavyweight hoodies weighing between 380 and 450 GSM (11 to 14 oz/yd²) yield the best results because their thick fleece structure provides enough body to handle aggressive sanding without tearing apart entirely.
Get our latest guides, news, and insights highlighted in your Google Search & AI Overviews.